Categorical Smoothing
This is a tool to clean stochastic realisation maps.
Configuration
Samples Database
Sample fields
Select Using Numeric Tag
Select Using Character Tag
Select Using Solid Triangulations
Select Using Field Restrictions
On the Block menu, point to Manipulation, the click Categorical Smoothing to display the Categorical Smoothing interface.
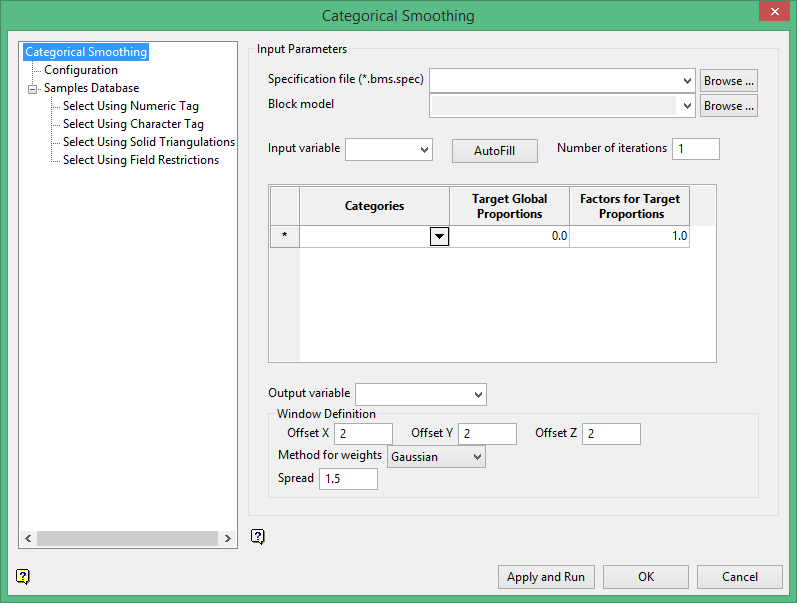
Configuration
Spec File
Select the specification file from the drop-down list or enter the name of a new one.
Block Model
Select the name of the block model.
Input Variable
Select the name of the categorical variable.
AutoFill
Click the  button to have Block Maps read the block model and determine the existing categories of the variable chosen. It will then create rows for them in the table. For example, in Diagram 1 below, four categories of a variable named "class" were found and the Categories column was automatically filled in.
Number of Iterations
Enter the number of iterations.
Categories
All categories need to be accounted for. For example, suppose you are cleaning the results of a model showing category reserves and the model shows measured, indicated and inferred. There may be some blocks that remain unaffected by the calculations, and therefore retain a default value of "none". When creating the list of categories, the default value needs to be listed as well. Your completed list of categories would be "measured", "indicated", "inferred", and "none".
Target Global Proportions
This number is the proportion each category represents out of the entire list. It does not need to be exact, but it should be close. You can obtain the proportions by histogram analysis or another basic statistical approach. It is important that the total sum adds up to 1. (See Diagram 1 below) When Block Maps runs, it will stay close to the proportions listed here. However, since it is a cleaning program meant to remove isolated blocks and artefacts, it could vary slightly from the proportions listed.
1
Factors for Target Proportions
These are weighting factors. You can apply a weighting factor to a category by order of importance if you desire. The higher the weight, the more influence it will have on the surrounding blocks. The example in Diagram 1 above shows weighting factors applied to both indicated and measured. A factor of 1 means that no weight will be applied. There is no set rule regarding how much weighting a category can have. So if you decide to use a weighting factor it may take several tries before you see results that you agree with.
Note: Although weights are shown in this example here, we do not recommend using them as a general rule. It is best to leave the factors as just 1.0. This is because the model has already been estimated and the global proportions have already been established. Using weights could introduce a strong bias into the model that is unsupportable by altering those proportions.
Output Variable
Select the output variable from the drop-down list. This is where the results of the Block Maps iterations will be stored.
Window Definition
The offset in the X, Y and Z direction refers to how many blocks in each direction away from the starting point the search will be conducted. Diagram 2 below shows the zone of influence with an offset of 2 in the X and Y direction. The centre block (starting point) is not counted.
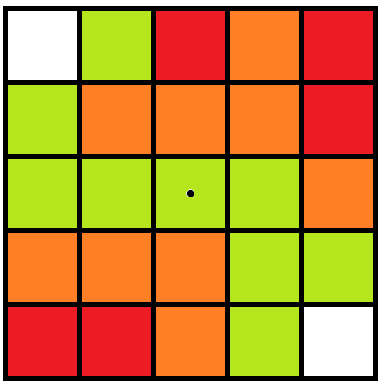
Figure 1: Red = measured; orange = indicated; green = inferred; white = none.
Method for weights
Block Maps allows you to choose between two different methods to clean stochastic realisations: Gaussian or variogram.
Gaussian

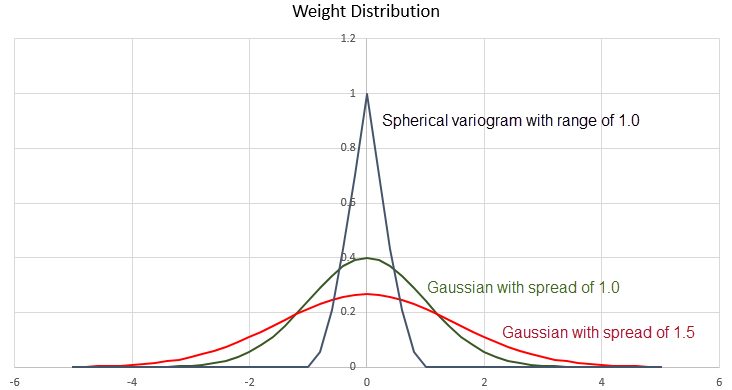
With Gaussian distribution, the spread is the important factor. The top of the bell curve is centred over the starting point. As the distance away from the centre increases, the influence decreases. A wider spread will mean that more weight will be given to the blocks further away from the centre block. This is seen in the example of the Gaussian distribution with a spread of 1.5 in Diagram 3. And as expected, a narrow spread will mean that more weight will be given to the centre blocks with less weight to the outside blocks. This is seen in the example of the Gaussian distribution with a spread of 1.0 in Diagram 3.
3
Variogram
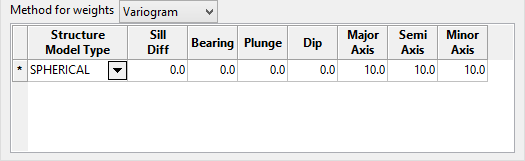
The variogram method allows you to have control over the direction of influence, as well as how far that influence extends. An example of a spherical variogram with a range of 1.0 can be seen in Diagram 3 above.
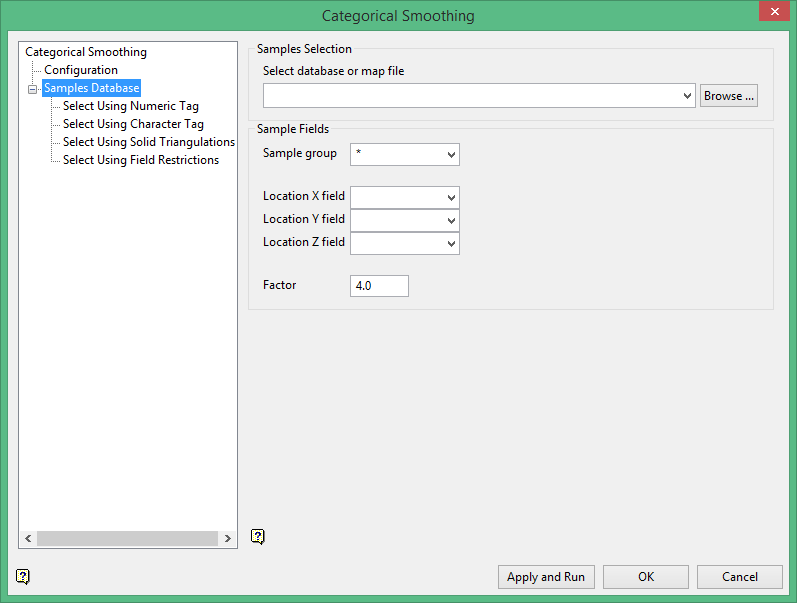
Samples Database
Select Database or Map File
Specify the name of the database or mapfile that contains the sample data. The drop-down list contains all of the Vulcan database files and mapfiles found within your current working directory. Click Browse to select a file from another location.
Sample fields
Sample group
Enter the name of the groups (database keys) to be loaded. Wildcards (* multi-character wildcard and % single character wildcard) may be used to select multiple groups. Multiple groups only apply to Isis databases (ASCII mapfiles consist of one group).
Location X/Y/Z Fields
Enter, or select from the drop-down list, the names of the fields containing the X, Y and Z coordinates.
Factor
This serves to increase the relative weight of blocks with data inside of them, as opposed to blocks with no data.
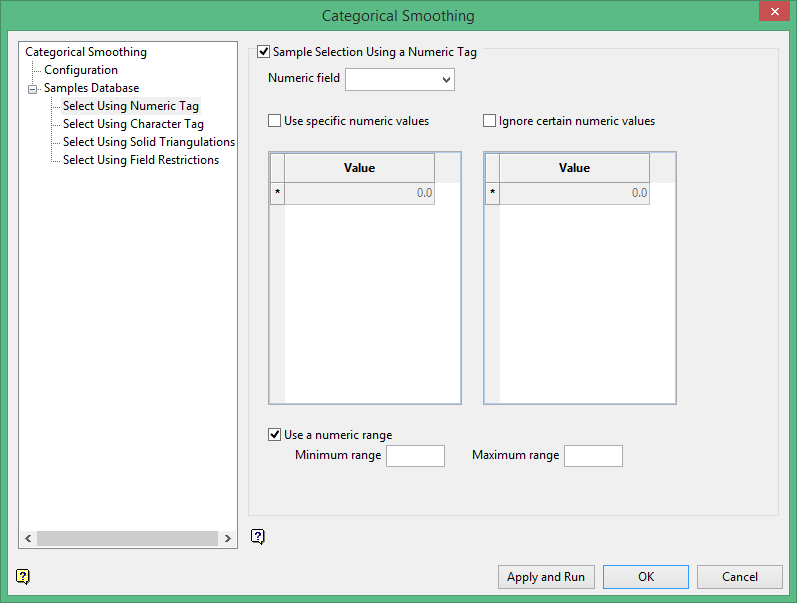
Select Using Numeric Tag
Select this check box to limit the samples to a specific numeric field. Once the numeric field has been specified, it is then possible to nominate whether to include or ignore those entries that contain specific numeric values.
For example, you may have a database field named 'BOUND' and the entries in this field are '1', '2' and '3', representing, respectively, ore, waste and internal waste.
Use specific numeric values
To use only value '1', select the Use specific numeric values check box and specify '1' as the specific value. The value can be entered through the Value column.
Ignore certain numeric values
To ignore specific values, select the Ignore certain numeric values check box. The specification of the value(s) to be ignored can be entered through the Value column.
Use a numeric range
Select this check box to ignore a whole range of values, for example,. '0 to -9999' to ignore all negative values. It can also be used to ensure any rounding errors are caught. You will need to enter the minimum and maximum for the range.
Note: The selection methods accumulate, that is, if more than one method is chosen, then the samples must satisfy each selected method before being included. Within a method, however, selection is based on the OR selection criterion except for field restrictions, which allows AND/OR selection criteria.
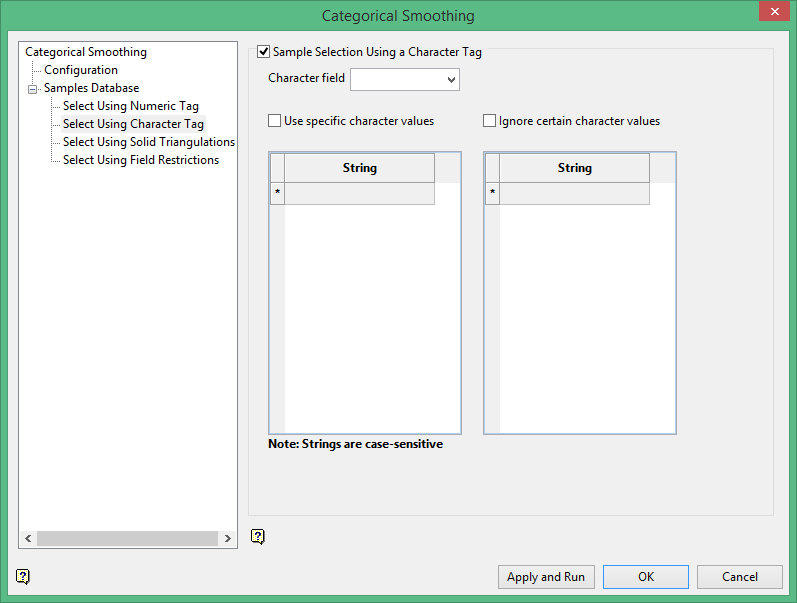
Select Using Character Tag
Select this check box to limit the samples to a specific character field. Once the character field has been specified, it is then possible to nominate whether to include or ignore those entries that contain specific character strings.
For example, you may have a database field named BOUND and the entries in this field are 'ore', 'waste', and 'internal waste'.
Use specific character values
To use only the character string 'Ore' you would need to check the check this box and specify 'Ore' as the specific string. The strings to use are specified through the Value column, which is enabled once the Use specific character values check box has been selected.
Ignore certain character values
Enable the Ignore certain character values check box if you want to ignore specific character strings. The strings to exclude are specified through the Value column, which is displayed below the Ignore certain character values check box.
Note: The selection methods accumulate, that is, if more than one method is chosen, then the samples must satisfy each selected method before being included. Within a method, selection is based on the OR selection criterion except for field restrictions, which allows AND/OR selection criteria.

Select Using Solid Triangulations
Select this check box to limit the samples by triangulation. If this check box is selected, only the samples that fall within the nominated triangulations will be included. This check box must be selected to add the necessary triangulations.
Adding triangulations to the Triangulations list
Click Screen Pick to select a triangulation that is currently loaded on the screen.
Click Browse to display the Open panel and select the triangulations you want to load.
Select the required triangulation files and add them to the selection list on the right side of the panel.
- Click on the name of the file(s) you want to select.
- To select a triangulation file from another location, click Browse.
- To highlight multiple files that are adjacent to each other in the list, hold down the Shift key and click the first and last file names in that section of the list.
- To highlight multiple non-adjacent files, hold down the Ctrl key while you click the file names.
- Move the files to the selection list on the right side of the panel.
- Click the -> option to move the highlighted files to the selection list on the right.
- Click the >> option to move all the files to the selection list on the right.
- Click the <- option to remove a highlighted file from the selection list.
- Click the << option to remove all files from the selection list.
Click OK to add the triangulation to the Triangulations list.
Removing triangulations from the Triangulations list
- To remove a triangulation from Triangulations list, click the triangulation name and click Clear Selected.
- To remove a group of triangulations, hold down the Ctrl key and click on each triangulation that you want to clear. Click Clear to remove all the selected triangulations.
- To remove all of the triangulations,click Clear All.
Note: The selection methods accumulate, so if more than one method is chosen, the samples must satisfy each selected method before being included. Within a method, however, selection is based on the OR selection criterion except for field restrictions, which allows AND/OR selection criteria.
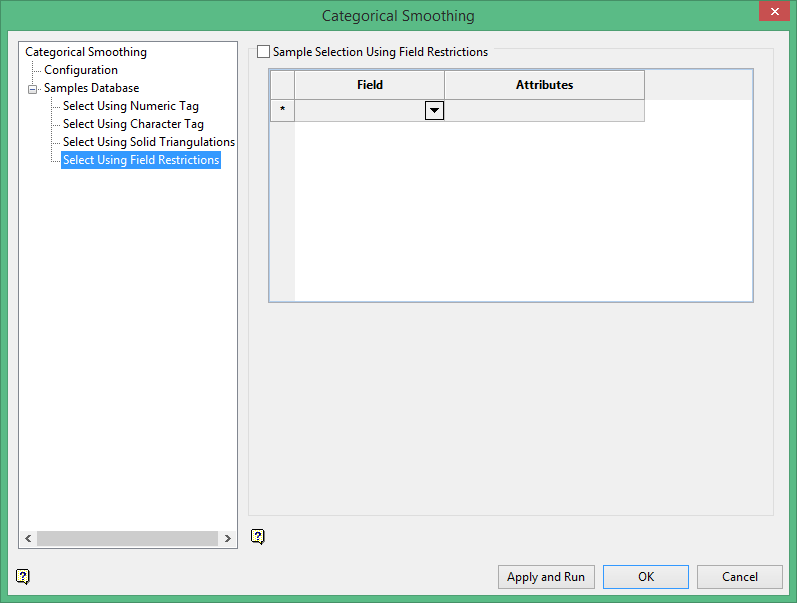
Select Using Field Restrictions
Select this checkbox to limit the samples to those with fields that match certain selection criteria. Select a Field from the drop-down list and enter applicable selection criteria in the Attributes column.
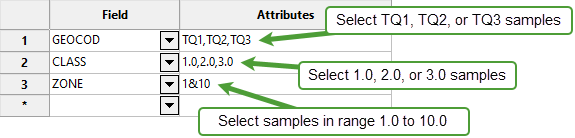
Include spaces in the entries in the Attributes column only if spaces are included in the desired field values.
When entering a range, always enter the smallest number specified before the largest number.
-792&-720 since -792 is smaller than -720. This range is evaluated as -792.0 ≤ VALUE < -720.0.
The range entered must always have the smallest number specified before the largest number, for example, -792&-720, since -792 is smaller than -720.
Note: The selection methods accumulate, that is, if more than one method is chosen, then the samples must satisfy each selected method before being included. Within a method, selection is based on the OR selection criterion except for field restrictions, which allows AND/OR selection criteria.

