Create Maximum Spoil Profile
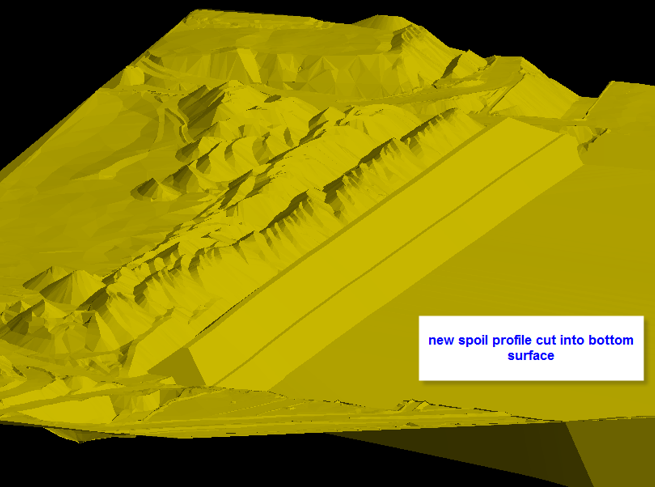
This option will create a strip spoil template (surface and strings), spoil solid (valid), and updated topography surface (showing spoil updated so it can be used for the next strip).
Aim
Determine if all Dragline dirt will fit for a given strip. If dirt doesn’t fit, be able to calculate how much postrip is required to be left behind by the dragline.
Input
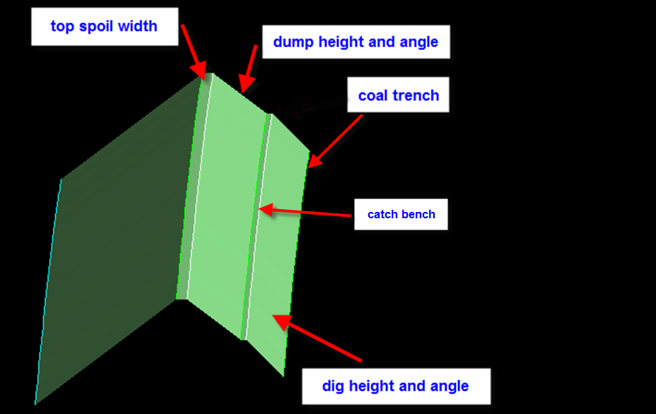
Dig Depth, Dig Angle, Coal edge trench width, Dump height, dump angle, catch bench width, Spoil peak width, bottom surface (include’s pit void that has been cut into current topo), spoil angle around EW and bridges, strip lines, end wall lines, bridge centreline, access ramps from endwalls or bridges, flat length at bottom of ramps.
Output
Strip spoil template (surface and strings), Spoil solid (valid), updated topography surface (showing spoil updated so it can be used for the next strip).
Instructions
On the Dragline menu, point to Strips, then click Create Maximum Spoil Profile to display the following interface.
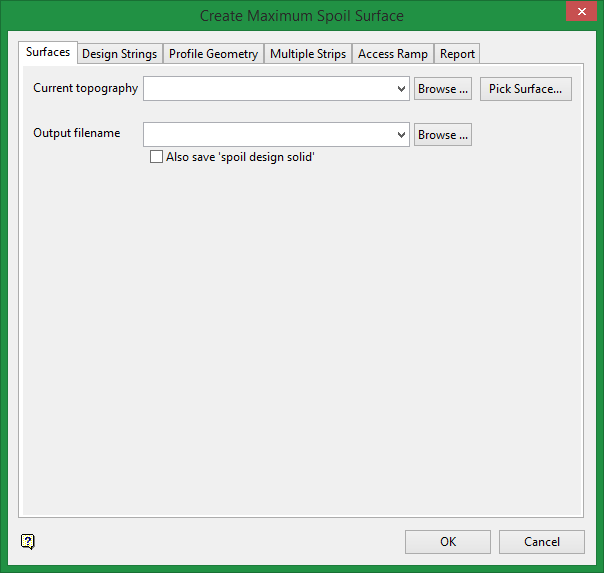
Current topography
Select the surface triangulation that represents your surface topography from the drop-down list, from the browser by clicking the Browse button, or by selecting it from the Vulcan workspace by clicking the Pick Surface button.
Output filename
Select an output filename from the drop-down list, or enter a name for a new file. This will be the resulting updated topography surface.
Spoil design solid
Select this option if you want to save the difference in area between the Current topography surface and the Output filename surface as a solid.
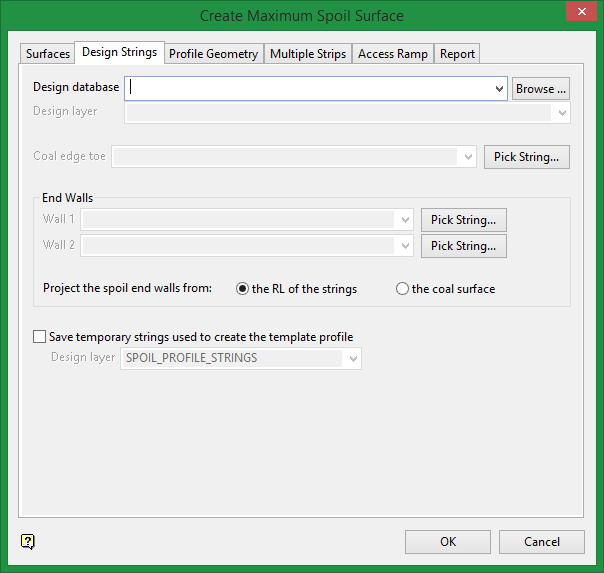
Design database
Select your DGD database from the drop-down list, or from the browser by clicking the Browse button.
Design layer
Select the layer that contains the design strings.
Coal edge toe
Select the string that represents the Coal edge toe from the drop-down list. If the design layer contains numerous objects, it may be easier to click the Pick String button and select the string from the screen in the Vulcan workspace.
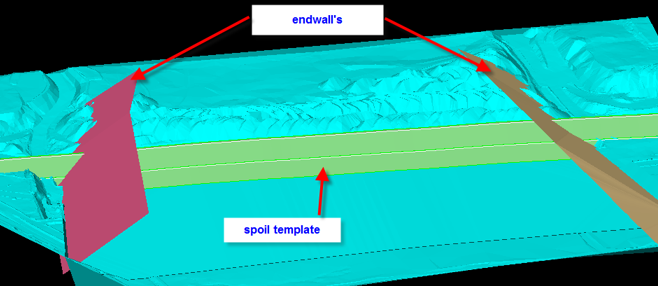
End Walls
Select the end wall strings from the drop-down list, or click the Pick String button and select the string from the screen in the Vulcan workspace.
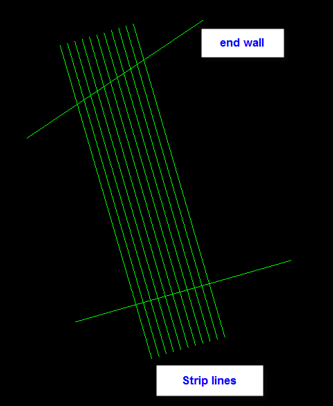
Project strip lines following the input parameters to give outline of spoil.
Project the spoil end walls from
- If using the RL: Using a RL value in this way will generate a top horizon that is completely flat and co-planar to the Easting - Northing (X-Y) plane.
- If using the coal surface: Using an existing coal surface model.
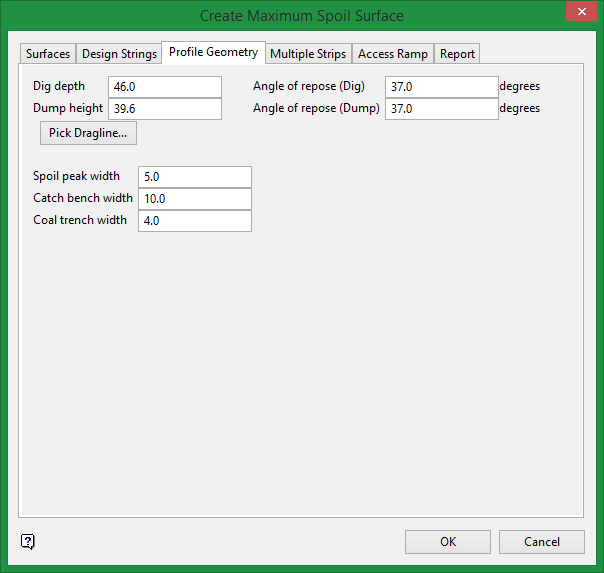
Input the height, depth, and angle parameters.
Then using the endwall lines provided, cut the template back at the spoil angle to form a solid of the spoil. This can be then used for volume analysis.
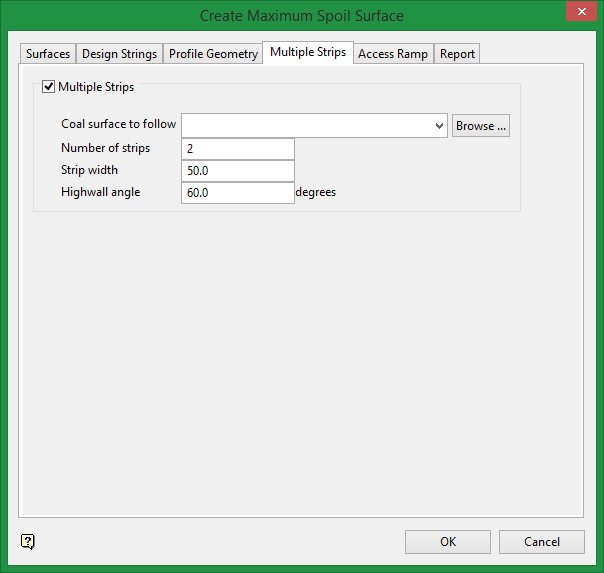
Multiple Strips
Select this option if you are planning multiple strips that have the same width and highwall angle.
Coal surface to follow
Select the surface grid file (.srg) from the drop-down list, or from the browser by clicking the Browse button.
Number of strips
Enter the number of strips.
Strip width
Enter the width of each strip.
Highwall angle
Enter the highwall angle.
This process can be repeated over and over, depending on how many strips have selected (generally about 5 to 10).
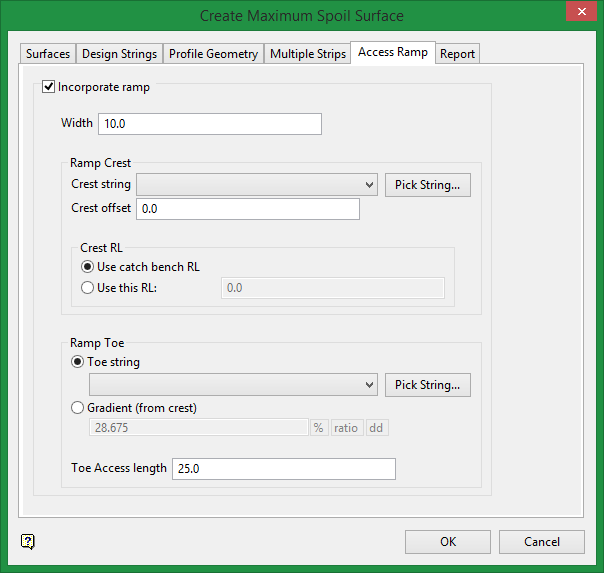
Incorporate ramp
Select this option if the plan will include a ramp.
Width
Enter the width of the ramp.
Ramp Crest
Crest string
Select the string that represents the crest from the drop-down list. If the design layer contains numerous objects, it may be easier to click the Pick String button and select the string from the screen in the Vulcan workspace.
Crest offset
Enter any offset.
Crest RL
Select between the catch bench RL or a custom RL.
Ramp Toe
Select a string from the crest to the toe or a use a gradient calculation.
Toe string
Select the string that represents the toe from the drop-down list. If the design layer contains numerous objects, it may be easier to click the Pick String button and select the string from the screen in the Vulcan workspace.
Gradient (from crest)
Enter the gradient, then select the units by clicking one of the buttons to the right.
Toe Access length
Enter the access length.

If a bridge has been specified, cut the relevant spoil out of the profile to account for the battered back walls, but include the dirt that is used to create the bridge.

Bridge with a low wall ramp included.
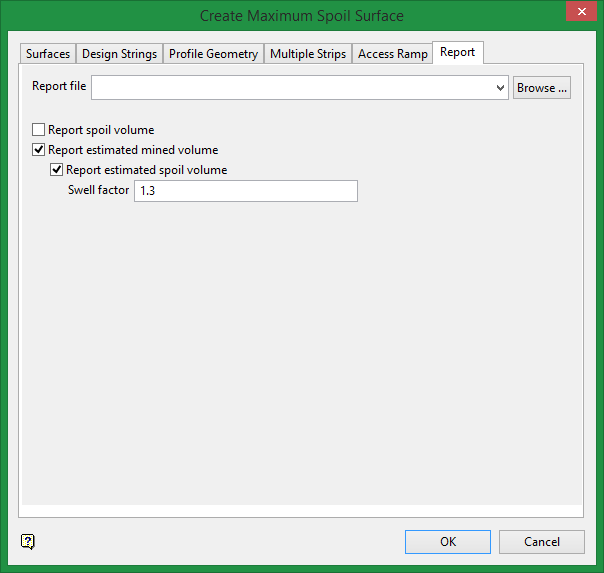
Report file
Enter a name for the CSV report, select it from the drop-down list, or search for it from the browser by clicking the Browse button.
Report spoil volume
Select this option if you wish the report to include the volume.
Swell factor
Enter the estimated swell factor.

