Create Holes Along Collar and Toe
Create drillholes from two reference lines: The collar line and toe line. You can also display attributes, names of holes, drill rig, and loading style if desired.
Instructions
On the Drill and Blast menu, point to Create, then click Create Holes Along Collar and Toe.
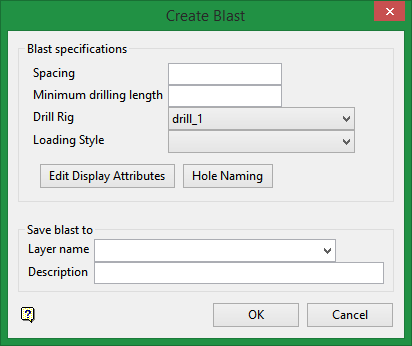
Blast Specifications
Spacing
Enter the spacing between drillhole collars.
Minimum drilling length
Enter the minimum drillhole length.
Drill Rig (optional)
This drop-down list is populated by the entries made in Drill Rig Library.
Loading Style (optional)
This drop-down list is populated by the entries made in the Explosives Library.
Click the  button to display the Display Attributes panel.
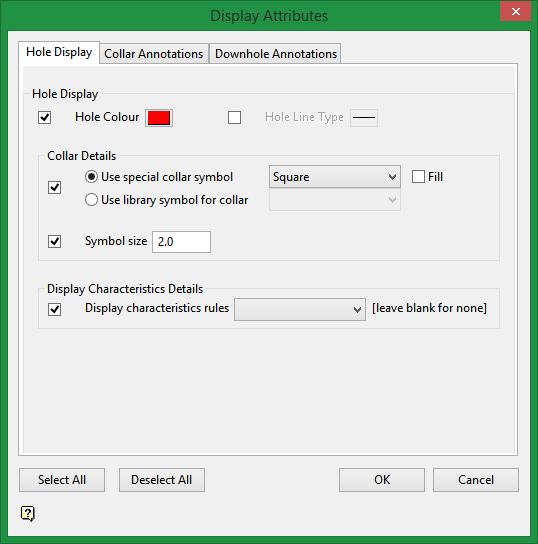
Hole Display
Hole Colour
Select a colour from the current colour table.
Hole Line Type
Select a line type from the table.
Collar Details
Use special collar symbol
Select between a square, circle, or cross.
Use library symbol for collar
Select a special from the symbols library.
Symbol size
Set the symbol size in pixels.
Collar Annotations
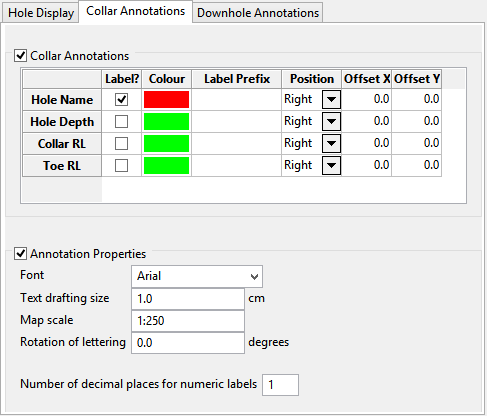
Collar Annotations
These labels will be displayed around the collar of the drillhole.
Use the table to determine which labels will be visible and where they will be located.
Annotation Properties
Use these properties to determine how the labels will look.
Downhole Annotations
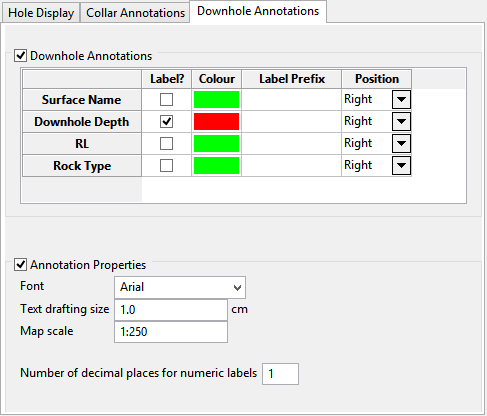
Downhole Annotations
These labels will be displayed at the bottom of the drillhole.
Use the table to determine which labels will be visible and where they will be located.
Annotation Properties
Use these properties to determine how the labels will look.
Hole Naming
Click the  button to display the Hole Naming Details panel.
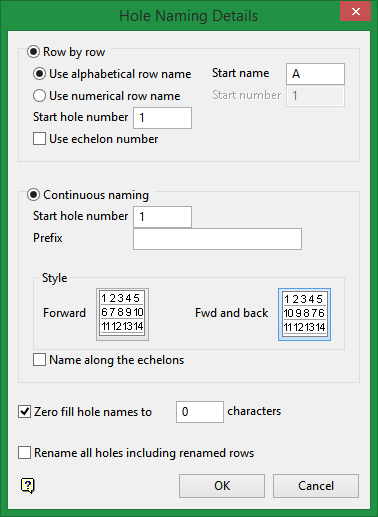
Row by row
Select this option to assign a different prefix to each row and restart the numbering when naming the following row.
Use alphabetical row name
Select this option to use alphabetical row names, For example, A1, A2, A3 etc. You will need to specify the start row name for the first row, as well as the start hole number, that is, the number of the first hole in the row. Holes named using this method will be assigned to groups based on the row name.
All holes in row A are assigned to group A, while all holes in row B are assigned to group B.
Use numerical row name
Select this option to use numerical row names, For example, 1, 2, 3 etc. You will need to specify the start hole number.
Select the Use echelon hole naming check box if you want to adjust the hole numbering for the rows so that the numbers follow echelons. If this check box is checked, then the holes will be named according to the hole name located in the row diagonally above, in an oblique or step-like formation.
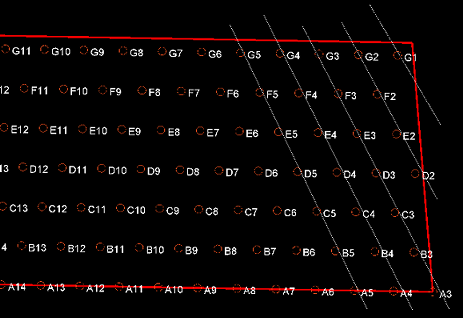
Figure 1: Use echelon hole naming check box checked with holes running along the white lines in a sloping direction.
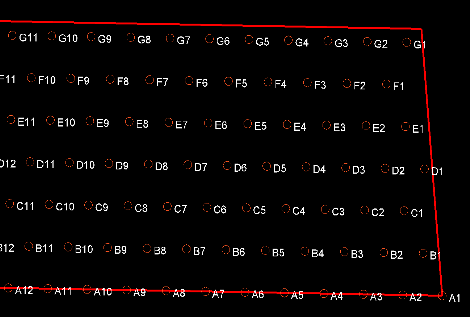
Figure 2: Use echelon hole naming check box unchecked where the first hole in each row is always a one hole, for example A1, B1, C1, D1etc.
Continuous naming
Select this option to use continuous naming when assigning the hole names. You will be required to specify the start hole number and prefix, as well as select the naming style.
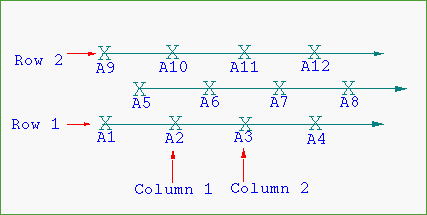
Figure 3: Forward Hole Naming Style

Figure 4: Forward and Back Hole Naming Style
Specify naming by object
Select this option to resequence blast hole numbers based on a digitised line on screen. You will need to select a design object after clicking OK. The holes are then renamed according to the location of the perpendicular intersection with the design object, as seen here.
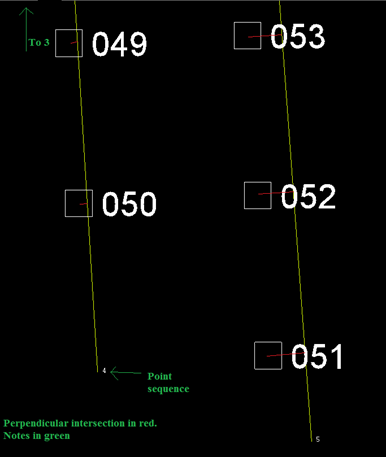
Care must be taken in drawing the ordering object to ensure that all holes have the expected perpendicular intersection, as seen here.

Zero fill hole names to
Select this check box if you want to use zeroes to fill in the hole names. You will need to specify the number of characters that you want to use.
If you specify that you want to use 3 characters, then A1 will become A001 and A21 will become A021.
Rename all holes including renamed rows
Select this check box to rename the holes that were previously renamed using the Rename Holes option. If this check box is not checked, then previously renamed holes will be ignored and their current hole names will be maintained.
Click OK.
Save blast to
Layer name
Select the layer where you want to save the drillholes, or enter a name for a new layer.
Description (optional)
You can write a short description.
Click OK.
After you enter the information into the Create Blast panel and click OK, the Blast naming panel will be displayed.
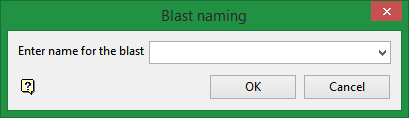
Select a name for the blast, or enter a new name. This can be edited later by using Rename Blast.

