Import 3d Dig Triangulations
Instructions
On the File menu, click Import to display the Import panel.

Click 3d-Dig in the File Format column on the left.
Select Triangulations from the File Type field on the right side of the panel.
Click OK to display the Import 3d-Dig Triangulations panel.
This panel consists of two tabbed sections:
-
Selection
-
Options
All import triangulations use the default triangulation folder set in preferences, unless you have defined an alternate path.
Selection Tab
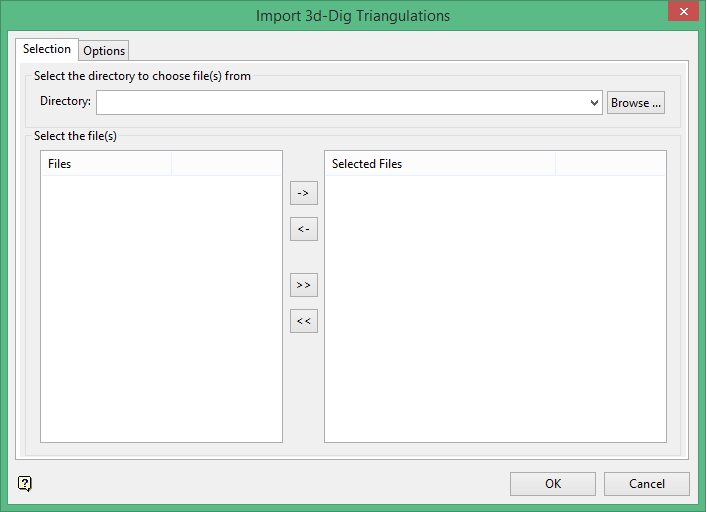
Select the 3d-Dig ASCII triangulation files (.tri) that you want to import.
- Click the -> button to move the highlighted file(s) to the selection list on the right.
- Click the >> button to move all files to the selection list.
- To highlight multiple files that are adjacent in the list, hold down the [ Shift ] key while you click on the first and last file names in the list.
- To highlight multiple non-adjacent files, hold down the Ctrl key while you click on the file names.
- To remove files from the selection list, highlight the file name(s) and click the < button or click the << button to remove all files from the selection list.
The resulting triangulations, which will be stored in your current working directory, will inherit the names of the selected 3d-Dig files. For example: if your 3d-Dig triangulation file is named 'surface.tri', then the resulting file will be named 'surface.00t'.
Options Tab
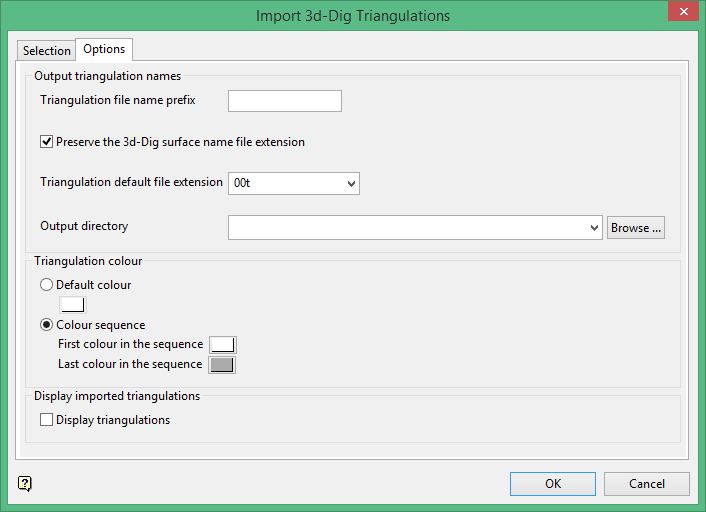
Triangulation file name prefix
Enter a prefix that will be attached to the beginning of all the triangulations that are imported in.
Preserve the 3d-Dig surface name file extension.
Select this option if you want to keep the 3d-Dig file extension instead of replacing it with Vulcan's default extension.
Triangulation default file extension
Select the default file extension from the drop-down list. By default, the extension is set as the standard <filename>.00t.
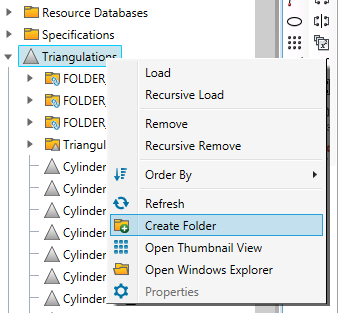
Output directory
Choose the destination for the imported files. You can create a new folder inside the Triangulations folder by right-clicking on the Triangulations icon in the Data Explorer window, then choosing Create Folder.
Triangulation colour
Select from two options. One option is that all triangulations will be the same colour. The other option is that the triangulations will be assigned a colour based on the colour palette settings. Select the first and last colour in the sequence and the imported triangulations will cycle through the colours in between until all triangulations have been imported.
Display imported triangulations
Select this option to display the triangulations after they have been imported.

