Drillhole Planning
This tool provides the capability to plan holes from a digitized or manually entered collar.
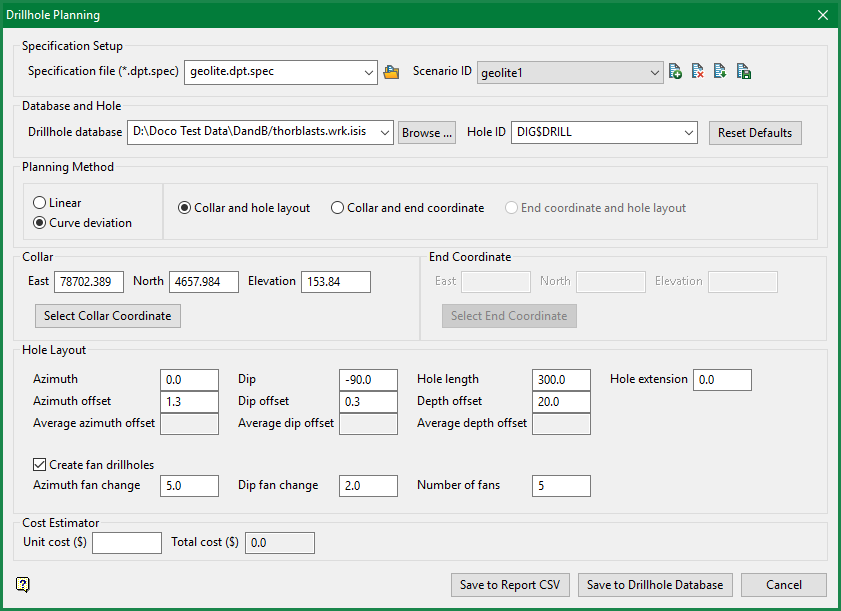
On the Geology menu, point to Drilling Utilities, then click Drillhole Planning to display the following interface.
Specification Setup
Specification file ( *.dpt.spec )
Use drop-down list to select a specification file, browse for a file by clicking the folder icon, or enter a name for a new one.
Scenario ID (optional)
Enter a short description as a Scenario ID name by clicking the New icon.
-
-
 New
New -
 Save
Save -
 Save as
 -
 Delete
-
Database and Hole
Drillhole database
Use drop-down list to select a drillhole database, or browse for a database by clicking the Browse button.
Hole ID
Existing holes
If the hole is an existing hole, the hole's collar coordinates, azimuth, dip, hole length, azimuth offset, dip offset, and depth offset will be displayed on the panel depending if the hole is a curve deviated hole or linear hole. As the holes are highlighted in the list, they will be displayed in the Vulcan screen. You can then make changes to the existing hole and either save the drillhole to the database by overwriting the existing hole with the new data or save the changes to a new hole by giving it a new name.
New holes
If the hole entered is a new hole, then you will be required to either enter the collar coordinates, azimuth, dip, hole length, azimuth offset, dip offset, and depth offset if the hole is to be a curve deviated hole. If the hole is to be a linear hole, and depending on how the linear hole is to be created, either with collar and linear data, collar and end coordinates data, or linear and end coordinates data, you will need to enter the collar coordinates and/or the azimuth, dip, hole length, azimuth offset, dip offset, depth offset data and/or the end coordinates data.
Planning Method
Linear or Curve deviation
Select whether you want to plan for the curved deviation in the drillhole projection or plan with no deviation.
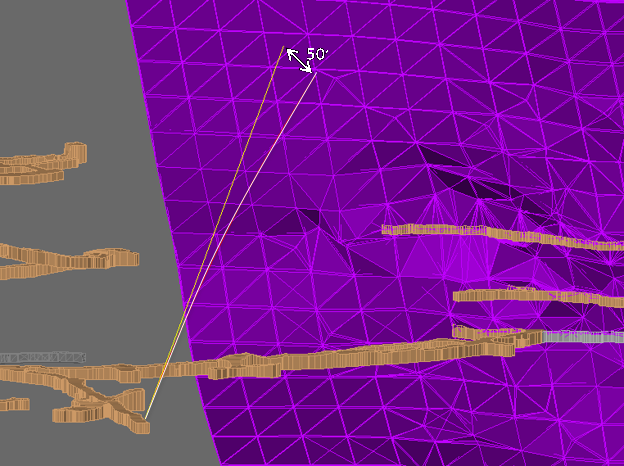
The tan line is linear. The white line shows a curved deviation with a 50-foot offset at the target.
Collar / End Coordinate
Enter or edit the collar coordinates here. When you select a drillhole from the Hole ID list, the collar coordinates will automatically populate. You can also select the collar location interactively by clicking the Select Collar Coordinate button.
Hole Layout
Azimuth / Dip / Hole length
If you are working with an existing hole, these fields will be automatically populated. However, they can be edited. Any edits will be displayed on the screen.
Hole extension
You can adjust the length of a hole either by changing the value in Hole length or by entering a value into Hole extension. Entering a positive value will extend the length of the hole, and entering a negative value will shorten the length of a hole.
Average azimuth offset  / Average dip offset / Average depth offset
These display information only and cannot be edited. They show the average offsets (deviations) from whatever existing hole was last chosen from the drop-down list Hole ID. They stay populated as the most recent existing hole's data (offset averages) even when a new hole ID is typed in so that you can use the greyed out average offset numbers as a reference when determining the offsets to be used for design of the new hole.
Create fan drillholes
Select this option to create a drillhole fan. Once this option is enabled, you will need to provide the Azimuth fan change, Dip fan change, and the Number of fans in the group. After you have entered the information, the fan will be displayed on the screen.
Cost Estimator
The Cost Estimator data will calculate the cost of the current hole as the Unit cost ($) multiplied by the Hole length.
Save to CSV
Click this button to export your information to a CSV file.
Save to Drillhole Database
Click this button to save your drillholes to the drillhole database.
Done
Click here to close the panel.

