Edit Codes
Edit or create the survey.codes file
The Edit Codes option to edit or create the survey.codes file. Survey codes are used to define the naming and graphical attributes of objects with a given survey code. This file is read when using the Reduction and Coordinates option.
Each code line of the file contains:
code#object name#group name#feature name#colour#linetype#point(0) or line (1)#
For example:
TOEH#TOE#HIGHWALL#TOEH#17#12#1#
The survey code field can contain wildcards. This is useful if you pickup data using string numbers as part of the survey code. An asterisk (*) defines zero or more characters, while a percent(%) defines one character. For a wildcard entry, if any of the naming fields contain the special keyword $CODE, then the actual survey code will be substituted.
Example:
SPOT*#SPOT#SPOT#$CODE#17#12#0#
If the survey code is SPOT1, then that will match this line in the survey.codes file. The created object's feature code will then be set to SPOT1, as this is substituted for $CODE.
It is important to remember that with wildcards, the first line in the survey codes file that matches will be used, so order is important if there are ambiguous entries. Currently you need to reorder using a text editor, as this option to edit the codes does not allow any ordering. It is advisable to exit Vulcan if you are editing the survey codes using an editor.
The survey.codes file is located in the $SURVEY_DATA directory or, if this directory does not exist, in your current working directory. An example is provided in Appendix A.
Instructions
- Select Survey menu
- Select Surveying submenu
- Select Edit Codes option
The following panel displays.
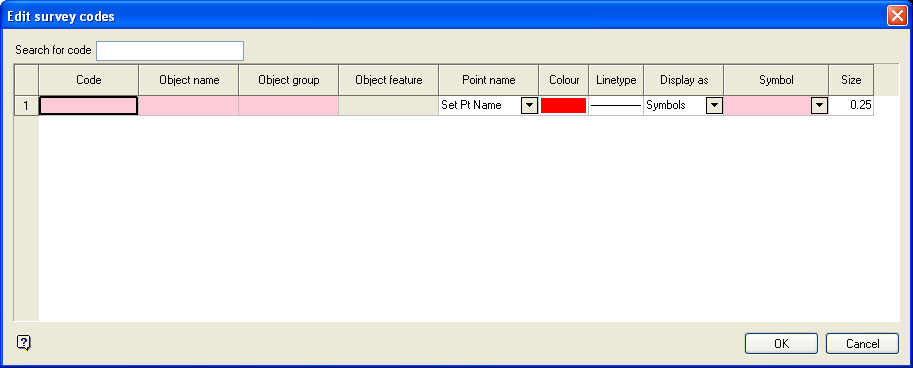
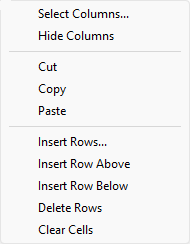
The panel utilises grid controls to manage the grid information, i.e. right-click context menus, that allow you to perform options such as hiding columns, cutting, copying, and pasting cells, and inserting and deleting rows. Right-click in the grid area to display the context menu. Descriptions of the available options are listed below.
-
Use the Select Columns option to choose which grid columns to display in the panel, and optionally save the selection to a template for future use. Alternatively, select cells and click Hide Columns to hide the respective columns directly.
-
Select cells and use the Cut, Copy, and Paste options to duplicate or move cell entries.
-
Select a cell in a row of interest and use the various insert and delete row options to manage the records in the grid.
-
Click Clear Cells to clear the contents of a selection.
Search for code
Enter the survey code you are trying to find.
Code
Select the survey code that you want to edit. To create a new entry, type in a new value (maximum of 16 alphanumeric characters). Enter the Name, Group and Feature. The maximum size of each is 10 alphanumeric characters.
Point name
Select, from the drop-down list, the point name options. The available options are:
| Ignore | All points in the object of this code are assigned a blank point name. |
| Set W-tag | The W-tag of the point is set to the point name in the download file. However, if the point name is not numeric, then this cannot be done. In which case the point name of the point is assigned the point name in the download file. |
| Set Point Name | The point is named based on the point name in the download file. This option is set as the default. |
| Set W-tag/Point Name | The W-tag and point name are set to the point name in the download file. However, if the point name is not numeric, then this cannot be done. In which case the point name of the point is given the point name in the download file. |
| Ignore - use Object | All points in the object are assigned the object name. Any point names in the download file are ignored. |
Graphical attributes
Select the colour and linetype for objects in the survey code.
Display as
The following three options allow you to assign strings, point markers and symbols at the pickup points.
Select from the drop-down list one of the following options:
Load as a string
Select this option to connect the pickup points with strings.
Load as points
Select this option to display a point marker (+) at each pickup point.
Load as symbols
Select this option to display a specific symbol at each pickup point. Specify the symbol and the symbol size (in plotter units).
Select OK.
The survey.codes file is then updated.

