Plot Periods
Annotate and Shade Reserve Block Polygons and Triangulations
Use the Plot Periods option with the Chronos > Network > Generate Directions option to annotate and shade reserve block polygons and triangulations according to the period in which they were scheduled. Blocks scheduled over multiple periods will be annotated and shaded accordingly.
Instructions
- Select iGantt menu
- Select Display & Query submenu
- Select Plot Periods option
The following panel displays.
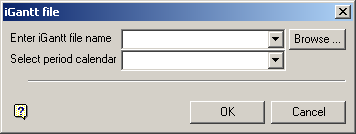
iGantt file panel
Enter iGantt file name
Enter or select from the list the iGantt file you want to open. Click Browse to select a file from another location..
If a specification file does exist, the entered value will be used as the default. If more than one specification file exists, the last used file will be the default.
Select period calendar
Select a period calendar from the list.
Click OK.
The following panel is then displayed.

Annotation fields panel
Block Selection
This section allows you to apply specific annotation and shading features to either triangulations ( Apply to triangulations, Split polygons to different layers ), polygons ( Apply to polygons ), or centre lines ( Apply to centre lines ).
Note: Options with an asterisk ( * ) are only applicable to polygons.
Optional Filtering
Process
Select a process from the list.
Filter reserves
Select this check box to examine the value of a given field (for each block in the Reserve sheet) and ignore the block if the value matches a specified pattern ( Value ).
Block Colouring
Colour Field
Select the colour to be used to highlight the particular field from the list. As the colour scheme sets the colour for the block, depending upon the value of one of the fields for the block, the scheme has a sequence of ranges of values with associated colours. If the value lies in a certain range, then it gets a certain colour.
If the Scale check box is selected, then the value of the field is multiplied by the proportion mined before it is used to determine the colour.
Scheme
Select the scheme file that will be applied to those polygons/triangulations that have been copied to a new layer from the list.
Default Colour
Select the colour to be used to highlight the fields.
Pattern *
Select the fill pattern to be used to highlight the fields.
Residual Pattern *
Select the pattern to be used to represent the portion of the block that hasn't been mined.
Block Annotation
Annotate blocks *
Select this check box to define what is to displayed on the plot.
Field *
Select from the list, the Reserve sheet variables that are to be displayed on the plot.
Prefix *
Select this check box to prefix the Field value with the field name.
Scale *
Select this check box to scale the Field value by the percent mined.
Font *
Select from the list, the font to be used for the plot.
Text drafting size in plotter units *
Enter the size of the text to be used for the plot's title.
Map scale for this size *
Enter the scale to be used for the plot. For example: If the text drafting size is 20cm and the map scale is 1:500, then the text will appear on the screen the same size as an object that is 1000 units tall.
Align text to block *
Select this option to align the text with the block that's being annotated so that it runs along the length of the block.
Set drafting angle *
Select this option to align the text in the same direction. If this option is selected, then you will need to enter the angle at which the text block appears. For example, 0° = horizontal (as normal text), 90°= vertical.
Default Text Colour
Select the colour to be used for the plot's text.
Select OK.
The Multiple Selection box is then displayed, allowing you to nominate the block direction layer by object, name etc. Once a direction arrow is chosen, you will then be asked to confirm its selection. Cancel when you have finished nominating the block direction layer.
The following panel is then displayed.
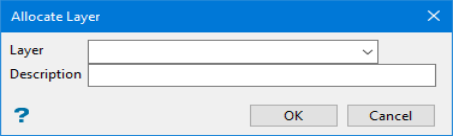
Allocate Layer panel
Name
Select the name of the layer from the Name list, or enter a new name to create a new layer. If you select an existing layer that is already loaded, subsequent digitising will be appended to this layer. If you select an existing layer that is not loaded, you will be prompted to specify whether you want to load the existing layer or overwrite its existing content.
Description
Enter a description of this layer. The description can contain up to 80 alphanumeric characters and can include spaces. If a description is not entered, a default description will be used instead. If the selected layer already has an assigned description, it displays when the layer is selected. Existing layer descriptions can be overwritten.
Click OK.
The Multiple Selection box is then displayed, allowing you to select a block by object, name etc. Once selected, the reserve block polygons/triangulations are shaded and annotated.

