Tutorial #2: Vulcan workflow example
Grids are a way of modelling stratigraphic deposits. They are able to define orebodies that have definite changes between material types e.g. coal, iron. Because of their regularity, calculations can be easily performed on them. However, some programs such as Maptek Evolution cannot view grid models. In such circumstances, it is useful to convert the grid to a triangulation, a function which is readily provided by Vulcan. This tutorial will show you how to create a workflow that will support converting multiple grids into triangulations at once.
For the below example, users will need a set of grid models which can be downloaded here.
The key steps we want to represent in the workflow are:
-
Select the grid model
-
Select the output folder to save the triangulation
-
Convert the grid model to a triangulation
To create and run the workflow:
-
Initialise a new workflow by opening the Workflow Editor.
-
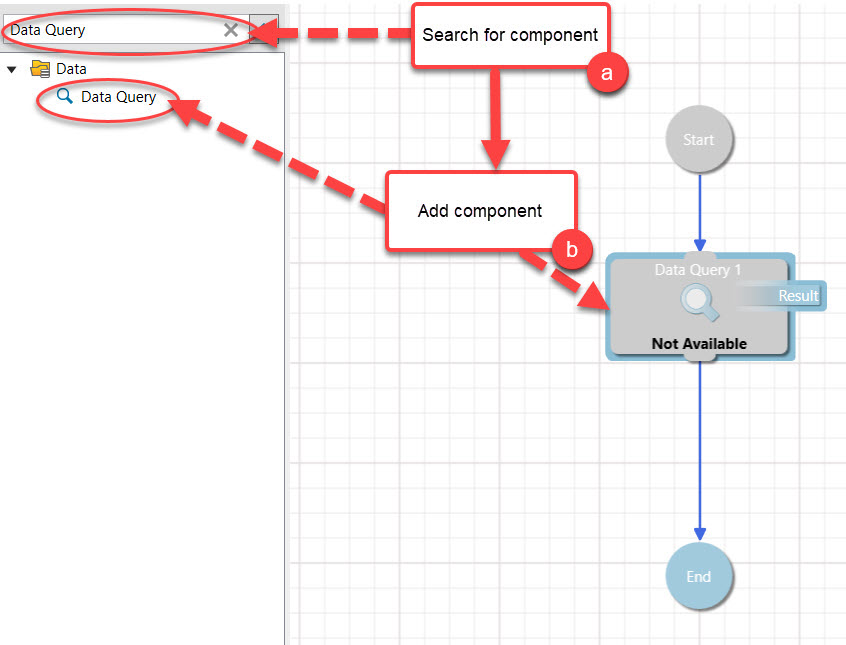
Add a Data > Data Query component to the workflow by searching for the term "Data Query" in the Toolbox Filter.
-
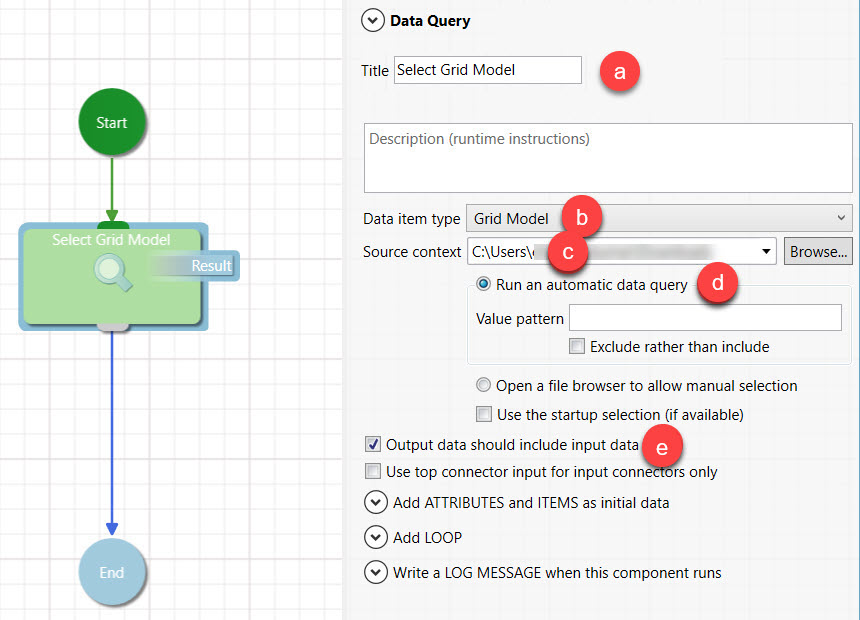
Configure the Data Query component by completing the following steps:
-
Change the Title to "Select Grid Model".
-
Set the Data model type to Grid model.
-
Set the Source context to the location of the file.
-
Select the Run automatic query radio button.
-
Select the Output data should include input data radio button.
-
-
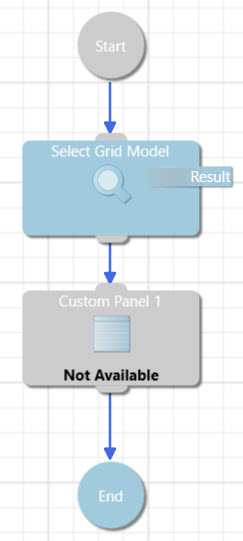
Add a Custom Panel to the workflow using the search method described previously in step 2.
-
Change the component heading of the panel to Output Folder Selection.

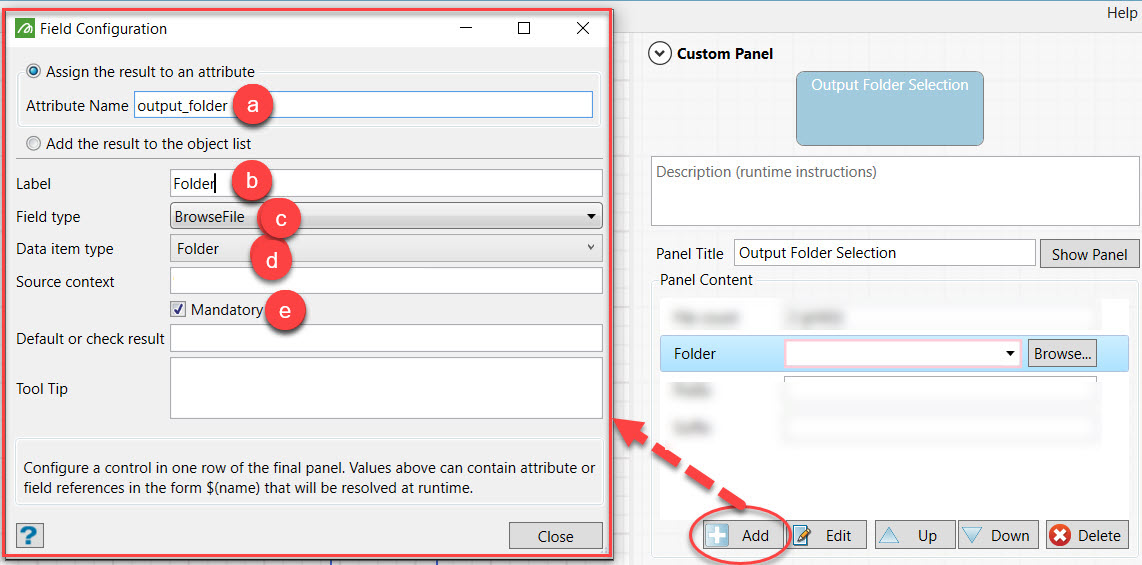
- Add a Folder field to the panel by clicking the Add button. This will open the Field Configuration panel.
-
Configure the Custom Panel by completing the following steps:
-
Set the Attribute Name to output_folder. This name will be referenced later when performing the conversion from grid to triangulation.
-
Set the Label to Folder.
-
Set the Field type to BrowseFile.
-
Set the Data item type to Folder.
-
Make the field mandatory by checking the Mandatory checkbox.
-
- Add a Command Lines > Triangulation Commands > Grid to Triangulation component to the workflow.
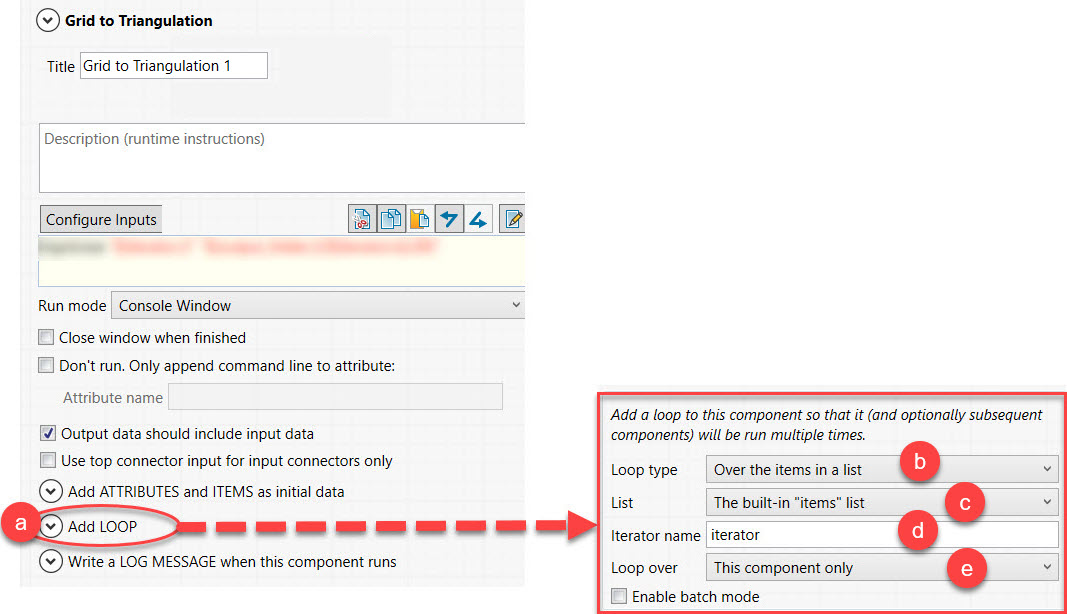
- Add a loop to the component so that it will execute on all grid files. Each grid file in the folder will be referred to by a variable named iterator. Complete this step by performing the following actions:
Expand the Add LOOP section of the panel to open a new window.
Set Loop type to "Over the items in a list".
Set List to "The built-in "items" list".
Set Iterator name to "iterator".
Set Loop over to "This component only" as it is the last component in the workflows.
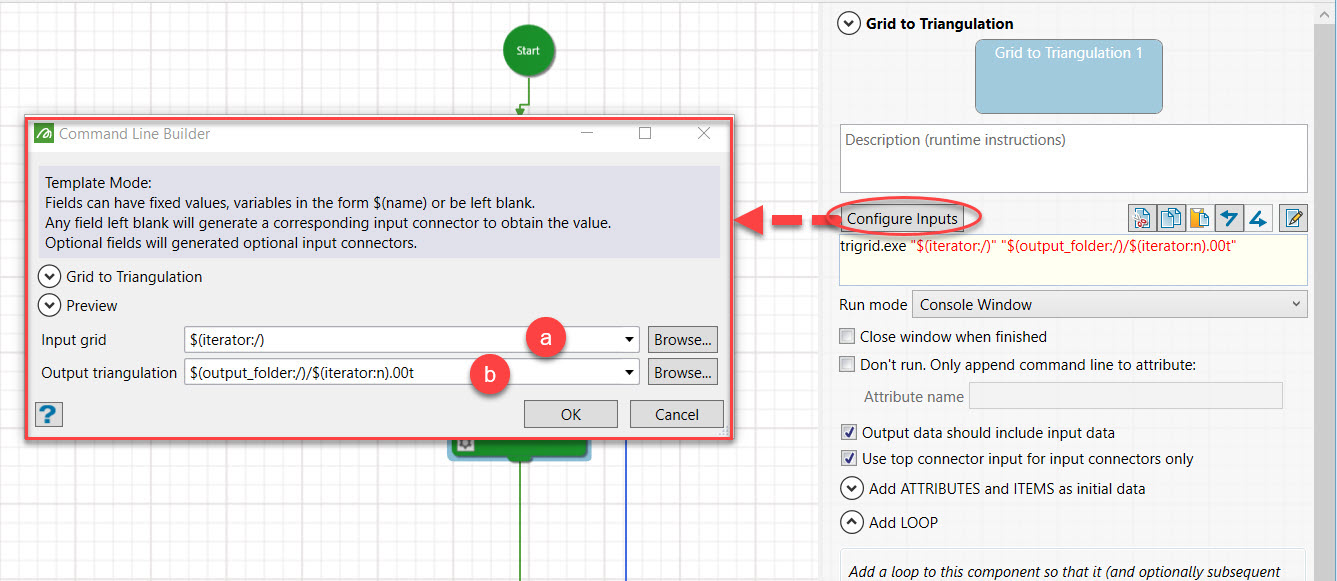
- Configure inputs and outputs by clicking the Configure inputs button and then specifying the input grid and output triangulation using the variables previously set (iterator in step 8 and output_folder in step 6 a.) . For more information on referencing data, go to the Attributes section.
- Set the input grid to $(iterator:/).
- Set the output triangulation to $(output_folder:/)/$(iterator:n).00t.
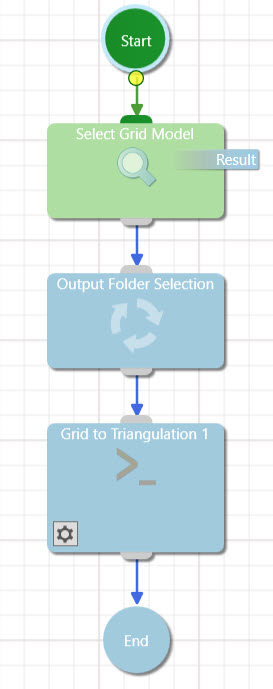
- The final step before running the workflow is to connect all components from start to end to indicate the flow of data. This is executed by clicking the output connector and dragging the connection to the input connector of the upcoming component. The final workflow should look like this:
- Run the workflow. Two triangulations files should be created from the provided dataset.