Interface Overview
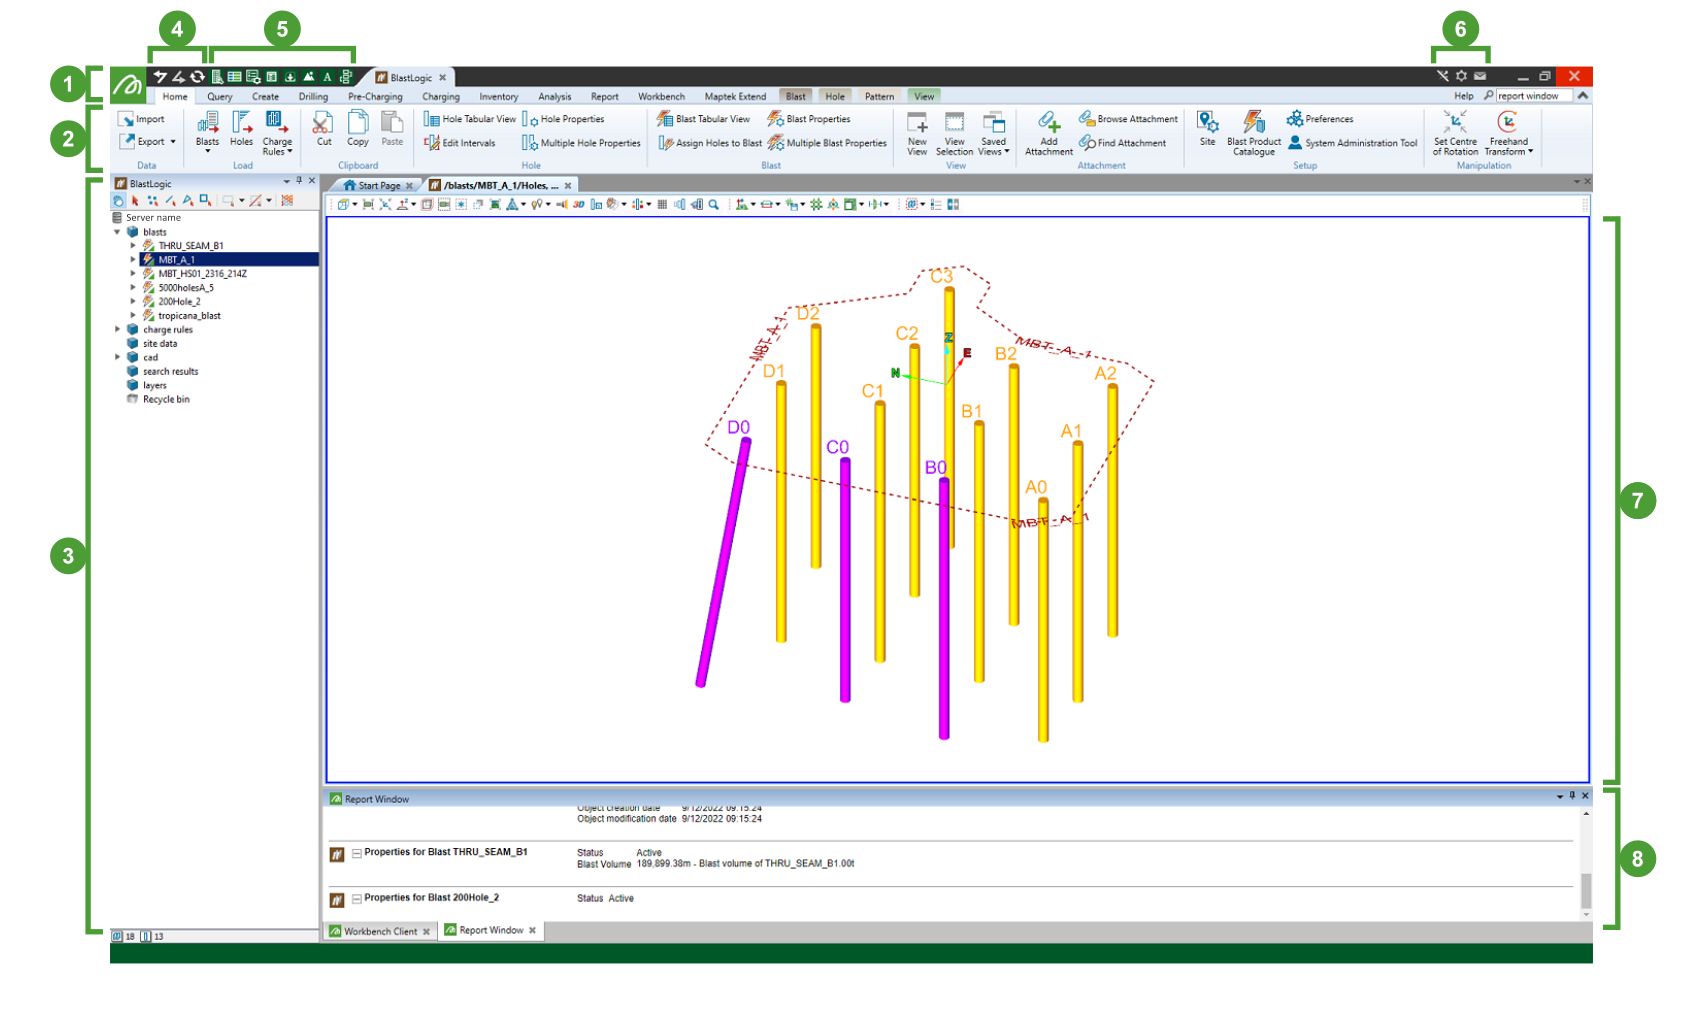
|
Launch button
The Workbench launch button ![]() is a general menu containing a few relevant options. From here you can launch BlastLogic, other Maptek software products that you have installed, as well as various other tools and utilities.
is a general menu containing a few relevant options. From here you can launch BlastLogic, other Maptek software products that you have installed, as well as various other tools and utilities.

BlastLogic ribbon
The BlastLogic ribbon menus provide easy access to operations that are supported by the program. These operations are grouped into categories that either correspond to a type of performed action, or a workflow. Some ribbon menus (such as Blast) are context-sensitive, which means they are only active when that category of tools is applicable to currently performed operations. For example, when a blast is selected, Blast, Pattern and Hole menus appear on the ribbon, as these attributes constitute a blast.
Note: The View context-sensitive ribbon appears when there is at least one BlastLogic 3D view window open.
For detailed information on each ribbon menu, see Menus and Tools.
Project explorer
The project explorer allows you to browse, organise, and select your project data.
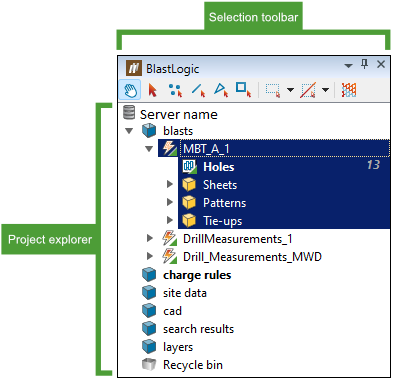
Selection toolbar
The selection toolbar contains tools that you can use to adjust the viewing perspective of your blast, and the way the blast elements are displayed in the view window.
 Hands-free manipulation
The ![]() Hands-free manipulation tool allows you to adjust the viewing perspective and the angle of your blast.
Hands-free manipulation tool allows you to adjust the viewing perspective and the angle of your blast.
After selecting ![]() from the toolbar,
from the toolbar,
-
Use the left mouse button to rotate your view.
-
Press and hold the middle mouse button to pan your view.
-
To zoom in to the blast, scroll with the mouse wheel towards yourself. Accordingly, scroll with the mouse wheel away from yourself to zoom out.
-
You can also press and hold the right mouse button and drag the mouse towards yourself to zoom in, or drag the mouse away from yourself to zoom out.
 Select objects
To select a single element of a blast, click and then choose an element you would like your view to be focused on. Other elements of the blast will be dimmed.
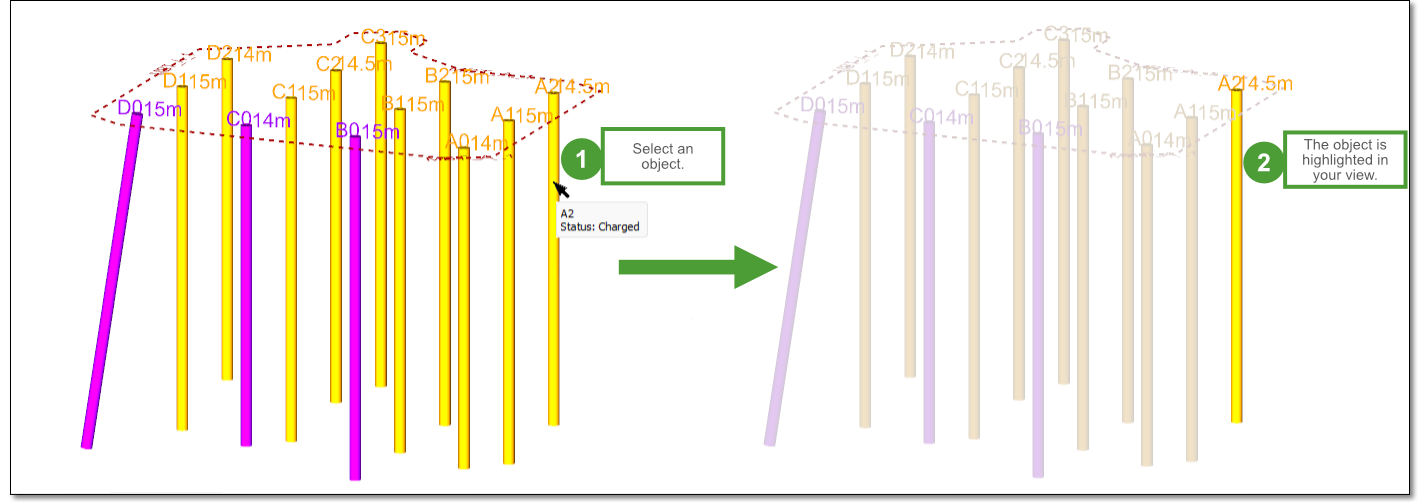
Use the following combinations to adjust your view in this mode:
| Rotate: | Alt + left mouse button |
| Pan: | Alt + middle mouse button |
| Zoom: | Alt + right mouse button, Alt + scroll wheel |
Select objects mode is 1 .
 Select points
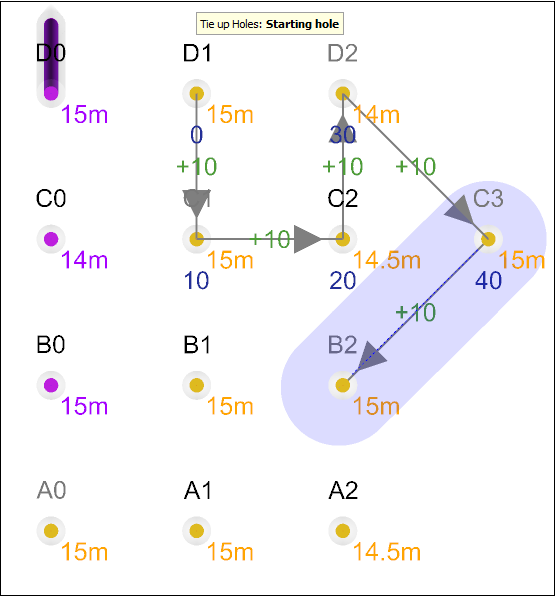
This tool allows you to select the required points within the blast and is mostly used in electronic tie-ups.
Use the following combinations to adjust your view in this mode:
| Rotate: | Alt + left mouse button |
| Pan: | Alt + middle mouse button |
| Zoom: | Alt + right mouse button, Alt + scroll wheel |
Select points mode is 2 .
 Select edges
This tool is used to select tie-up connectors, used in the Tie-up Editor.

Use the following combinations to adjust your view in this mode:
| Rotate: | Alt + left mouse button |
| Pan: | Alt + middle mouse button |
| Zoom: | Alt + right mouse button, Alt + scroll wheel |
Select edges mode is 3 .
 Toggle selection mode
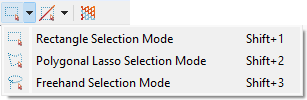
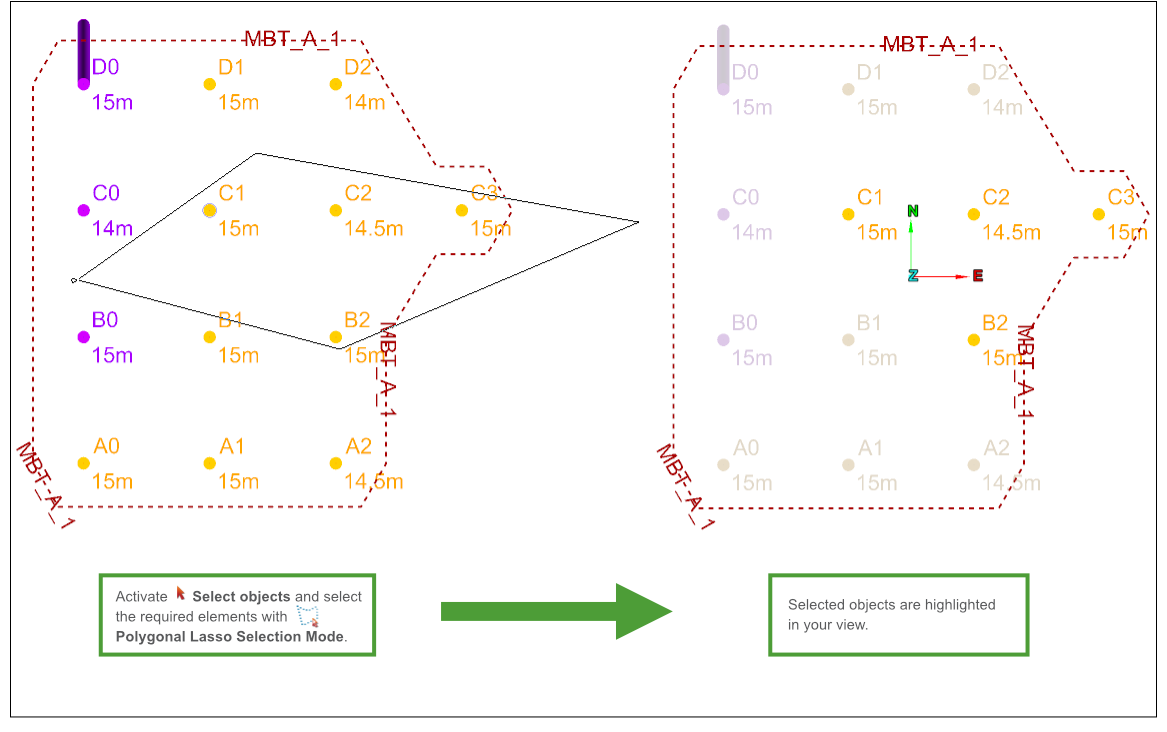
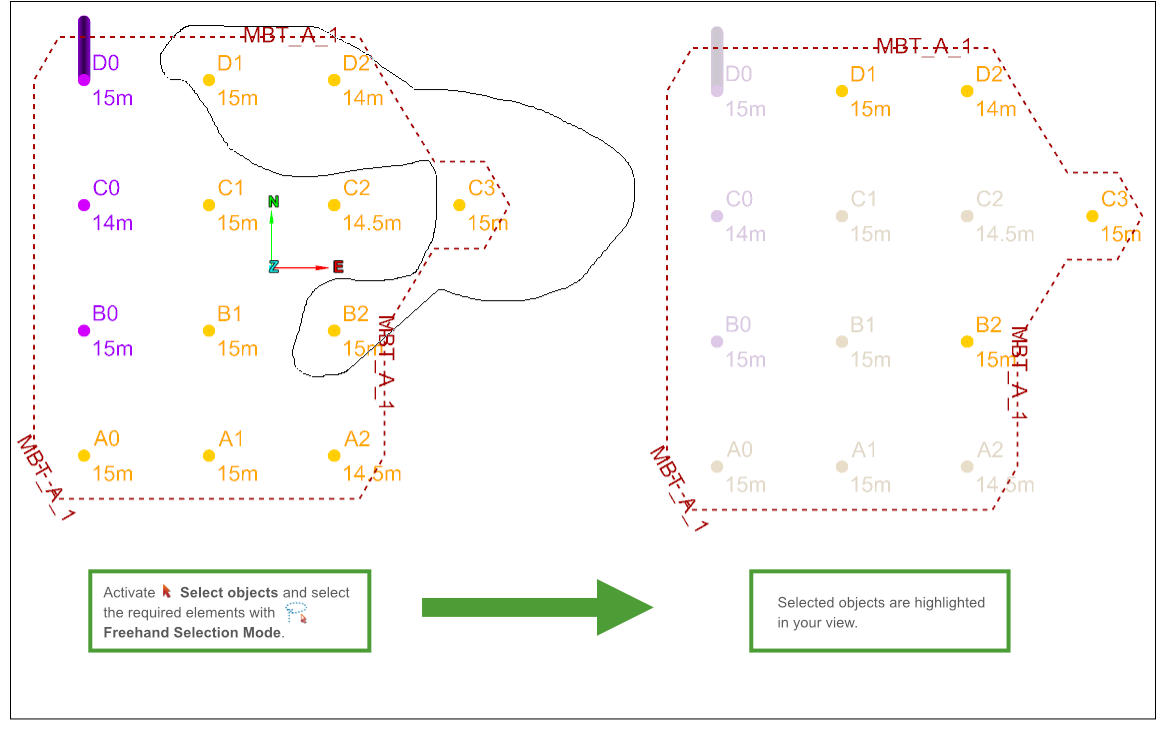
This tool contains three types of selection modes. Click Select objects and then choose the required selection mode.
-
Rectangle Selection Mode
Allows you to select the elements of the blast by drawing a rectangle in the view window.
 Tip! The keyboard shortcut to switch to theRectangle Selection Mode is Shift + 1 .
 -
 Polygonal Lasso Selection Mode
Allows you to select the elements of the blast by drawing a polygon in the view window.
 Tip! The keyboard shortcut to switch to the Polygonal Lasso Selection Mode is Shift + 2 .
 -
 Freehand Selection Mode
Allows you to select the elements of the blast by drawing an irregular shape in the view window.
 Tip! The keyboard shortcut to switch to the Freehand Selection Mode is Shift + 3 .Tip! Use SHIFT+~ to toggle between these three selection modes.
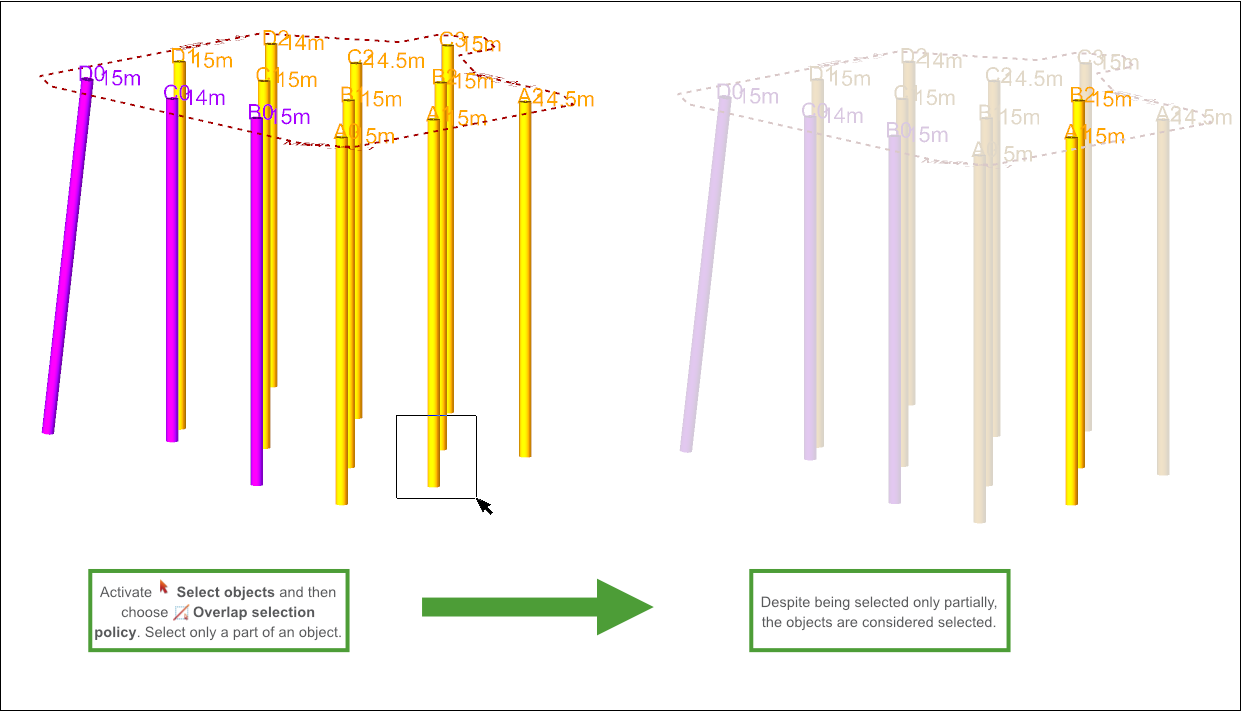
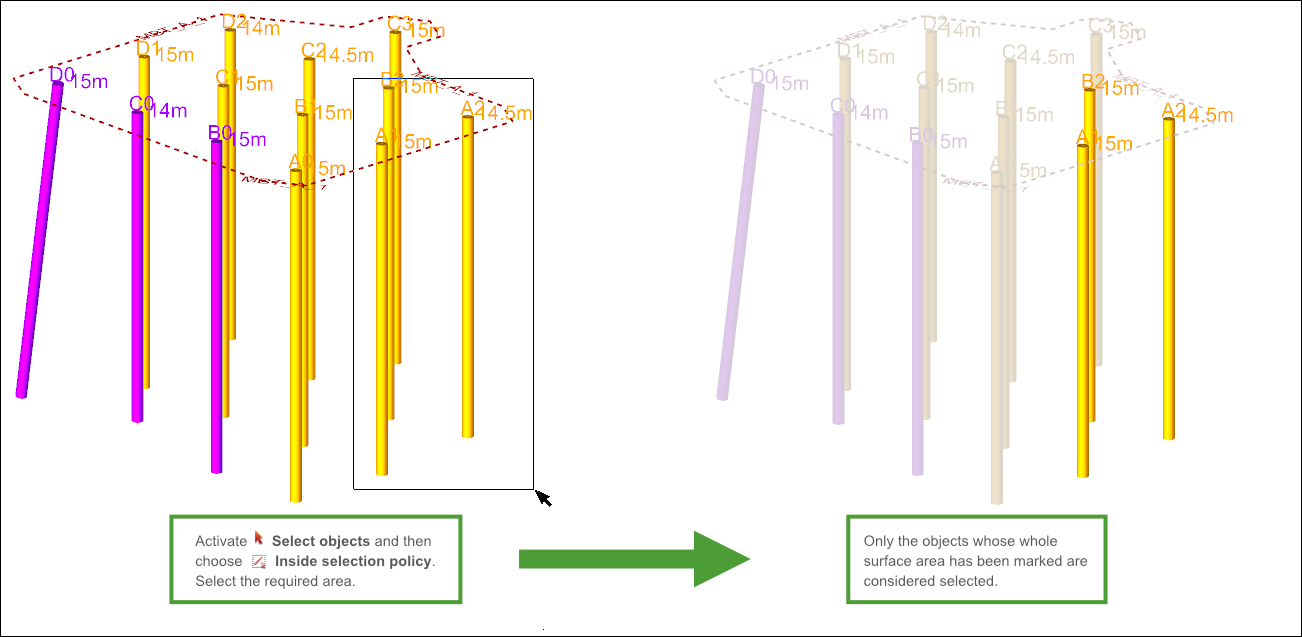
 Toggle selection policy
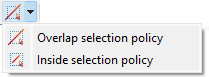
Toggle selection policy allows you to determine if the object should be considered selected, depending on the selection area. Click Select objects and then choose the required selection mode.
-
Overlap selection policy
When the Overlap selection policy is active, the object is considered selected even when only a part of it has been marked.
-
 Inside selection policy
When the Inside selection policy is active, the object is considered selected only when its whole area has been marked.
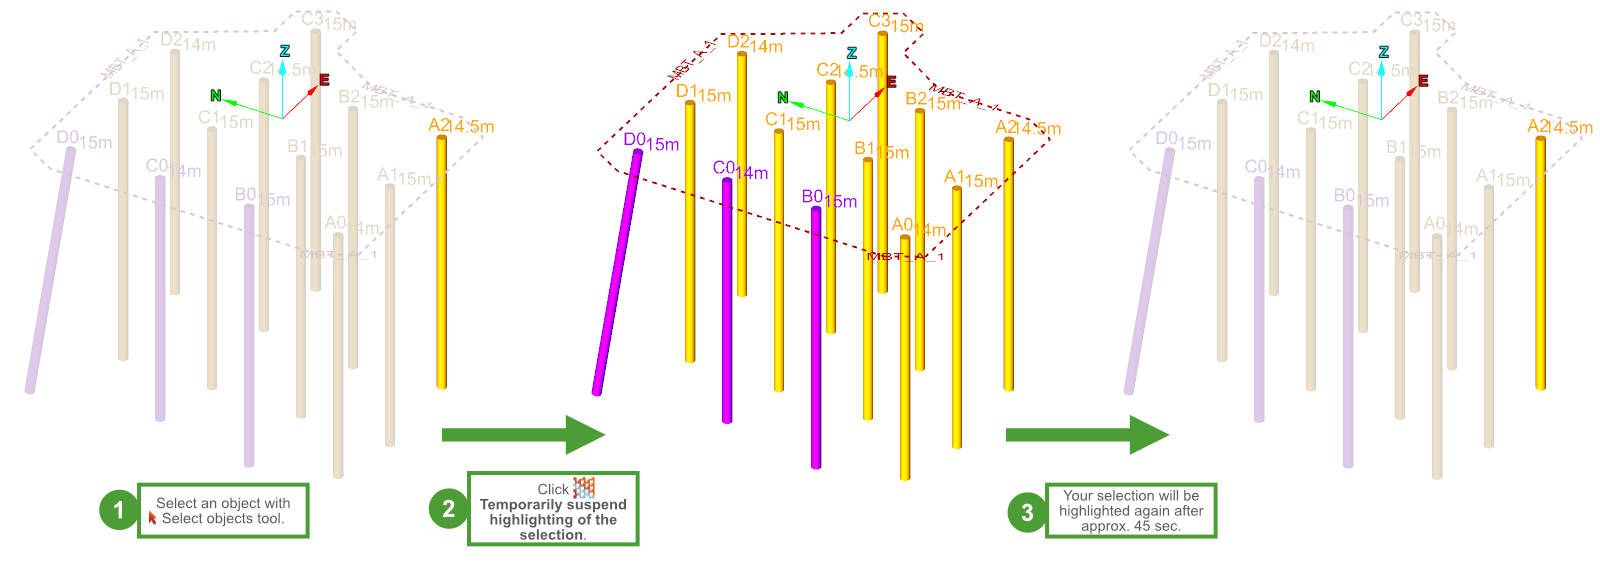
 Temporarily suspend highlighting of the selection
After selecting an object with the  Select objects tool, if you want to remove the highlighting effect from your view, click the
 ![]() icon. The highlighting effect will disappear, and the blast view will return to the default view after approximately 45 seconds.
icon. The highlighting effect will disappear, and the blast view will return to the default view after approximately 45 seconds.
Selecting data
- Select the required selection mode icon.
- Click the object or primitive. Multiple selections can be made by clicking with the left mouse button and dragging.
- A bounding box or polygon will be displayed. Once the mouse button is released, the appropriate objects or primitives will be selected.
-
Hold down the shift key to add more objects or primitives to the current selection.
-
Hold down the ctrl key to remove objects or primitives from the current selection.
-
To cancel a selection, click the background of the view window or at the bottom of the explorer window, or press ctrl + space.
Project explorer

|
The explorer window allows you to browse and select your blast data. All blasts, sheets, patterns and charge rules that you load or create will be listed here in a hierarchical order. The main containers |
 classify the major components of a dataset, whereas the subcontainers
 Undo/Redo/Rerun buttons
| Icon | Keyboard shortcut | Function |
|---|---|---|
 Undo Undo |
Ctrl + Z | Reverts the last performed operation. |
 Redo Redo |
Ctrl + Y | Repeats the last operation that has been undone. |
 Rerun Rerun |
Alt + R | Performs the last five operations again with either the same or different data. Rerun is not available until an operation that can be rerun is performed. |
Workbench tools
 Explorers Explorers |
Displays and hides data explorer on the left-hand side of the screen. |
 Logs Logs |
Displays and hides the Report Window at the bottom of the screen. |
 Property Editor Property Editor |
Displays and hides the Property Editor window on the right-hand side of the screen. |
 CSV Editor CSV Editor |
Activates the tab with the integrated CSV Editor. |
 Download Manager Download Manager |
Activates the tab with Download Manager where you can download other available software versions of Maptek products. |
 Image Viewer Image Viewer |
Opens the tab that allows you to load, view and print several images. |
 Text Editor Text Editor |
Opens the tab with the integrated text editor, where you can load, edit, save and print an already created file or create and save a new file. |
 Workflow Editor Workflow Editor |
Opens the tab that introduces the Workflow Editor. |
Help and preferences
 Maptek Extend Maptek Extend |
Contains links for acquiring Maptek licences, setting Maptek Account preferences, and to the detailed information on Maptek Extend. Once the licence is acquired, the icon changes to  . . |
 Preferences Preferences |
Allows you to set preferences and check the release notes for BlastLogic, and to set Workbench preferences. |
 Request Support Request Support |
Allows you to request support, suggest a new feature, and report bugs in the program. |
View window
The view window is your workspace, where you can view your blast data and adjust the way it is displayed.
Report Window
The Report Window shows the summaries of operations that have been performed, including warnings and errors. You can toggle between two tabs:
-
Report Window, which displays BlastLogic-related information, including blast status, warnings, and errors.

-
Workbench Client, which displays information related to the Workbench.

