Query
Source file: inventory-query.htm
The Query group of the Inventory ribbon contains tools that allow you to view the current and previous stock levels, as well as bulk explosive and stocktake history.

 Current Stock Levels
The Current Stock Levels tool allows you to view and search the current levels of stock.
To view the current stock levels, follow these steps:
-
On the Inventory ribbon, in the Query group, select
Current Stock Levels.The Current Stock Levels panel will appear. For each product, BlastLogic displays the current stock level. Positive values indicate that the product is in stock.
-
Optionally, filter the results by selecting the desired information from the Product type and Magazine drop-downs.
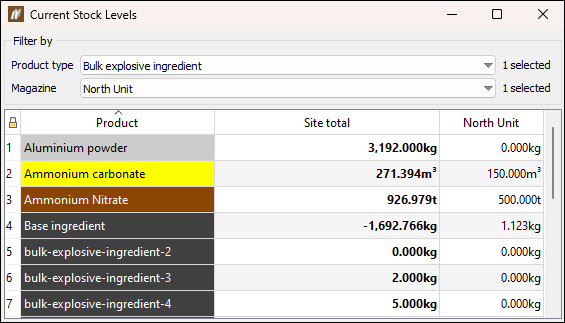
Tip: Click on the name of each column to sort the list alphabetically or numerically (in ascending or descending order), depending on the column category.
 History
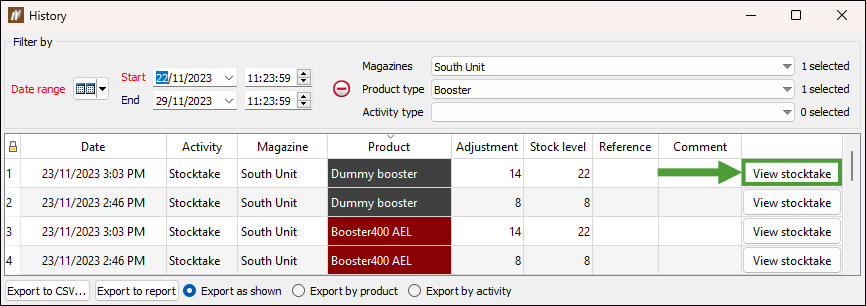
The History tool allows you to view the usage of blast accessories and bulk product ingredients over a period of time. You can also export the results to a PDF or CSV file.
To display the product history, follow these steps:
-
On the Inventory ribbon, in the Query group, select
History. The History panel will appear. -
Select the desired time range from the Date range drop-downs.
You can choose from the following Date range types: Two dates
Specify the time frame by setting the Start and End date and time: 
 Start date and duration
Specify the time frame by setting the Start date and time, and the duration (the number of days and hours): 
 Duration and end date
Specify the time frame by setting the End date and time, and the time (days and hours) preceding the end date. 
Note: If an entry relates to a stocktake, you can open the relevant stocktake information by selecting View stocktake in the final column of the table, for the corresponding row.
-
Optionally, filter the results by selecting the desired information from the Magazines, Product type, and Activity type drop-downs.
Tip: Click on the name of each column to sort the list alphabetically or numerically (in ascending or descending order), depending on the column category.
-
Optionally, you can export the data. To do this:
-
Select how you wish to group the data for export using the export radio buttons at the bottom of the panel.

-
Select to export the data in a CSV or PDF file by selecting Export to CSV... or Export to report respectively.
-
 Bulk Explosive History
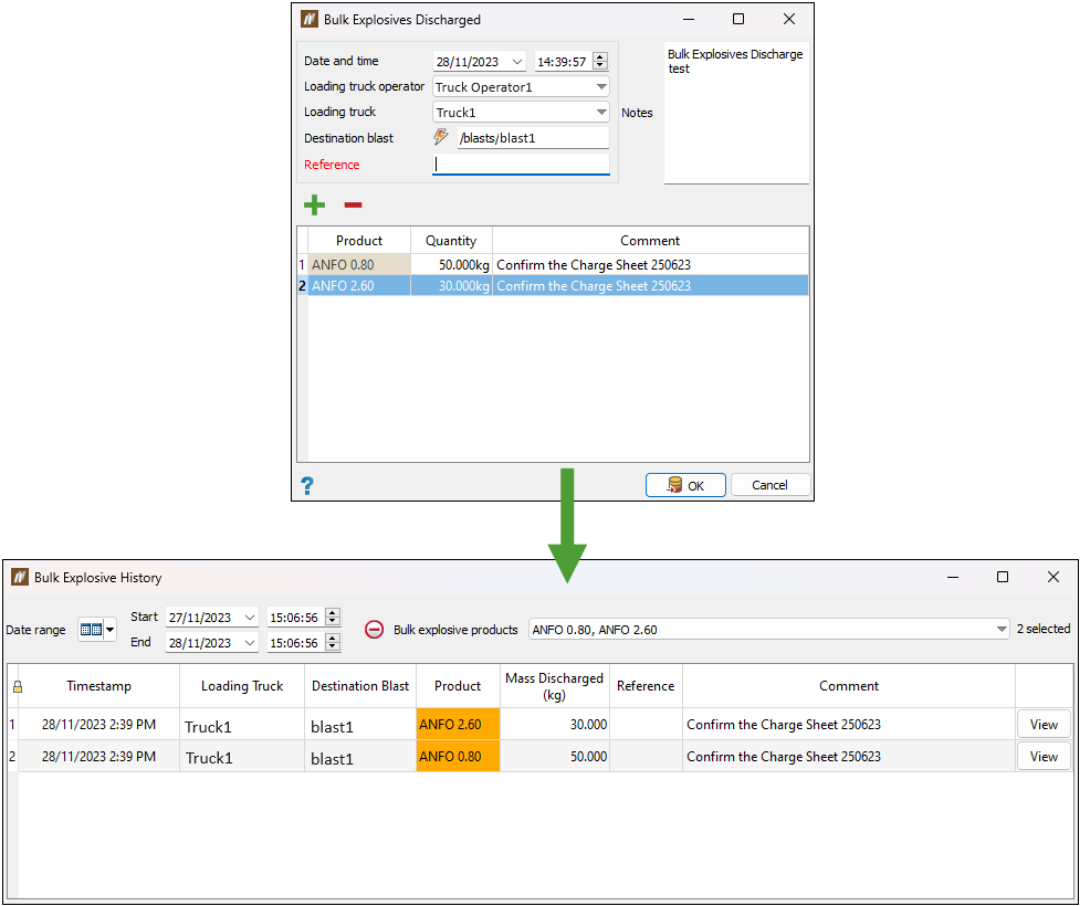
The ![]() Bulk Explosive History allows you to search the site's discharge history based on the specified search criteria.
Bulk Explosive History allows you to search the site's discharge history based on the specified search criteria.
The data displayed in this panel is based on the entries that you have made in the BlastLogic tablet application (Inventory module > Bulk usage tab) and in the Bulk Explosives Discharged panel in the BlastLogic desktop application (see Bulk Explosives Discharged for more information).
|
Tablet
|

|
| Desktop
Bulk Explosives Discharged panel " Desktop Bulk Explosive History panel |
|
You can apply the following search filters:
-
Date range: Specify the required time frame. See History for detailed information on available date and time filters.
-
Bulk explosive products: Select the required products from the list.
The view will be filtered based on the search criteria you apply.
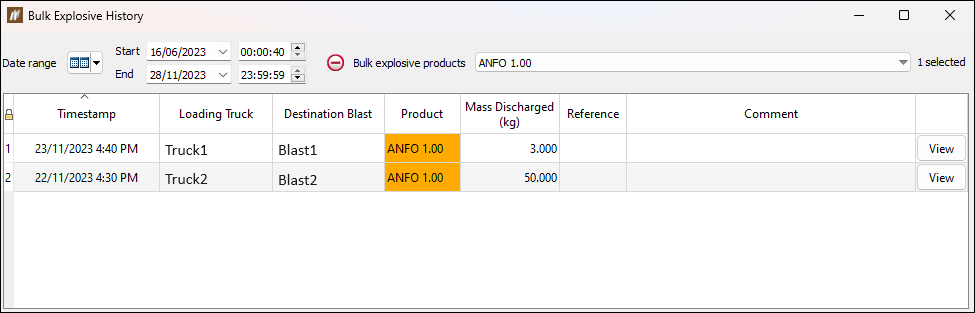
Tip: Click on the name of each column to sort the list alphabetically or numerically (in ascending or descending order), depending on the column category.
Click View to check detailed information of each entry in the Bulk Explosive History table.
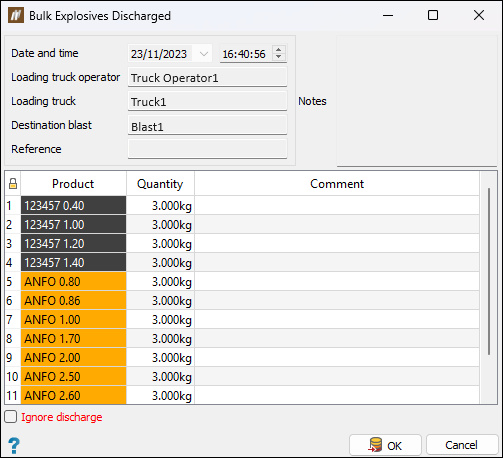
Selecting the Ignore discharge checkbox allows you to ignore the currently viewed discharge transaction. Its product entries will be treated as though they were never made, and, consequently, they will not affect the product stock levels. The listed products will be struck through to indicate that their effect has been ignored.
Ignoring a discharge transaction will not delete it from the discharge history; its product entries will remain visible, but struck through in the same manner to indicate them as ignored.
 Stocktake History
The Stocktake History tool enables you to view and search for existing stocktakes.
To view and search through the stocktake history, follow these steps:
-
On the Inventory ribbon, in the Query group, select
Stocktake History. -
Enter the desired time range using the Date range drop-downs. See History for detailed information on the available date and time filters.
-
Select the desired magazines using the Magazines drop-down.
-
Click View on an entry to view the stocktake.
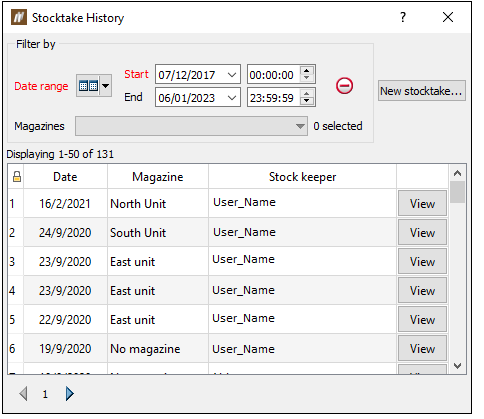
Note: If while viewing the history you need to stocktake the inventory again, you can do so directly from this panel by clicking the New stocktake... button. To add a new stocktake, follow the steps listed in Create Stocktake.
