Engine Parameters
Source file: strategy-setups-advanced.htm
The ![]() Engine Parameters tab is visible if the option is enabled in Evolution. To enable it, go to Project ribbon and select Settings. Then, on the Settings pop-up window, go to the Strategy tab and select the Display advanced options tab checkbox.
Engine Parameters tab is visible if the option is enabled in Evolution. To enable it, go to Project ribbon and select Settings. Then, on the Settings pop-up window, go to the Strategy tab and select the Display advanced options tab checkbox.

The ![]() Engine Parameters tab provides the following options:
Engine Parameters tab provides the following options:
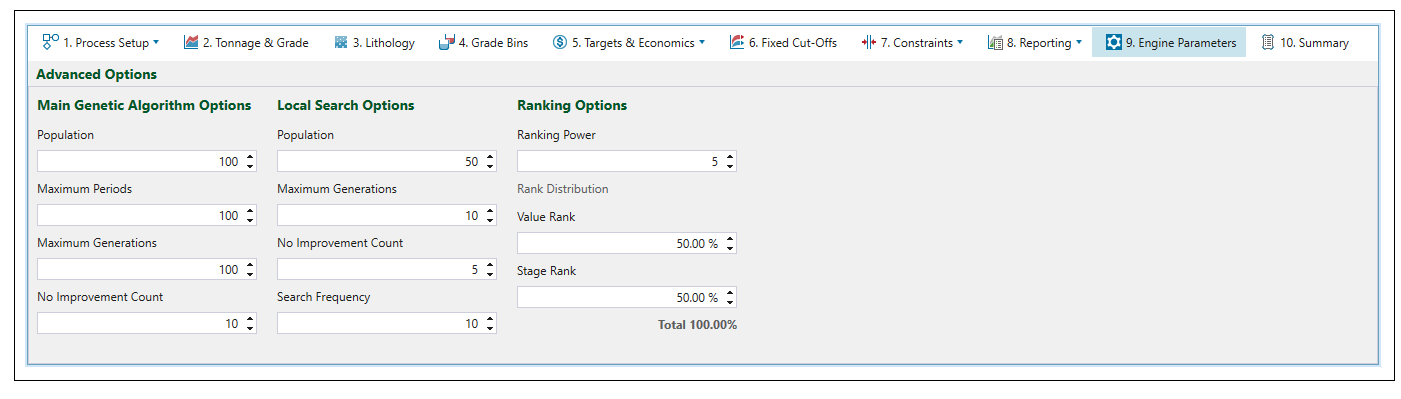
Main Genetic Algorithm Options
A genetic algorithm is an optimisation process in which a population of solutions is maintained and improved over time.
You can influence the algorithm by altering the following parameters:
-
Population
This determines the number of individual solutions to be maintained during the optimisation. The larger the population is, the higher quality and more consistent results can be obtained, but this will also result in a longer schedule generation time.
Use this field to specify the number of schedules that will be used to produce the final result. -
Maximum Periods
This field sets the maximum number of years to schedule.
Use this field to specify the maximum number of periods that can be used to produce the final result. -
Maximum Generations
Use this field to specify the maximum number of generations that the algorithm will run for while optimising a period before moving to the next. -
No Improvement Count
An early exit condition when a period is being optimised. Namely, if no improvement is observed after processing the set number of generations, the period is abandoned, and the software starts optimising the next period.
Use this field to specify the maximum number of successive generations after which no improvement has been achieved, so that the software will stop searching for a better solution for this period.
Local Search Options
Every few generations Strategy will pause the main optimisation process to revise it by exploring the local solution space with a smaller and simpler local search.
You can influence the algorithm by altering the following parameters:
-
Population
This determines the number of individual solutions to be maintained during the optimisation. The larger the population is, the higher quality and more consistent results can be obtained, but this will also result in longer schedule generation time.
Use this field to specify the number of schedules that will be used to produce the final result. -
Maximum Generations
Use this field to specify the maximum number of generations the algorithm will spend during optimisation. -
No Improvement Count
An early exit condition when a period is being optimised. Namely, if no improvement is observed after processing the set number of generations, the period is abandoned.
Use this field to specify the maximum number of successive generations after which no improvement has been achieved, so that the software will stop searching for a better solution. -
Search Frequency
Use this field to specify how frequently the local search function will be executed (search to be performed every x generations).
Ranking Options
Ranking Options are divided into Ranking Power and Rank Distribution, which comprises Value Rank and Stage Rank.
-
Ranking Power
Entering Ranking Power values allows you to define the impact of the selected ranking mechanism on the initial sequences.
To use this function, apply numbering to the stages by the convention in which the inner nested stages have lower stage numbers than the outer enclosing stages—this will prevent undercutting.
Follow these steps to apply numbering to the stages in your model:
-
Open the model in the viewer and select
 Hands Free Mode from the toolbar.
 -
In View Manager, right-click on the row with the name of your model and select
 Add Dynamic Colour.
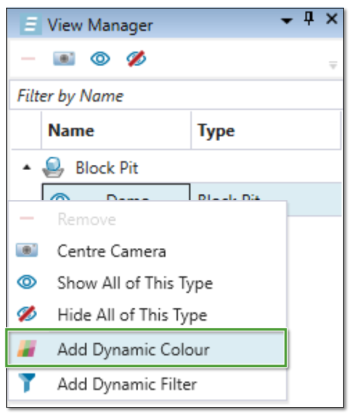
-
In View Manager, go to the
Dynamic Colour menu and select the variable that specifies the stages for your model.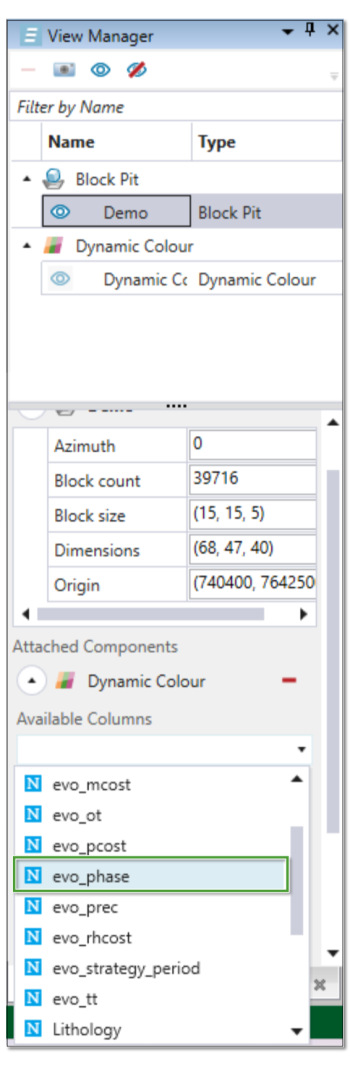
The colour scheme will be applied to your model.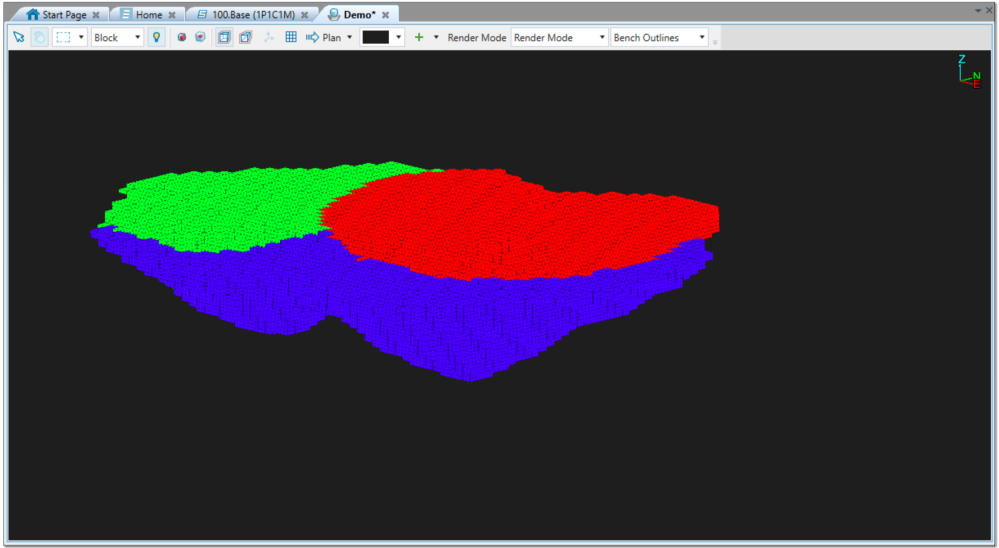
-
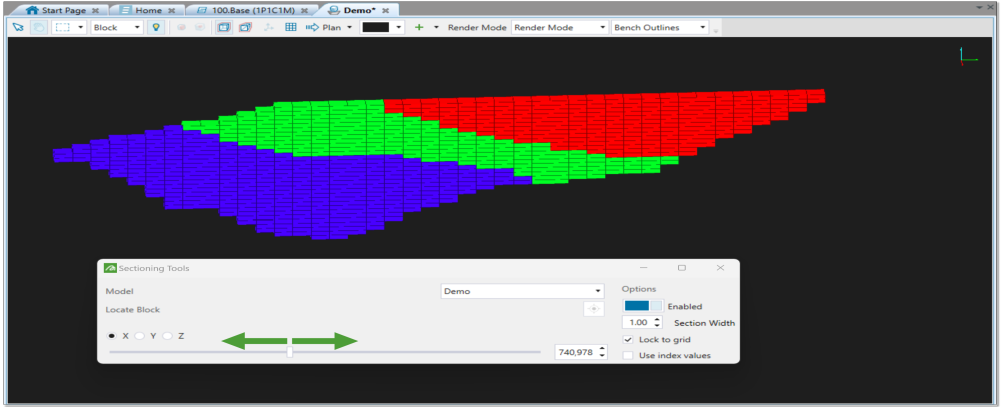
Select
 Section Models from the viewer toolbar.
 -
In the Sectioning Tools pop-up, adjust the sliding bar until you can clearly see all the stages defined for your model. Keep the Sectioning Tools pop-up open to maintain the view that you have set.
-
Go to the tab where your setup is open, select
 Process Setup and enter
  Stage & Process Precedence subtab to confirm the number of stages specified for your model.
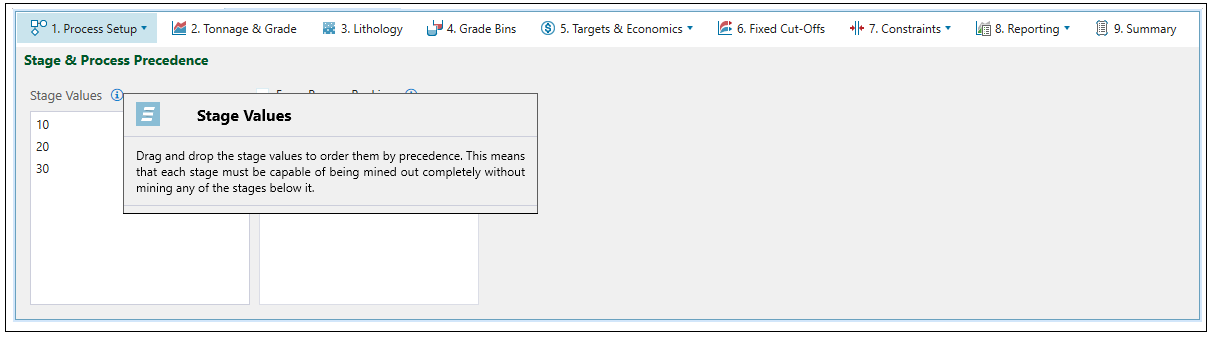
-
Go back to the tab where your model is open, change the selection to
 Interactive Mode and select a block from your model.
 -
Check the assigned stage of your selected block on the Properties tab.
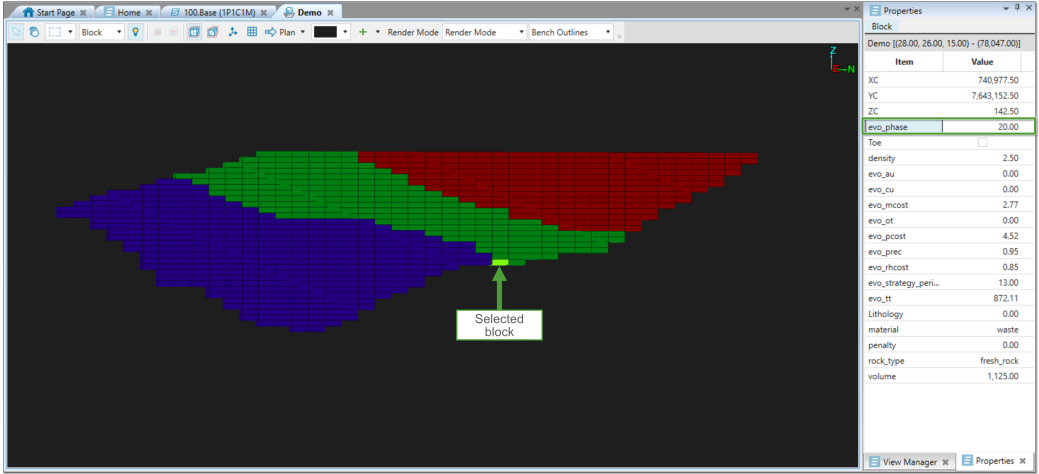
-
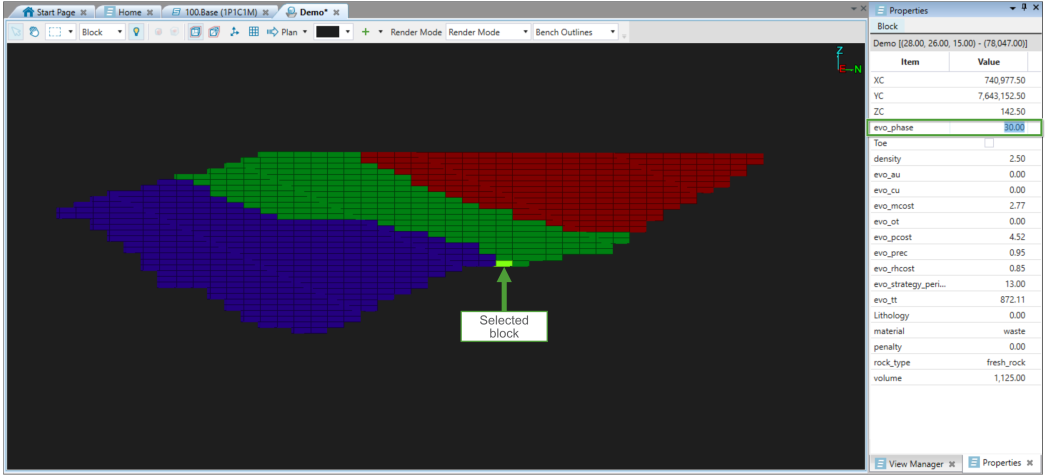
Assign a new stage by editing the field in the Value column.
-
Click
 Save, refresh your view or enter the tab with your model again. The colour that corresponds to the stage you have assigned to the selected block will be applied in your model:
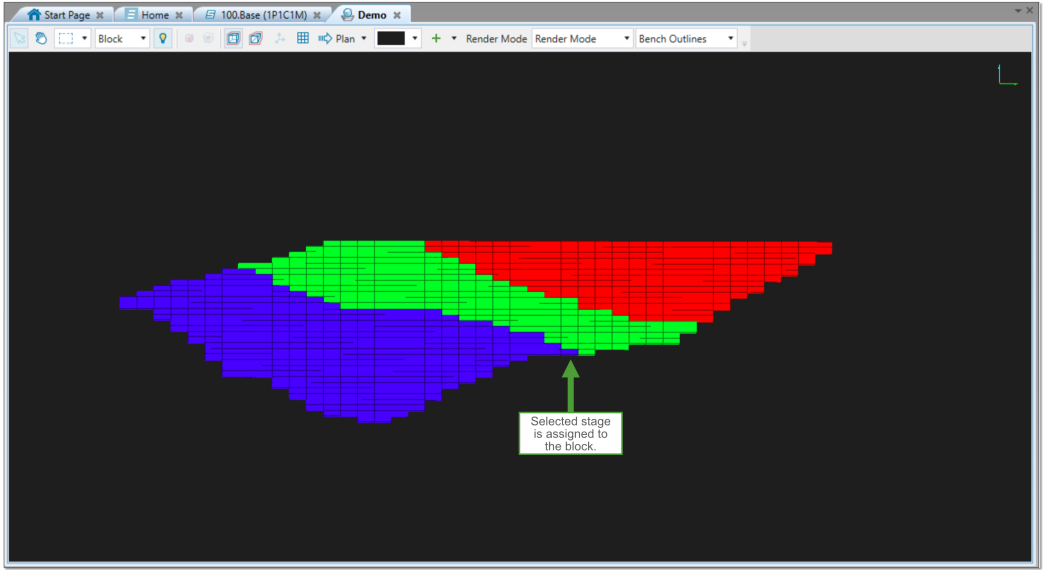
If two stages are spatially removed, the stage with a higher value should be assigned with a lower number.
The priorities and diversity of the population can be determined the following way:-
A ranking power greater than 5 focuses on value and ranking.
-
A ranking power less than 5 maintains diversity for longer so that other solutions are examined.
-
A ranking power equal to 0 enables the optimiser to select the stages to mine randomly, without focusing on the value or stage number. This solution is advantageous when there are more than 20 stages to choose from, or when a diversified approach is needed as focusing on only one factor (value or stage numbering) could lead to erroneous blends.
-
-
Value Rank
Value Rank is the percentage of the population that focuses on value as the main objective. -
Stage Rank
In order to maximise the value, Strategy focuses on mining the stages (phases) with the highest margin first. However, this approach does not take into account the cases when pre-strips stages have been designed. By default, pre-strip stages have a very low or negative margin, thus their execution would normally be deferred into the future. Stage Rank is the percentage of the population that focuses on stage number as the main objective. It allows you to include pre-stripping stages in the population composition so that the sequence can start them early in the schedule, which will result in accessing the high value ore faster.Note: Character-based stage names do not operate in Stage Rank, thus stage numbering needs to be applied in numeric order.
