Transforming a Block Model
Source file: origin-block-models-transform-new.htm
Origin Blocks models can be imported from a BMF, a CSV, an EVBM, or an EVWD file. If a block pit is imported from a BMF or an EVBM file, the object appears in the project explorer and can be immediately added to your Origin Blocks setup. Other import types require additional data preparation using the ![]() Transform function.
Transform function.
To transform a block model, right-click on the pit model in the project explorer and select ![]() Transform.
Transform.
![]()
A new file named Block Model Transform will be created in the Transforms folder in your project explorer.
Note: If you create more files of this type, a consecutive number will be assigned to each of them. You can change the default name by right-clicking on the transform file and selecting ![]() Rename.
Rename.![]()
The created transform file will also open in your viewer.
![]()
Configuring a transform
Transforms are the format that Evolution uses to prepare reserve or block models. They consist of three separate sections:
Input
There are four types of input data that can be provided to create a block model:
![]()
Regardless of the input supplied, you need to provide the following information:
- Centroid: Ensure that the correct centroid model attributes are displayed. Select the appropriate model attributes from the drop-down for each of the X, Y and Z coordinates.
- Block Type: Select the appropriate block model type (Regular or Sub-Cell (subblocked)).
- Block Size: If you are importing a regular block model, enter the dimensions of the imported model for the X, Y and Z dimension. If the import model is subblocked, select the appropriate model items from the drop-down for the X, Y and Z dimension.
- Origin: Enter in the block model origin if it is not a default 0, 0, 0 value. These coordinates are used in the block model manipulations, particularly reblocking.
- Rotated: If the block model being imported is a rotated model, select the Rotated checkbox and enter the values associated with the models: Azimuth, Dip and Plunge.
- Skip: This allows rows below the header to be skipped if required.
- Preview: This shows the top 50 records of the import file.
Vulcan Block Model (importing BMF file)
Once you have selected BMF File from the Input drop-down menu, the Block Model Transform screen in your viewer will be changed accordingly. Click Browse to load the data from the BMF file saved on your computer.
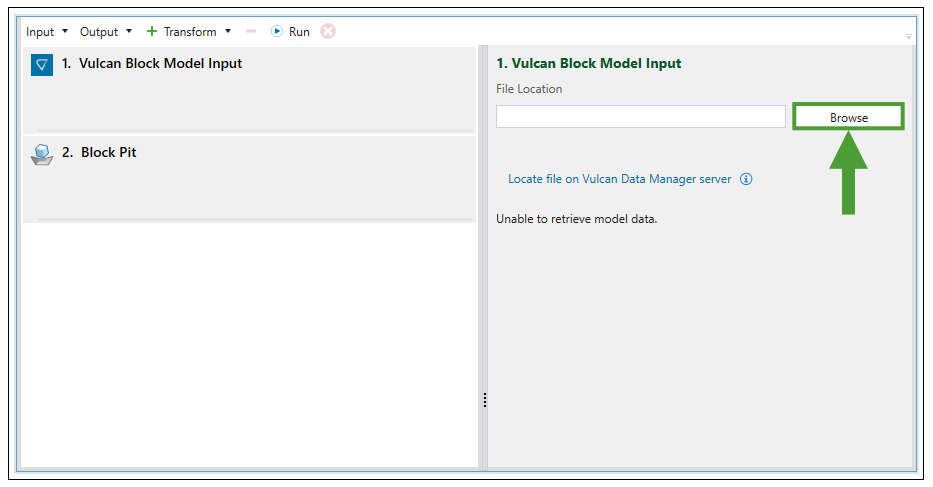
Note: To load the file from the server, click Locate file on Vulcan Data Manager server and enter the server information.
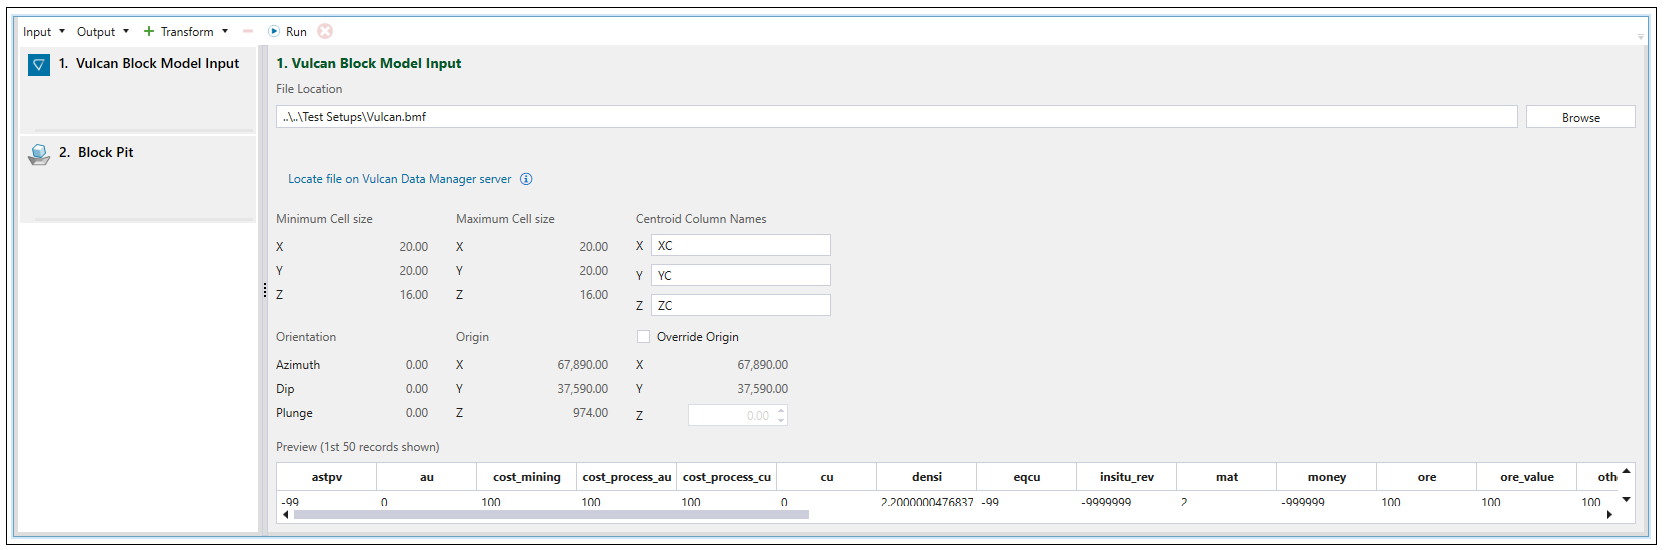
The data will be filled in based on the BMF file that you have loaded.
CSV input
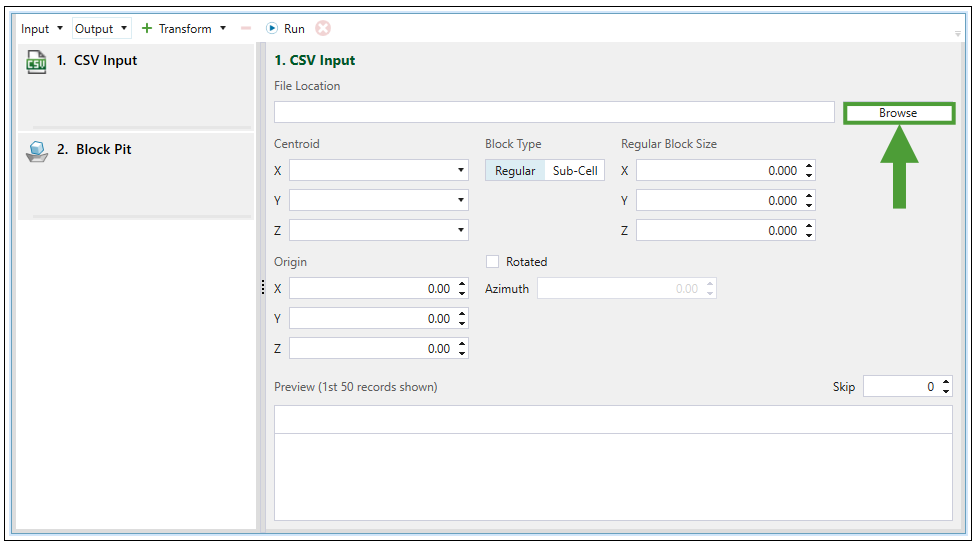
Once you have selected CSV File from the Input drop-down menu, the Block Model Transform screen in your viewer will be changed accordingly. Click Browse to load the data from the CSV file saved on your computer.
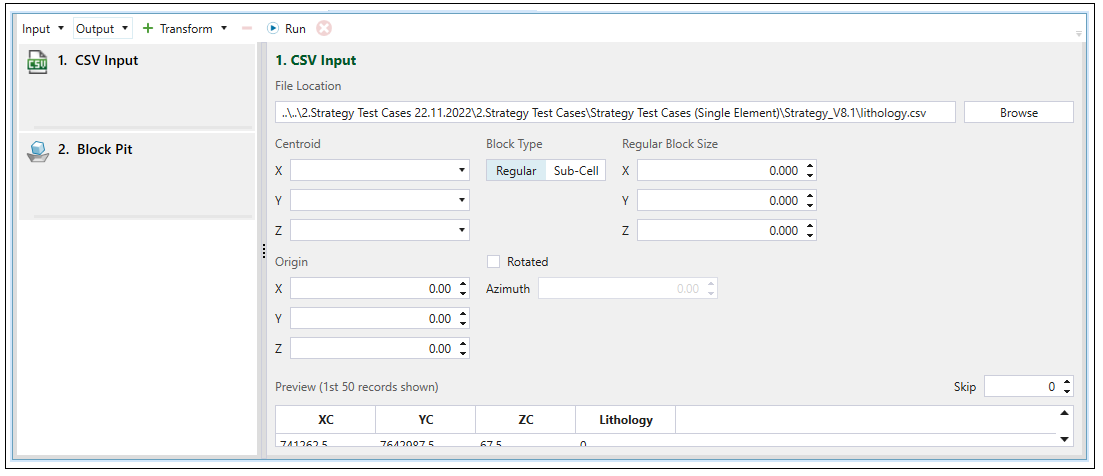
The data will be filled in based on the CSV file that you have loaded.
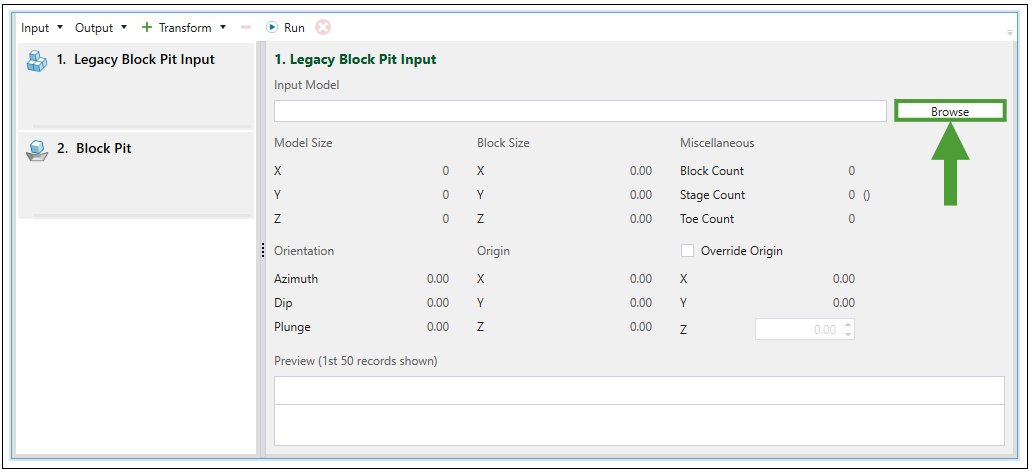
Legacy Block Pit Input
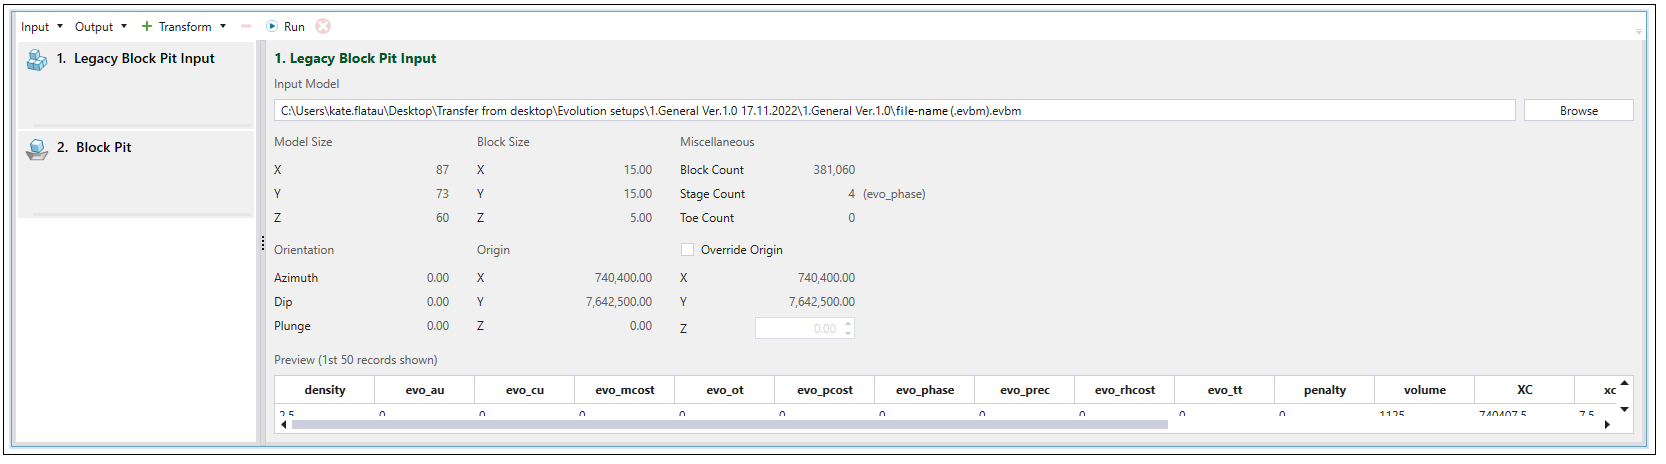
Once you have selected Legacy Block Pit Input from the Input drop-down menu, the Block Model Transform screen in your viewer will be changed accordingly. Click Browse to load the data from the Evolution block model file (.evbm) saved on your computer.
The data will be filled in based on the EVBM file that you have loaded.
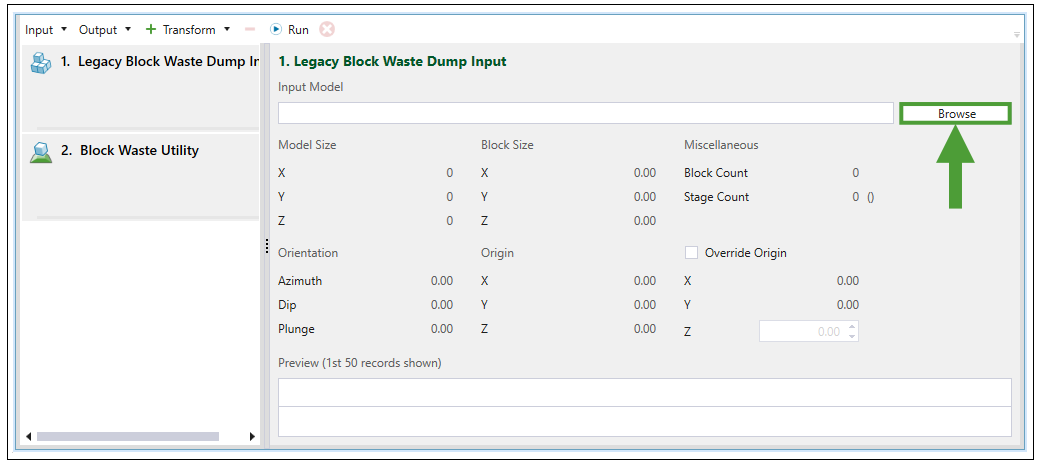
Legacy Block Waste Dump
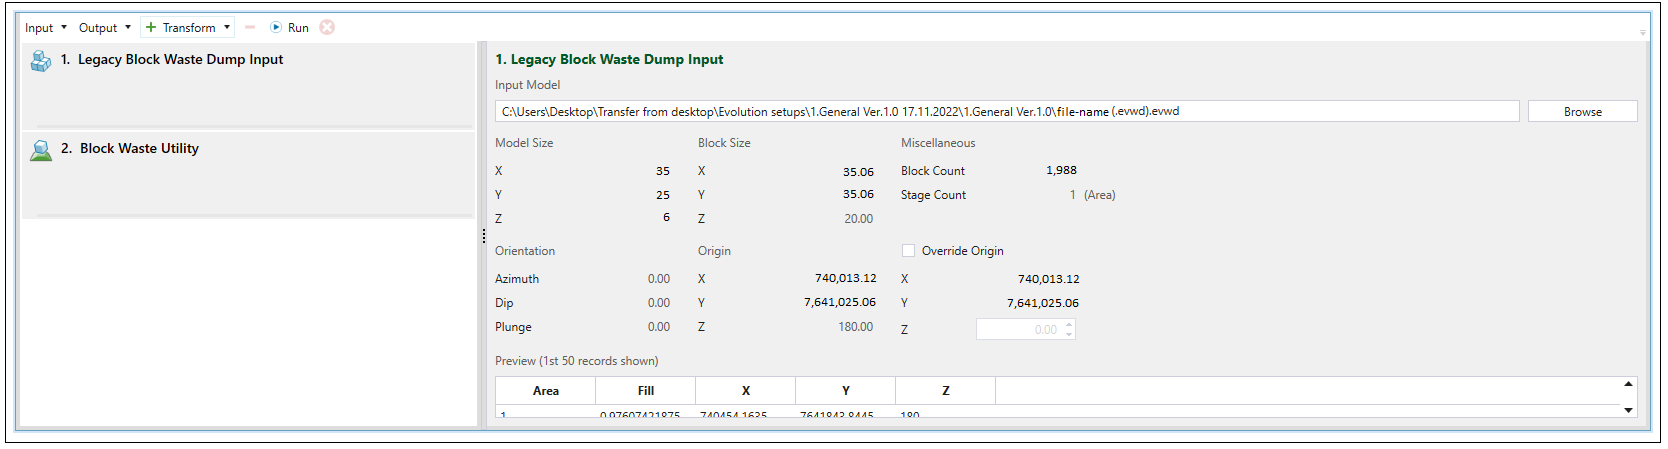
Once you have selected Legacy Block Waste Dump from the Input drop-down menu, the Block Model Transform screen in your viewer will be changed accordingly. Click Browse to load the data from the Evolution waste dump file (.evwd) saved on your computer.
The data will be filled in based on the EVWD file that you have loaded.
Transform operations
You can modify block models to create a dataset suitable to the setup to which you want to add your model. You can make such modifications by using the following transform operations:
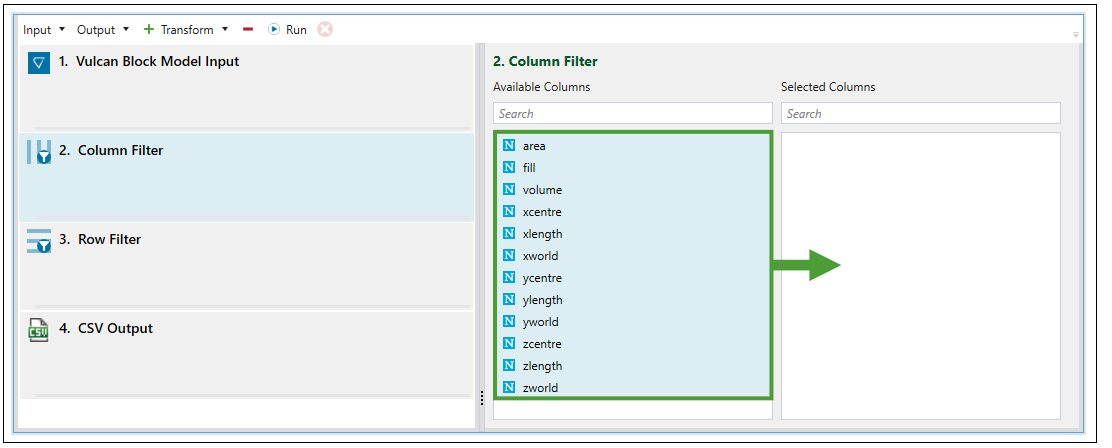
Column Filter
Use ![]() Column Filter to specify the attributes that should be included in the dataset. To do so, drag the required attributes to the Selected Columns field.
Column Filter to specify the attributes that should be included in the dataset. To do so, drag the required attributes to the Selected Columns field.
Row Filter
The ![]() Row Filter transform operation allows you to exclude solids from your model by applying a script.
Row Filter transform operation allows you to exclude solids from your model by applying a script.
For example, if the following script was applied:
 ,
,
then only the blocks with total tonnage greater than 0 would be imported.
Reblocker
The ![]() Reblocker transform operation is used to homogenise the dimensions of all blocks within a model by combining smaller blocks. See Reblocking a Block Model for more information.
Reblocker transform operation is used to homogenise the dimensions of all blocks within a model by combining smaller blocks. See Reblocking a Block Model for more information.
Maths Script
Use ![]() Maths Script to create solid attributes or to modify the existing ones in a model.
Maths Script to create solid attributes or to modify the existing ones in a model.
For example, if you apply the following equation as a maths script:
 ,
,
then every block within the model will have the availability variable set to 0.95.
Output
You can generate an output once you have performed the required transform operations. To generate an output, select the target output file format from the ![]() drop-down. The available file types listed in the
drop-down. The available file types listed in the ![]() drop-down will depend on the Input that you have selected. The availability of each output file type is shown in the table below:
drop-down will depend on the Input that you have selected. The availability of each output file type is shown in the table below:
| Input | Output |
|---|---|
| Vulcan Block Model |
|
| CSV File |
|
| Legacy Block Pit |
|
| Legacy Block Waste Dump |
|
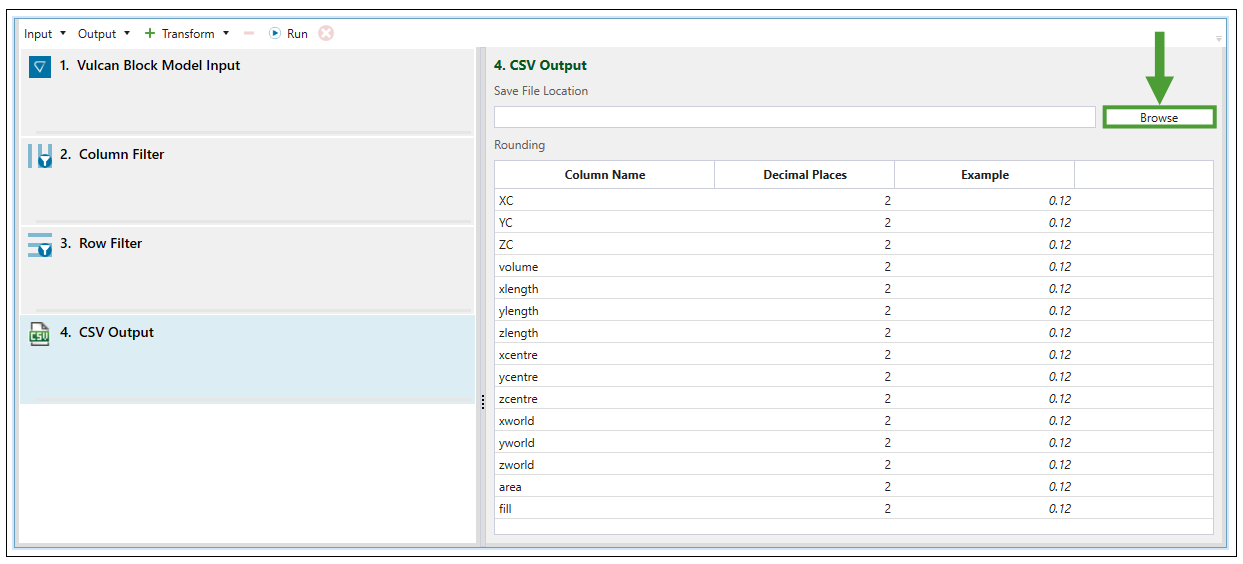
CSV file as an output
If you have selected CSV file as an output, the Column Name, Decimal Places and Example columns of the table will be automatically populated based on the data loaded from the input file and the filters you have applied with the Column Filter transform operation. Click Browse to specify the name of the CSV file to be generated and its saving location. Next, click ![]() Run to validate your model. The model will be loaded in the project explorer.
Run to validate your model. The model will be loaded in the project explorer.
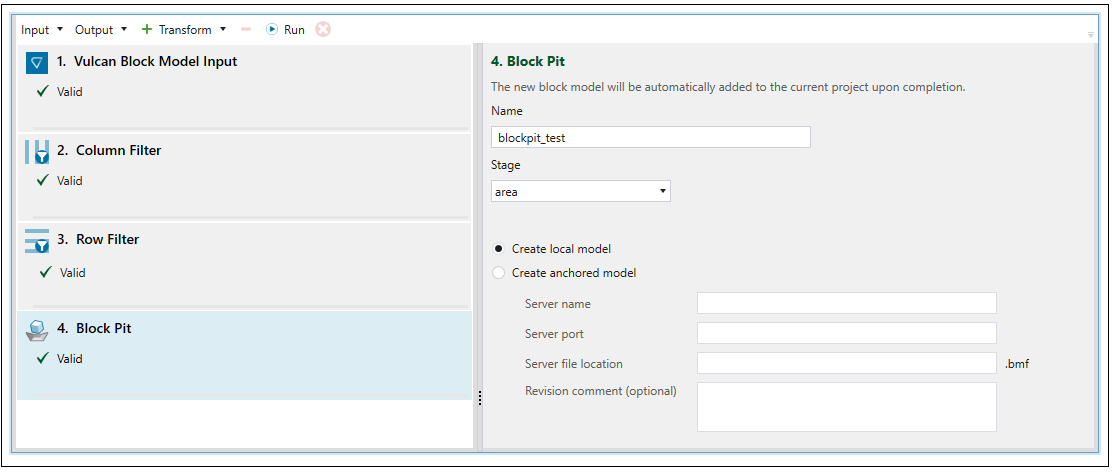
Block Pit as an output
If you have selected Block Pit as an output, specify the name of the new block model to be created and the stage from the Stage drop-down list. The variables listed in the Stage drop-down will be based on the data loaded from the input file and the filters you have applied with the ![]() Column Filter transform operation.
Column Filter transform operation.
-
Select Create local model if you want the model to be saved only on your machine.
-
Select Create anchored model and enter server details to save the model on the server.
-
After entering the required information, click
 Run to validate your model. The model will be loaded in the project explorer.
Block Waste Dump as an output
If you have selected Block Waste Dump as an output, specify the name of the new block model to be created and the area from the Area drop-down list. The variables listed in the Area drop-down will be based on the data loaded from the input file and the filters you have applied with the ![]() Column Filter transform operation.
Column Filter transform operation.
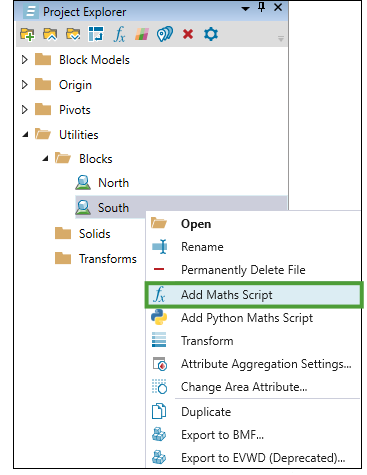
Using the Fill Percent (0.0-1.0) drop-down, specify the variable to indicate the filling level of the waste dump. To specify the unified level of filling of a waste dump, right-click on it in your project explorer and select ![]() Add Maths Script.
Add Maths Script.
Next, double-click on the autogenerated ![]() Block Maths file under the Math Scripts folder in the project explorer and enter the required formula.
Block Maths file under the Math Scripts folder in the project explorer and enter the required formula.

Important: 0 stands for 0% (empty), whereas 1.0 stands for 100% (full).
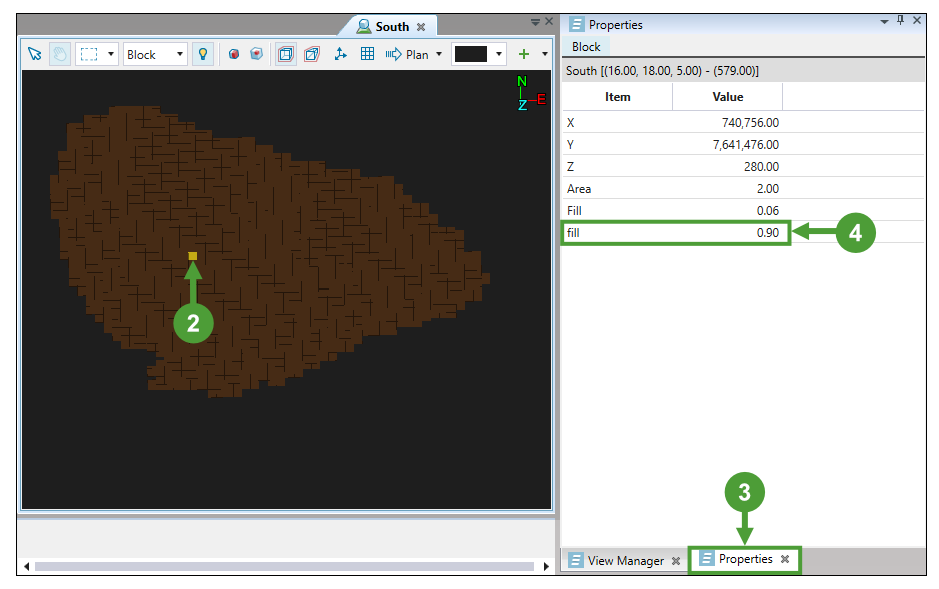
Follow these steps to check the application of the percentage that you have set:
-
Double-click on the waste dump model in the project explorer to open it in the viewer.
-
Select a block from your model.
-
Open the Properties tab located in the bottom left corner of your screen.
-
Confirm that the block fill percentage corresponds to the variable that you have set.
-
Select Create local model if you want the model to be saved only on your machine.
-
Select Create anchored model and enter server details to save the model on the server.
-
After entering the required information, click
Run to validate your model. The model will be loaded in the project explorer.

