Using the Waypoint Editor
Source file: howto-use-the-waypoint-editor.htm
The ![]() (Waypoint Editor) is located in the viewer toolbar next to the
(Waypoint Editor) is located in the viewer toolbar next to the ![]() (Waypoint collection) icon .
(Waypoint collection) icon .

Click on the ![]() (Waypoint editor) to open the Waypoint Editor toolbar underneath the viewer. This toolbar allows you to move, add and link waypoints.
(Waypoint editor) to open the Waypoint Editor toolbar underneath the viewer. This toolbar allows you to move, add and link waypoints.
Moving a waypoint
To move a waypoint:
-
Click the
 icon on the Waypoint Editor toolbar.
 -
Click a waypoint in the viewer.
-
Place the waypoint in an appropriate position on the road network.
-
If you have not placed the waypoint in the new position, you can exit the moving mode with a right-click.
-
If you want to reset the location after placing the waypoint, use the ctrl + z combination to undo the operation.
Adding a waypoint
To add waypoints:
-
Click
 in the Waypoint Editor toolbar. The waypoint properties settings menu will become active.
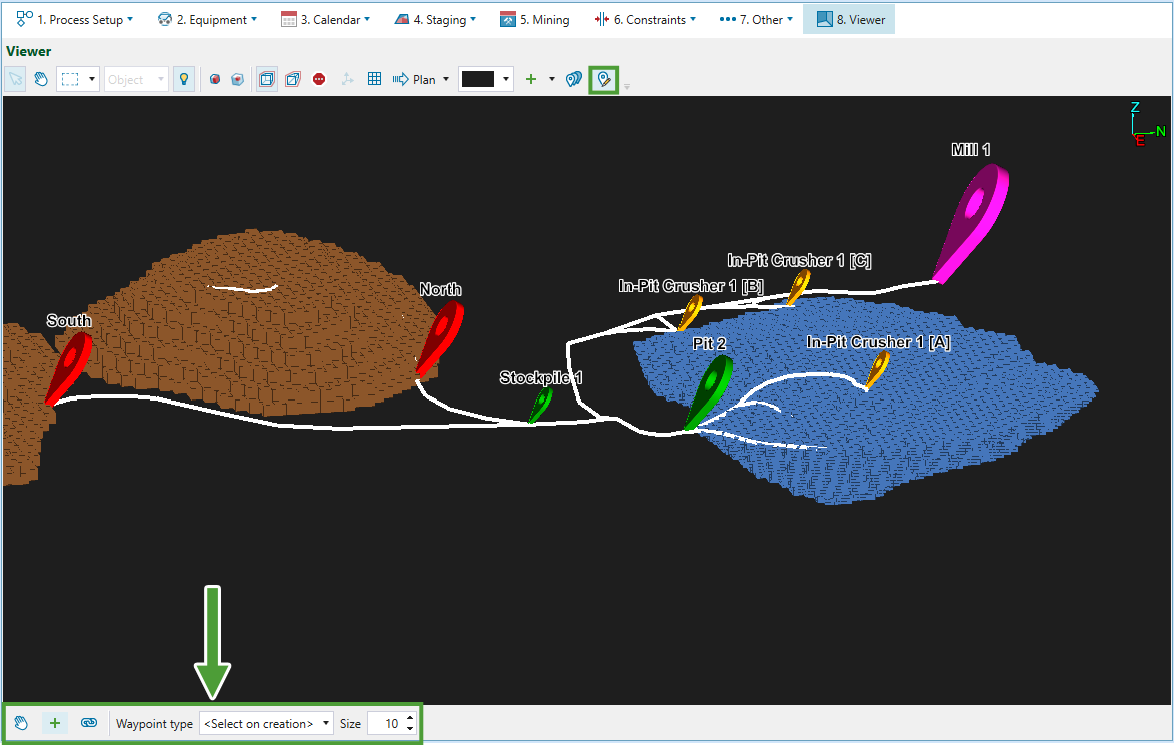
-
Add a waypoint by placing it on the road network. You can specify its properties beforehand (by selecting the type from the Waypoint type menu in the toolbar), or by selecting the waypoint type from the list that appears after you place a waypoint on the road network.

-
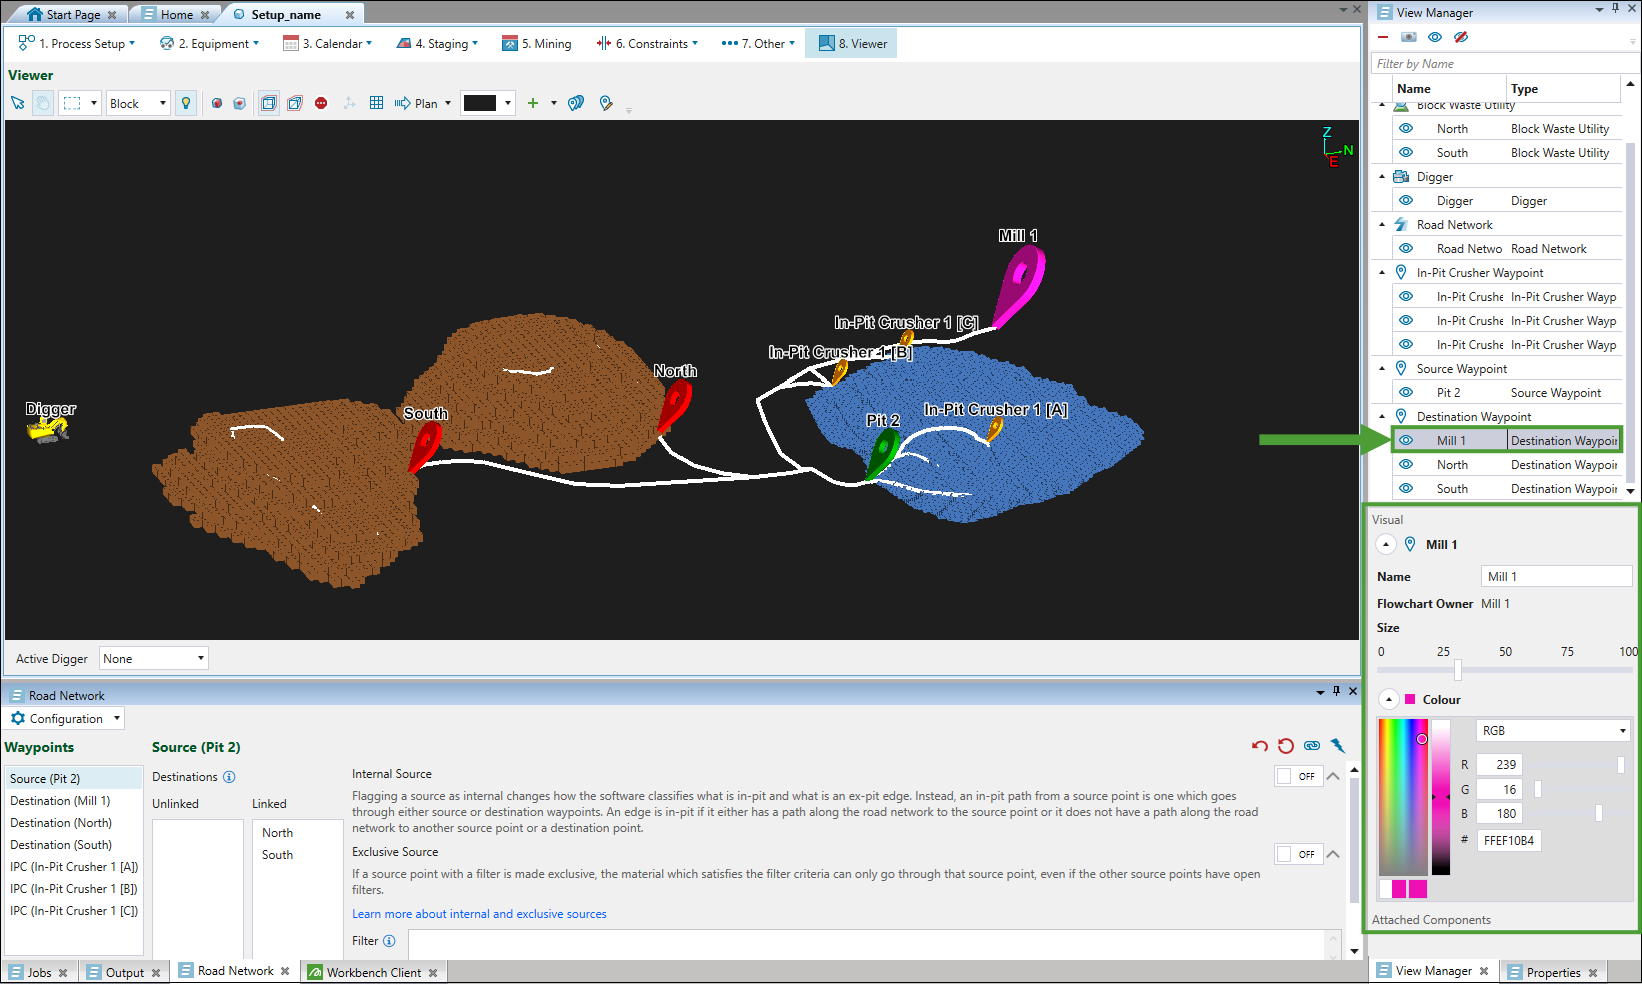
Once the waypoint is placed on the road network, you can change its name, size and colour in the View Manager. See Setting colour and size of a waypoint for more information.
Setting colour and size of a waypoint
The waypoints that you add to your setup are the same default size and have their default colour assigned to them. The default colours for the source and destination waypoint are green and red, respectively.
You can change these default properties by following these steps:
-
Open your setup in the viewer.
-
In the View Manager, select the waypoint for which you want the properties to be changed.
-
Set the new properties. You can designate a new name, change the size and the colour of the waypoint. The changes you make will be directly reflected in the viewer.
Linking waypoints
To link waypoints
-
Click the
 icon on the Waypoint Editor toolbar. The linking options will appear in the toolbar.
 -
Select the linking type:
-
If you have selected Single linking type:
-
Select the source and destination by clicking on the appropriate waypoints.
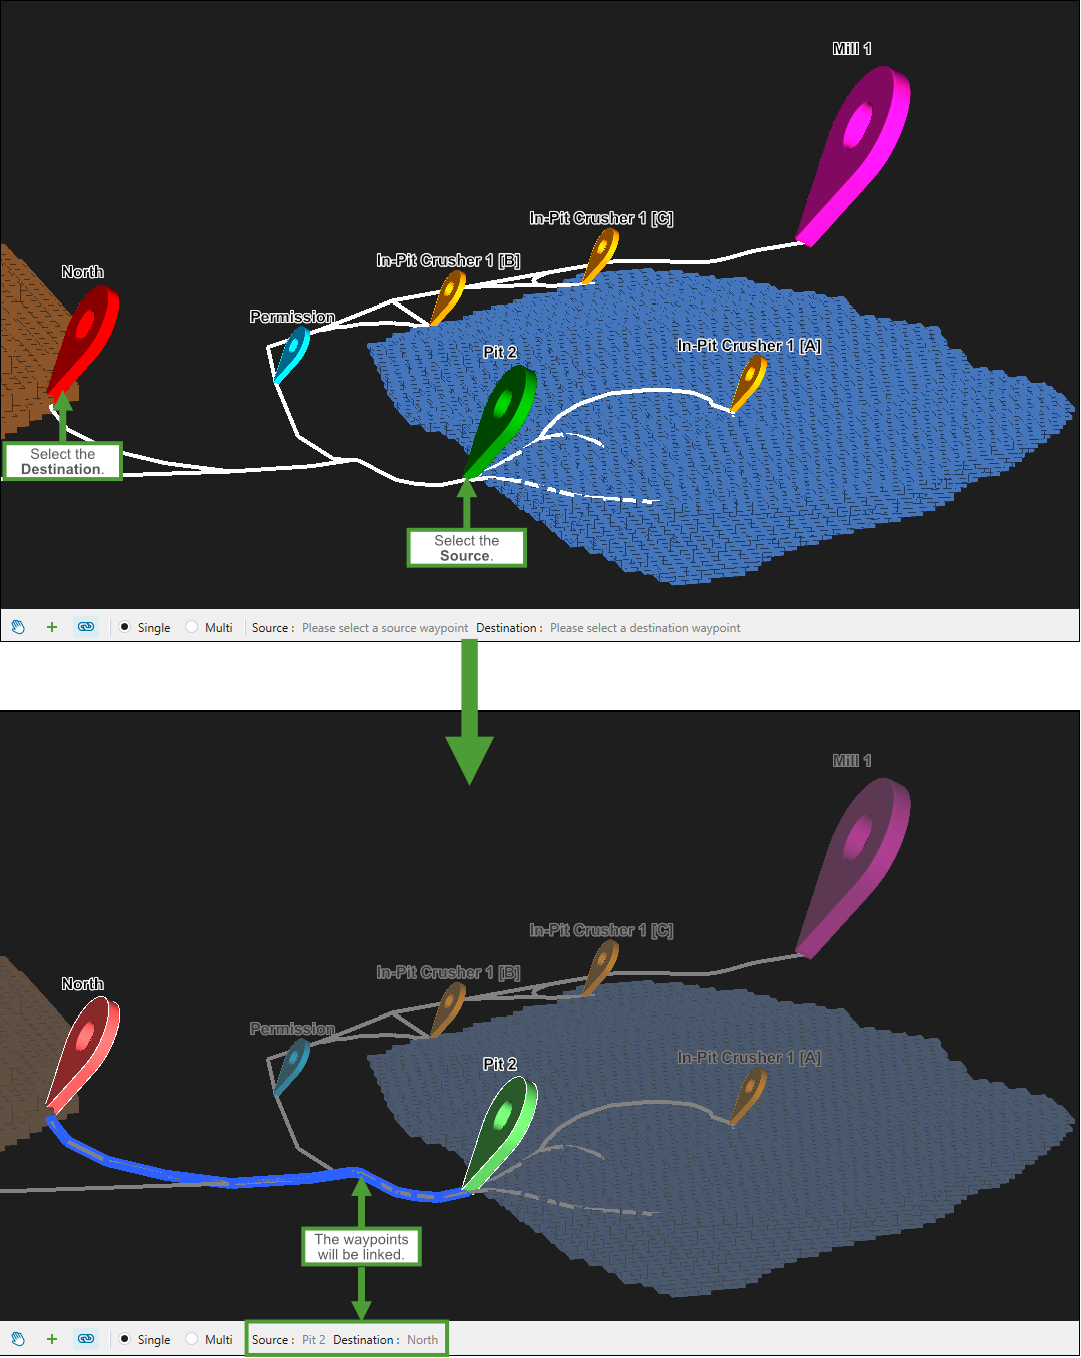
Note: A link will not be added if two waypoints are already linked.
-
-
If you have selected Multi linking type:
-
Select the waypoints you would like to link by clicking on them, then click
 Link to confirm your selection.
Note: Once the waypoints are linked, a toast pop-up informing that the linking has been successful will appear.
Tip: To unlink the waypoints, click
 (Unlink all sources and destinations) in the Road Network window. A dialog window asking you to confirm your selection will appear. Click Yes to unlink the waypoints.
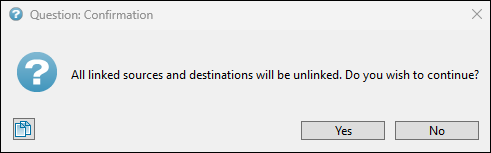
-
-
Assigning in-pit crusher’s identifiers and their waypoints
For each in-pit crusher identifier that you have added to the Locations table in the ![]() Configuration subtab (see In-pit crusher for more information), you have to assign a corresponding waypoint in the viewer. To do so, follow these steps:
Configuration subtab (see In-pit crusher for more information), you have to assign a corresponding waypoint in the viewer. To do so, follow these steps:
-
Open your setup in the viewer.
-
Select
 (Waypoint Editor) in the toolbar.
 -
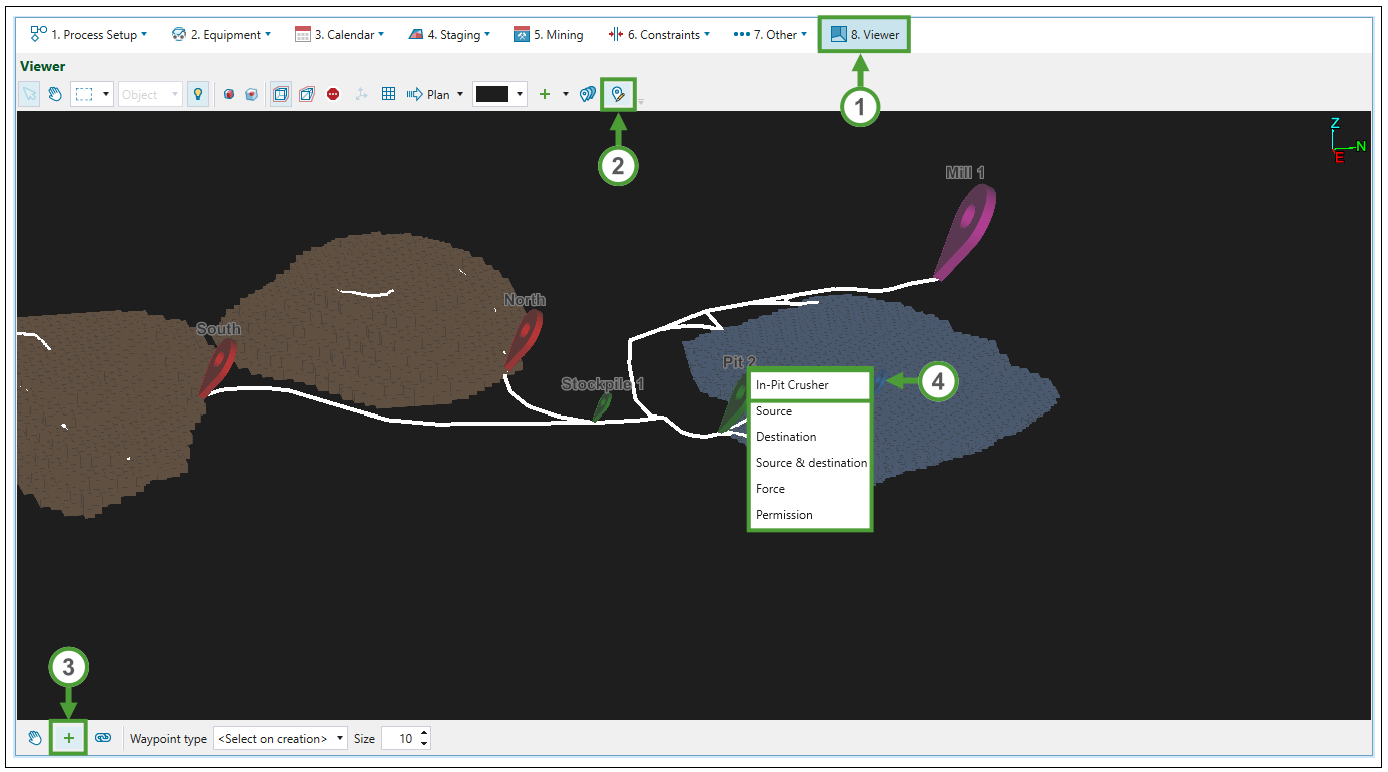
Select
 (Add Waypoints) in the waypoint toolbar.
 -
Place a waypoint on the road network and select In-Pit Crusher from the list.
-
Assign an identifier from the list.
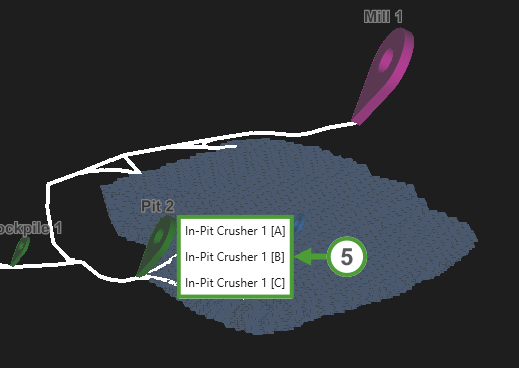
Note: Each location can only be assigned to a single waypoint, so once you assign a location, it will no longer appear in the list.
-
Repeat the operation for each identifier that you have added for the in-pit crusher.
-
Open your setup in the viewer.
-
Go into Vertex selection mode.
-
Select a point on the road network within the pit area.
-
Right-click to open the context menu and select
 Add Waypoint > In-Pit Crusher >
  In-Pit Crusher [Identifier].
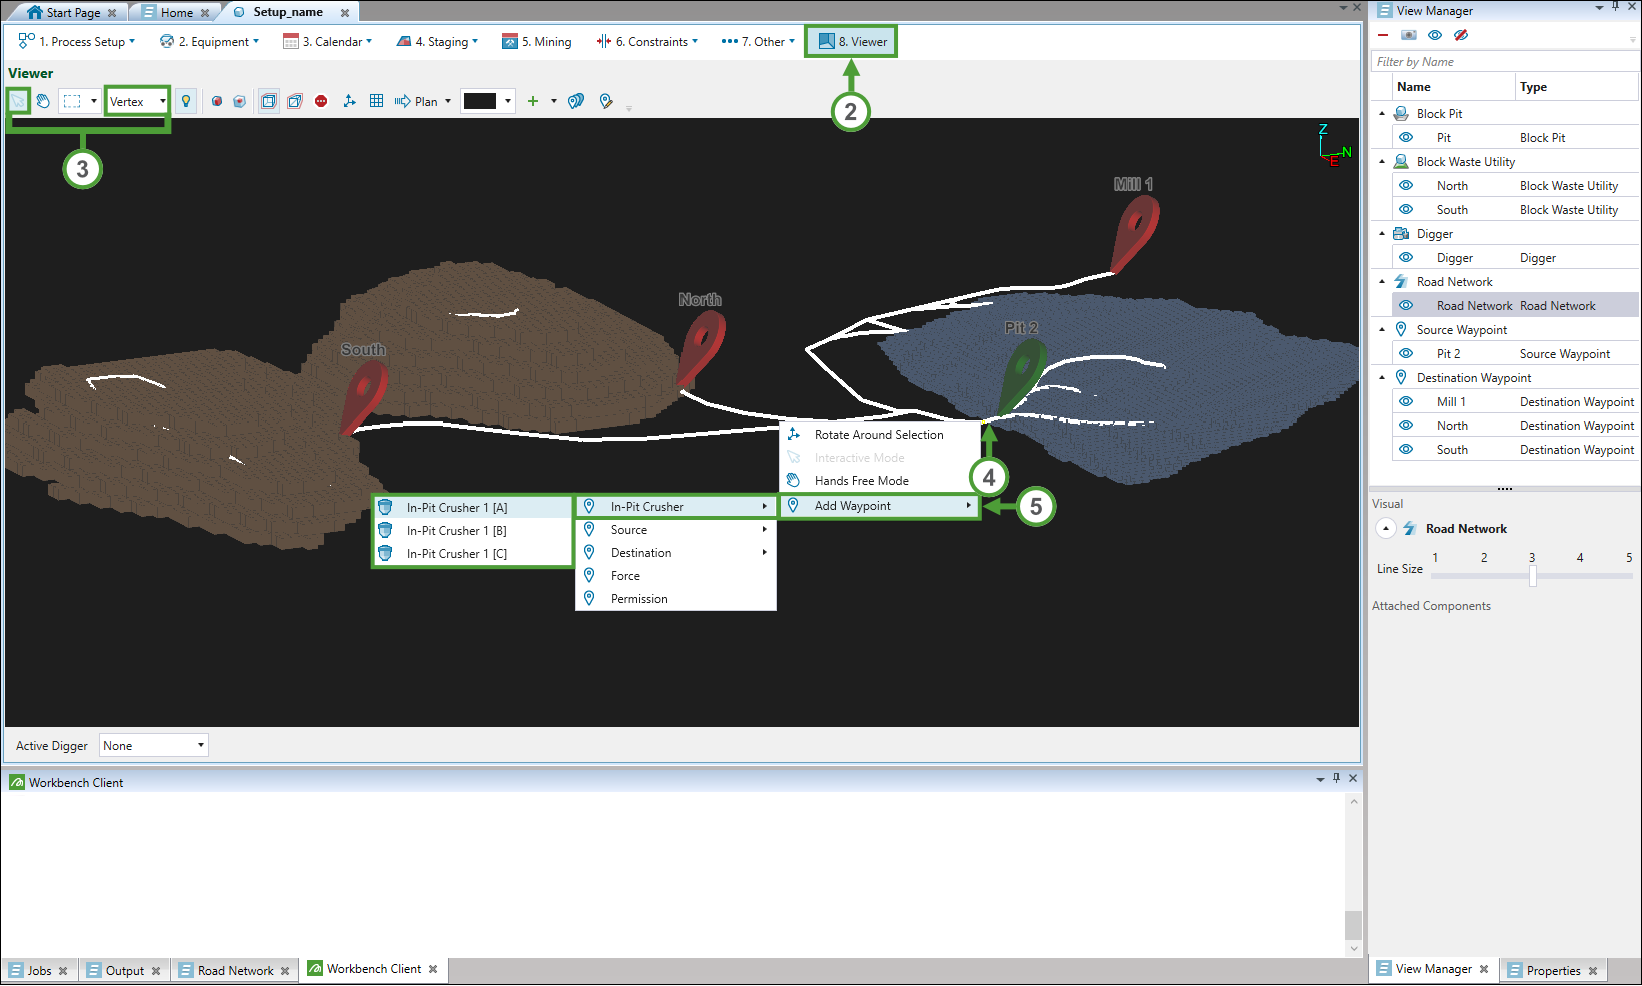
-
Repeat the operation for each identifier that you have added for the in-pit crusher.
Note: In-pit crusher's waypoints do not require further configuration in the Road Network > ![]() Configuration.
Configuration.
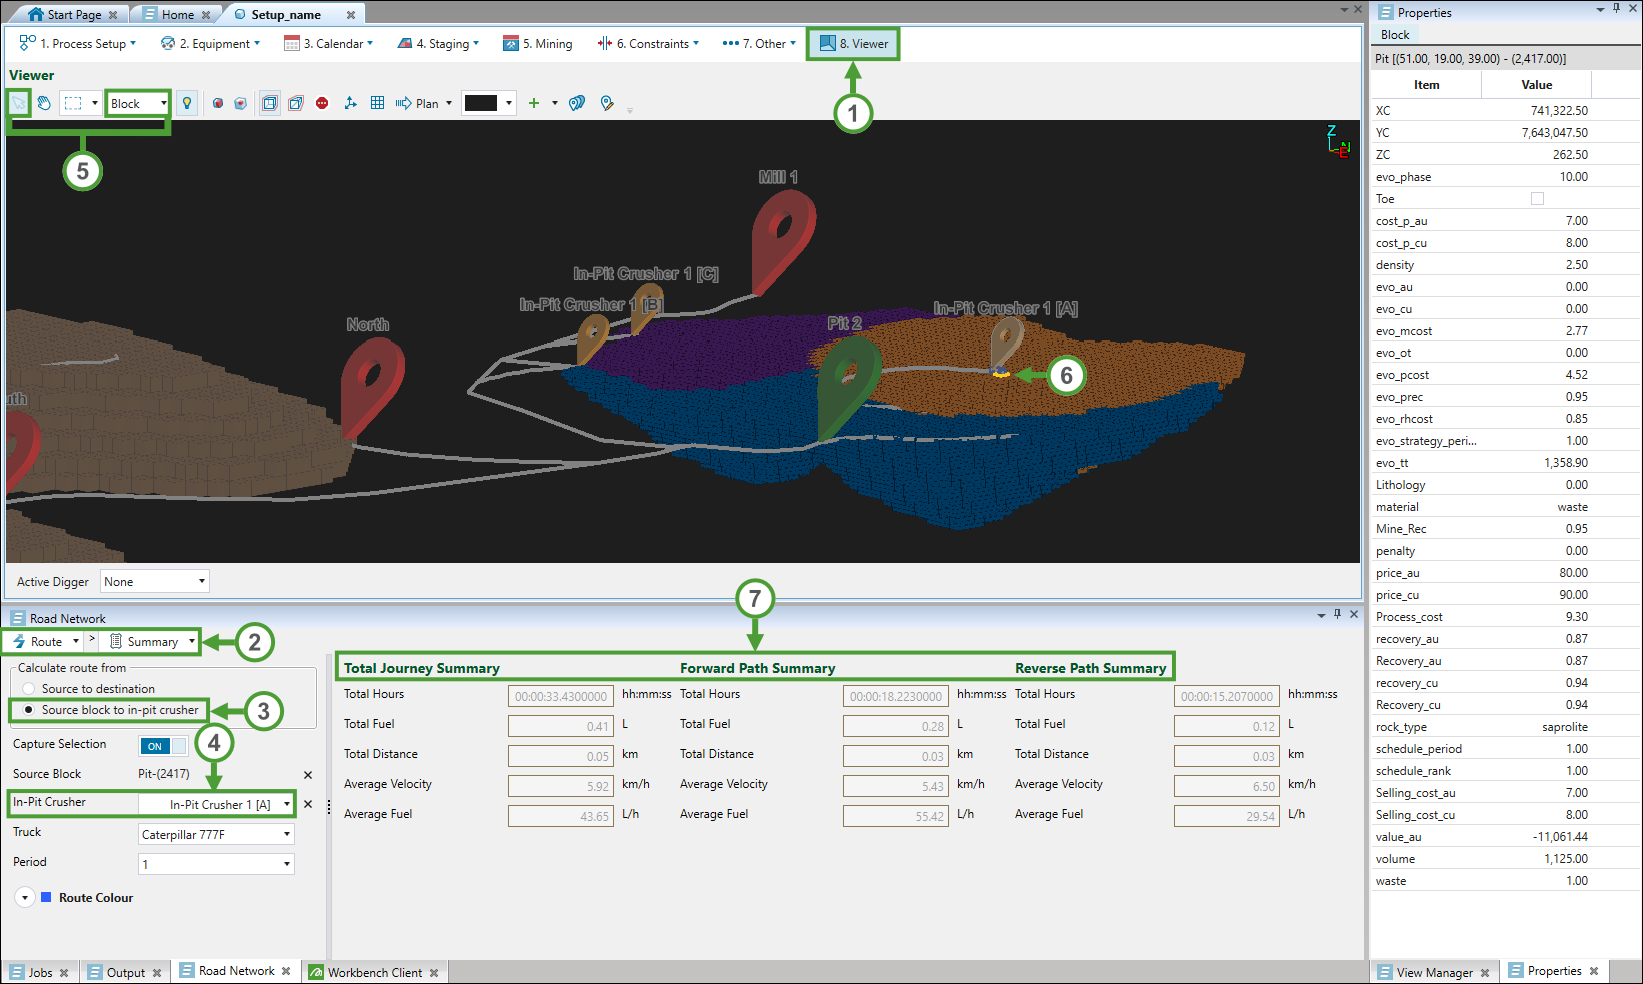
You can also obtain detailed information on a route between a source block and an in-pit crusher waypoint in the Road Network window by following these steps:
-
Open a setup with in-pit crusher waypoints in the viewer.
-
In the Road Network window select
 Route >
  Summary.
 -
Select Source block to in-pit crusher radio button in the Calculate route from field.
-
Select the required in-pit crusher waypoint from the corresponding drop-down menu.
-
In the viewer toolbar, set Block selection mode.
-
Select a block that passes the filter of the location (set on the
 Configuration page) associated with the waypoint selected in step 4.
 - Check the information on the route in the Road Network window.
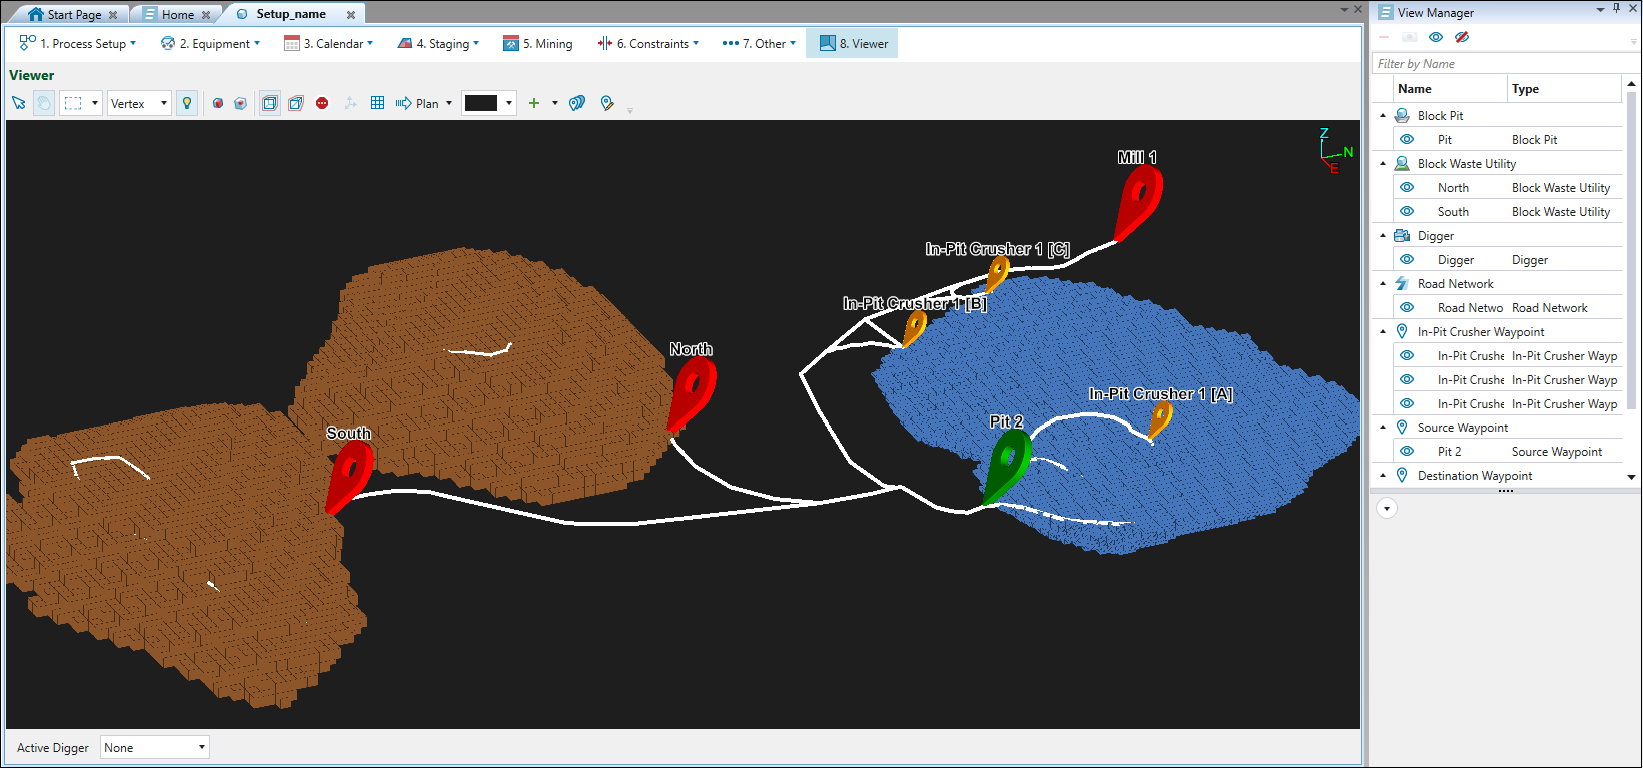
Note: You can set colour bands that correspond to the variable that you have selected for your in-pit crusher waypoints. This helps you to identify which blocks will be sent to each waypoint. In the example below, waypoints were assigned with a phase (stage) attribute, and the same attribute has been used to generate colour bands: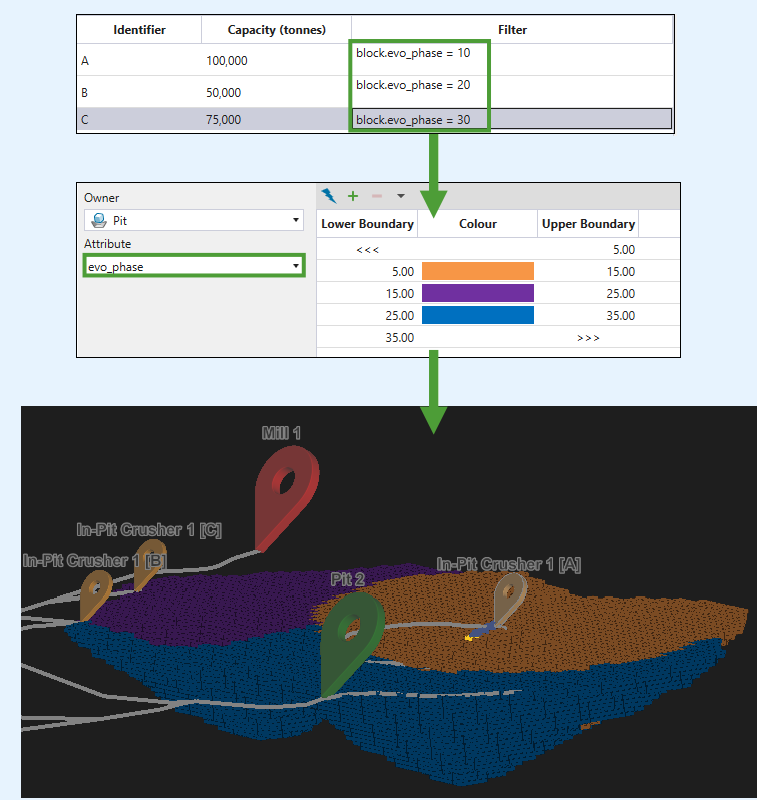
See Add Colour Bands for more information.
For more information on waypoints, see also Adding and Removing Waypoints, Creating a Waypoint Collection, and Exporting or Importing a Waypoint Collection as a JSON File.
