Settings
Source file: settings.htm
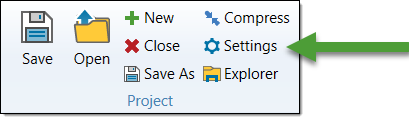
The Settings panel allows you to apply default settings for Evolution. To open the panel, click ![]() Settings in the Project group on the Evolution ribbon.
Settings in the Project group on the Evolution ribbon.
The panel consists of the following tabs:
Note: The Strategy, Origin, Epoch, and Epoch Priorities tabs will only appear if you have purchased licenses corresponding to each Evolution module.
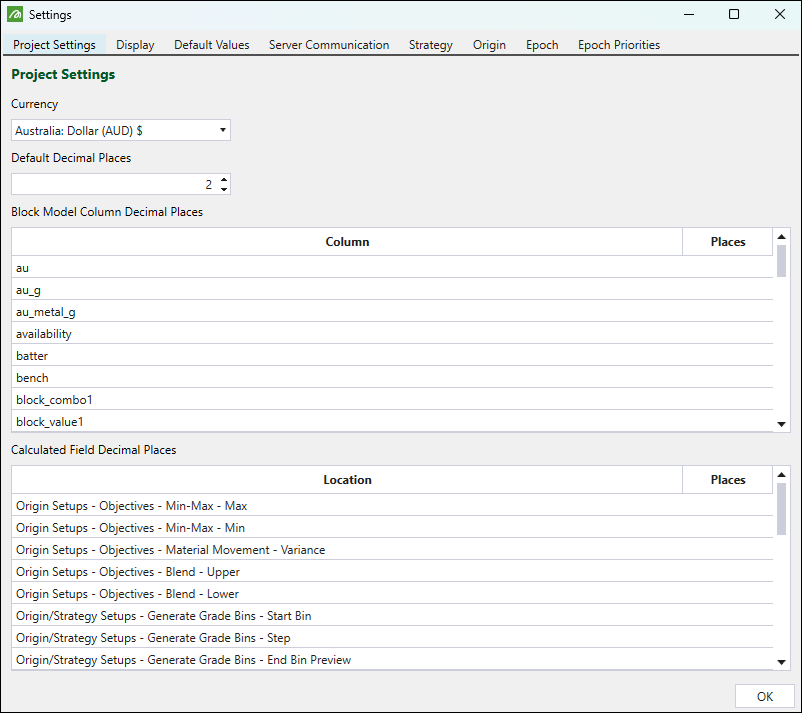
Project Settings
Use the Project Settings tab to set the required currency and the default decimal places value for each attribute.
Display
Use the Display tab to specify the terminology, enable solid durations and scripts, and to configure viewer settings.
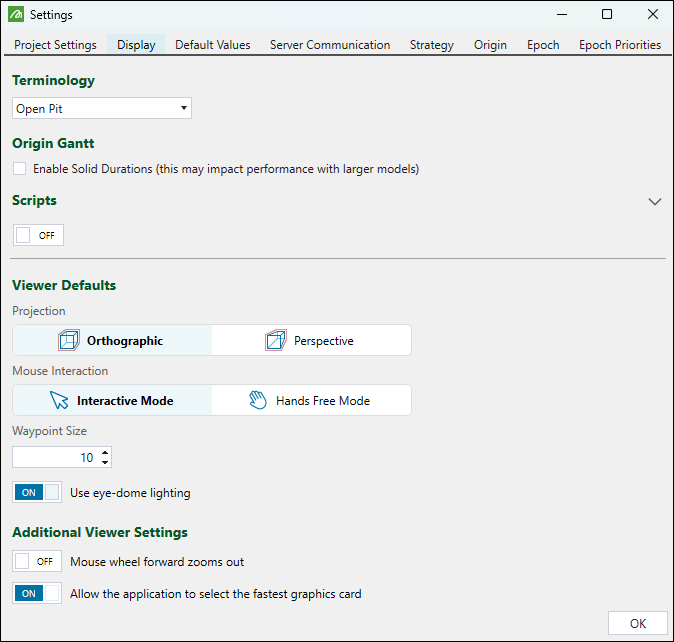
You can apply the following settings:
-
Terminology. Select the term that best describes the characteristics of your mine site from the following types listed in the drop-down:
-
Open Pit
-
Underground
-
Stratigraphic
-
-
Origin Gantt. Select the checkbox to enable solid durations in the Gantt view of your Epoch setup.
Note: Enabling solid durations can impact the performance in setups with larger models.
See also: Gantt View
-
Scripts. Click the toggle button to enable scripts for duration calculations. This will allow you to create complex functions that define the rate that equipment will progress through solids in your pit.
Note: The scripts set to disabled is a default setting for Evolution. You can enable scripts via this toggle button so that they are available in all relevant tabs. You can also have the scripts disabled by default and then enable them in individual tabs that you are working on, as required.
-
Viewer Defaults. Apply the following viewer settings:
-
Projection. Set the viewer projection mode by selecting one of the following:
-
 Orthographic: Display all viewer objects at the same size regardless of distance.
Or
-
 Perspective: Display viewer objects as they would appear if you were looking at them (distant objects will appear smaller).
-
-
Mouse Interaction. Set the mouse mode to either select objects in the viewer or to adjust the viewing distance and angle. Select one of the following:
-
 Interactive Mode. Select the required blocks, points, or objects.
Tip: Hold down Alt while in the interactive selection mode to enable viewer navigation in the hands free selection mode. See Hands Free Mode for more information.
-
Or
 Hands Free Mode. Zoom (by scrolling), rotate (by left-clicking and dragging), and pan (by middle-clicking) the viewer.
Note: Evolution will apply these settings when you enter the viewer for the first time after opening your setup. If you change the mouse interaction mode in the viewer, switch to another tab within the setup, and then open the viewer again, the last applied mouse interaction mode settings will be maintained.
-
-
Waypoint Size. Set the size that you want the road network waypoints to be displayed in the viewer. You can later change the size of each individual waypoint in the View Manager panel in the viewer.
See also: For more information on road networks in Evolution, see Road Networks. For more information on waypoints, see Adding and Removing Waypoints, Using the Waypoint Editor, and Creating a Waypoint Collection.
-
Use eye-dome lighting. Eye-dome lighting applies shading to the models and objects in the viewer to improve depth perception. This feature is enabled by default. To disable eye-dome lighting, click the toggle button in the Settings panel or disable it for an individual viewer by clicking the
 (Eye-dome lighting enabled) button in the viewer toolbar (when you disable the eye-dome lighting directly in the viewer, the icon will change to
  (Eye-dome lighting disabled)).
-
-
Additional Viewer Settings. Apply the following viewer settings as required:
-
To zoom out with mouse wheel forward scroll, click the corresponding toggle button to enable the function.
Note: This function is disabled by default.
-
To ensure the best resolution and prevent viewer loading issues, keep the Allow the application to select the fastest graphics card setting enabled.

-
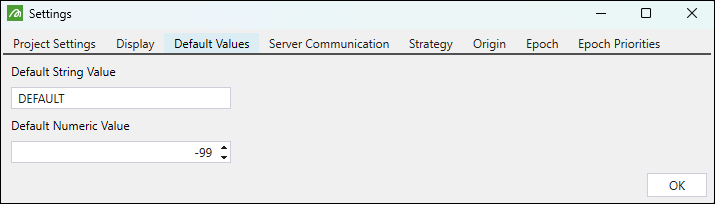
Default Values
Use the Default Values tab to define the default string and numeric values.
Server Communication
Use the Server Communication tab to edit the server, proxy, and job settings. You can set whether to download completed jobs automatically and set the schedule result confirmation. You can also set a proxy server and the interval for checking pending jobs.
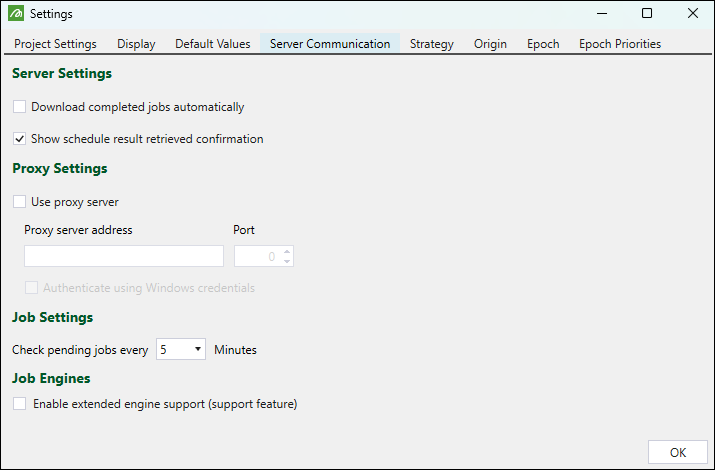
The Job Engines section contains the Enable extended engine support (support feature) checkbox. Select this checkbox to enable the use of previous engines when you run a job. By default, Evolution will always use the latest engine to run your jobs.
Important: You should only enable this feature and run jobs with previous engines as a last resort. We always recommend running your jobs with the latest engine.
After selecting this checkbox and clicking Run in a setup, you can process the job with an older engine by following these steps:
-
In the Run Setups panel, select the checkbox corresponding to the required setup.
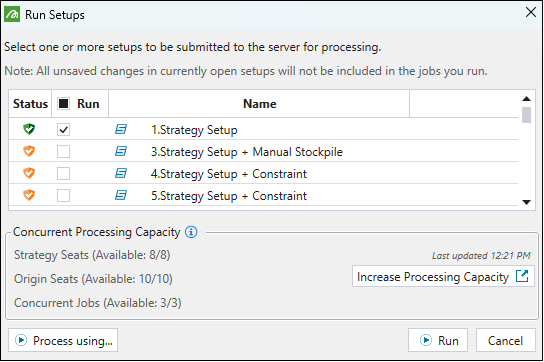
-
Click the
 Process using... button. The Engine Version Selection panel will appear.
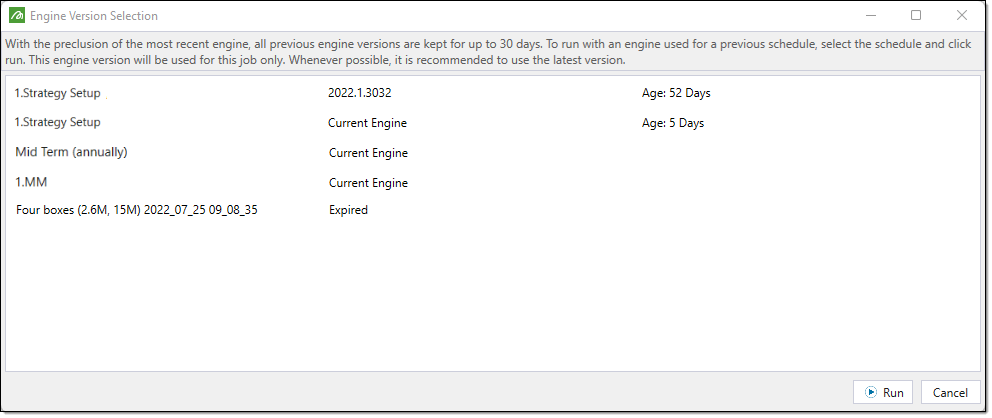
-
Select the desired engine from the panel list.
-
Click
Run. Evolution will submit the setup to the server for evaluation. You can view the status of the job in the Status column of the Jobs tab in the reporting window.
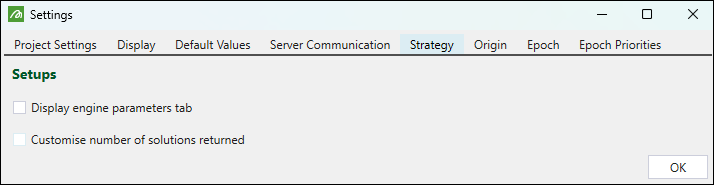
Strategy
Use the Strategy tab to show or hide the Engine Parameters tab on the ribbon in Strategy setups and also to customise the number of solutions that Evolution will return.
Origin
Use the Origin tab to set the maximum generation count for solid setups.
Note: The maximum number that you can set is 3000.
In the image below, the Maximum Generation Count is set to
300. 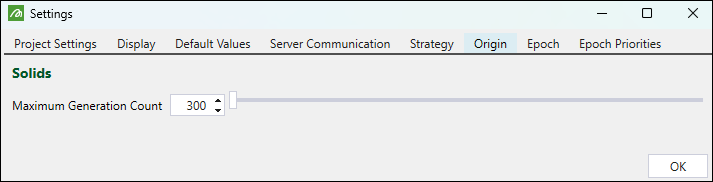
As a result, in the Engine Parameters tab, the maximum value you can set the Population Size parameter to is
300. 
See also: Engine Parameters in Origin Blocks, Engine Parameters in Origin Solids
Epoch
Use the Epoch tab to specify the decimal places for accumulation and grade values in your Epoch setups, to set the equipment text visibility in the viewer, and to configure Gantt chart view.

See also: Viewer in Epoch, Gantt View
Epoch Priorities
Each destination in an Epoch setup has an assigned priority. These priorities determine the order in which these locations are considered as potential destinations for material. When you first create a setup, the priority of each destination will be based on your default Evolution settings that you apply in the Settings panel. Changing these priorities is optional.
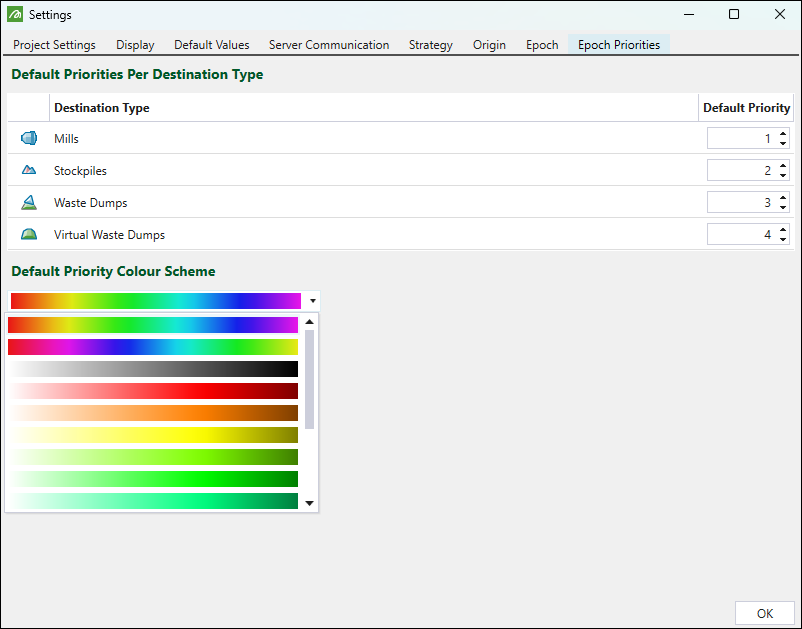
Important: A lower number indicates a higher priority, with 1 being the highest priority.
Note: These settings will be automatically applied to each new project you create.
You can also select a default colour scheme that will be applied to the destinations featured in the ![]() Destination Priority subtab. After configuring the required settings, click OK to apply them in your project setups. For more information on destination priorities in Epoch, see Destination Priority.
Destination Priority subtab. After configuring the required settings, click OK to apply them in your project setups. For more information on destination priorities in Epoch, see Destination Priority.
Note: You can change these settings for each individual setup in the ![]() Destination Priority subtab.
Destination Priority subtab.
