Selecting Data
On this page:
Almost all operations in Vulcan GeologyCore require you to select some data to work on. There are two basic kinds of selection: object selections and primitive selections. Object selections are used to operate on objects as a whole, while primitive selections are used to operate on the constituent elements of objects, such as points and edges.
The application is set to select objects by default. This means clicking on an object in the project explorer or view window will select that object.
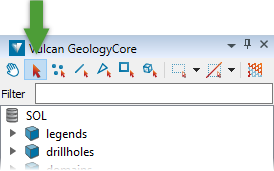
You can change the selection mode by clicking on any of the six selection modes in the selection toolbar at the top of the project explorer.
| Selection Mode | Keyboard Shortcut |
|---|---|
|
|
1 |
|
|
2 |
|
|
3 |
|
|
4 |
|
|
5 |
|
|
6 |
Selecting Objects
When making an object selection, make sure the selection mode is set to Select objects by clicking ![]() in the selection toolbar at the top of the project explorer.
in the selection toolbar at the top of the project explorer.
Selecting objects in the project explorer
To select objects in the project explorer, first make sure the selection mode is set to ![]() Select objects in the selection toolbar. Then:
Select objects in the selection toolbar. Then:
-
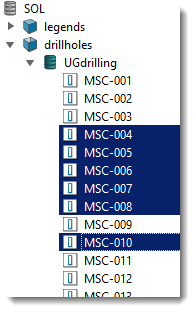
Click on a single object to select it.
-
Click on a container

 (including drillhole databases
  ) to select all the items in the container.
 -
Hold Ctrl and click on an item to add or remove that item from the selection.
-
Hold Shift and click on an item to select the range of items from the last clicked item.
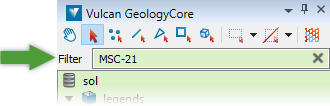
Tip: Type into the Filter field at the top of the project explorer to display only objects matching the given string.
Selected items are highlighted with a dark blue background in the project explorer.
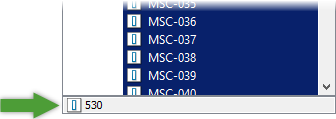
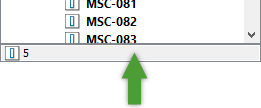
The selection status bar at the bottom of the project explorer tells you how many objects are in the selection. The icon indicates the type of objects selected if they are of a single type.
Selecting objects in view windows
To select objects in a view window, first make sure the selection mode is set to ![]() Select objects in the selection toolbar located at the top of the project explorer. Then:
Select objects in the selection toolbar located at the top of the project explorer. Then:
-
Click on a single object to select it.
-
Draw a region to select multiple objects within the region.
-
Hold Shift while clicking on objects or drawing a region to add objects to the current selection.
-
Hold Ctrl while clicking on objects or drawing a region to remove objects from the current selection.
Note: Selected objects are highlighted in the view window, while unselected objects are low-lit. Click ![]() in the selection toolbar to temporarily suspend highlighting of the selection.
in the selection toolbar to temporarily suspend highlighting of the selection.
To select all objects in the active view, click ![]() in the view window toolbar, or press Ctrl + A .
in the view window toolbar, or press Ctrl + A .
To invert the selection of objects in the active view, click ![]() in the view window toolbar, or press I.
in the view window toolbar, or press I.
Clearing the selection
To clear the selection, do one of the following:
-
Press Ctrl + Space.
-
Click on an empty region in a view window.
-
Click anywhere in the selection status bar in the project explorer.
Tip: All selection operations can be undone. For example, if you accidentally clear your selection, you can get it back by pressing Ctrl + Z.
Selecting objects in panels
Many tools require you to provide an object or selection of objects to perform the operation on.
Some tools work on the active selection. This means that they operate on whatever is currently selected in the project explorer. For example, Create > Topographic will take the current selection and turn it into a topographic surface when OK or Apply is clicked.
Other tools ask for a static selection. This selection must be explicitly specified in a list on the panel. You can populate a static selection from the active selection, but changing the active selection does not automatically modify the static selection.
To populate or add to a static selection, either:
-
Click
 above the list to add the current active selection.
 -
Drag and drop the current selection from the project explorer onto the list.

Tip: You can add an object to a static selection field without changing your active selection by using the middle mouse button to drag and drop.
To remove an item from a static selection, select it in the list and click ![]() .
.
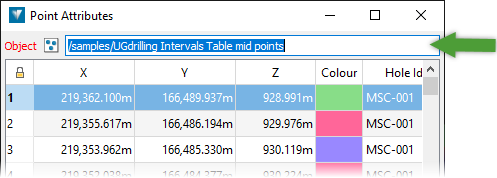
Some tools require you to specify a single object. To do this, either:
-
Click on an object in a view window while the field is active (indicated by a red label).
-
Drag and drop the object from the project explorer into the field.
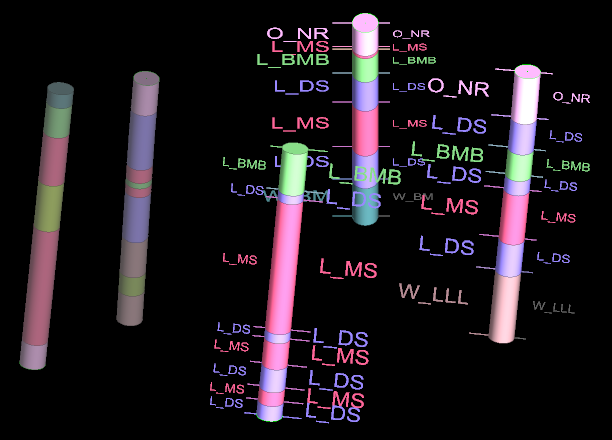
Primitive Selections
All spatial objects such as surfaces, polygons, and block models are composed of lower order structures called primitives. There are five primitive types: points, edges, facets, cells and blocks.
Occasionally you will want to operate on a primitive subset of an object rather than the entire object. To do this, you need to make a primitive selection.
To make a primitive selection:
-
Change the selection mode to the type of primitive you want to select. Select one of the following from the selection toolbar located at the top of the project explorer:
Selection Mode Keyboard Shortcut  Select points
2  Select edges
3  Select facets
4  Select cells
5  Select blocks
6 -
In a view window, select primitives using the following methods:
-
Click on a single primitive to select it.
-
Draw a region to select multiple primitives within a region. To change the region selection mode, select Rectangle
 , Polygonal Lasso
 or Freehand
  Selection Mode from the selection toolbar.
 -
Hold Shift while clicking on primitives or drawing a region to add primitives to the current selection.
-
Hold Ctrl while clicking on primitives or drawing a region to remove primitives from the current selection.
-
To select all primitives within selected objects in the active view, click ![]() in the view window toolbar, or press Ctrl + A .
in the view window toolbar, or press Ctrl + A .
To invert the selection of primitives within selected objects in the active view, click ![]() in the view window toolbar, or press I.
in the view window toolbar, or press I.
Saved Selections
If you find yourself repeatedly selecting the same set of objects or primitives, you can save the selection for later retrieval.
To save the current selection, either:
-
In a view window, right-click on an empty region and navigate to Saved Selections >
 Save Selection from the context menu.
 -
On the ribbon, navigate to Home > Selection > Saved Selections, and select
Save Selection from the drop-down menu.
The selection is saved with a default name, such as the number of objects in the selection or the primitive selection type.
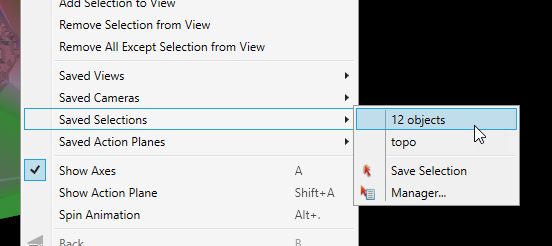
To retrieve a saved selection, either:
-
In a view window, right-click on an empty region and navigate to Saved Selectionsin the context menu. Select the name of the selection you want to retrieve.
-
On the ribbon, navigate to Home > Selection > Saved Selections, and select
Save Selection from the drop-down menu. Select the name of the selection you want to retrieve.
Managing saved selections
You can rename, export, import, and easily create multiple saved selections using the saved selection manager.
To launch the manager, either:
-
In a view window, right-click on an empty region and navigate to Saved Selections >
 Manager... from the context menu.
 -
On the ribbon, navigate to Home > Selection > Saved Selections, and select
Manager... from the drop-down menu.
The Manage Saved Selections panel appears.
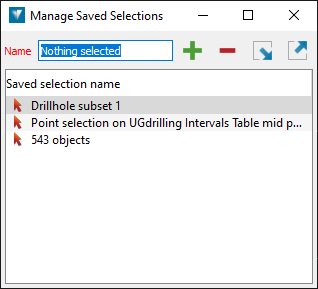
-
To create a new saved selection, change the active selection and then click
. -
To delete a saved selection, select it in the list and click
 .
. -
To rename a saved selection, double-click on an item in the list.
-
To export a saved selection, select one or more items from the list and click
 . Selections are saved to a file with a .sel extension.
 -
To import a saved selection, click
 and specify a .sel file to import from.