Correlation
The following table describes the tools in the Correlation section of the Stratigraphic tab.
| Tool | Description |
| Correlation | Creates a display of drillhole correlations. |
| Correlation View | Opens a new correlation view window containing the drillholes in the current selection. |
| Stratigraphy Editor | Creates a Stratigraphy, including parent-child relationships of seams. |
| Associate Geophysical Log | Links geophysical data with the appropriate drillholes. |
Correlation
The correlation tool is used to create a display of the stratigraphic sequence by joining common horizons found within the drillholes with a correlation . The information regarding the stratigraphic sequence is obtained from a stratigraphy . Note that it is possible to run the correlation option across multiple databases provided they share the same schema.
The correlation tool is also useful for the validation of the drillhole database as crossing correlations may indicate horizons which have been incorrectly logged. The correlation creates a minimum spanning tree (i.e. it creates a tree with the shortest edge length that joins up all of the drillholes in the selection). Because of this, some correlations may be skipped in a large selection to prevent cluttering. Selecting a smaller subset of drillholes will create a more complete correlation for the selected area.
The correlation is only meant as a guide and shows the correlations between connected drillholes - the absence of a connection does not indicate an absence of correlation. Correlations are most effect when selecting a row of drillholes.
Note: Correlations are automatically updated when edits are made to the stratigraphy or drillholes , so long as the table used to display the drillholes is unchanged (i.e. assay, geology, etc.).
-
Create a stratigraphy that defines the horizons within the vertical sequence.
-
Select the required drillholes.
-
Select Stratigraphic > Correlation > Correlation.
-
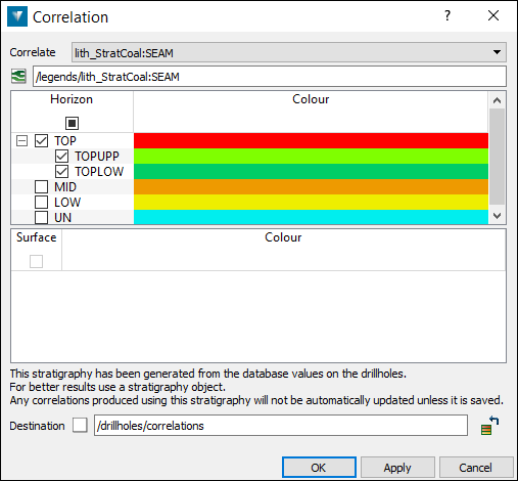
The stratigraphy relevant to the drillhole selection will be loaded automatically. If no stratigraphy is available, a stratigraphy will be generated from the displayed legend on the drillholes. Any correlations produced using this stratigraphy will not be automatically updated unless it is saved. A prompt will appear when the correlation is created asking to save the stratigraphy.
-
Select the field to use to create the correlation from the drop-down menu. Any field from the table used to visualise the drillholes can be selected.
-
Use the tick-boxes to select the horizons to be correlated.
-
Click OK or Apply to create the correlation. Correlations are saved in the drillholes container.
Coal seams containing splits can also be correlated by first associating the child seams with the parent using the Stratigraphy editor. In the example below, TOPUPP and TOPLOW have been defined as children of the TOP seam, and TOP has been coupled as an Alias. The resulting correlation will be created as a single object including the splits and Alias.
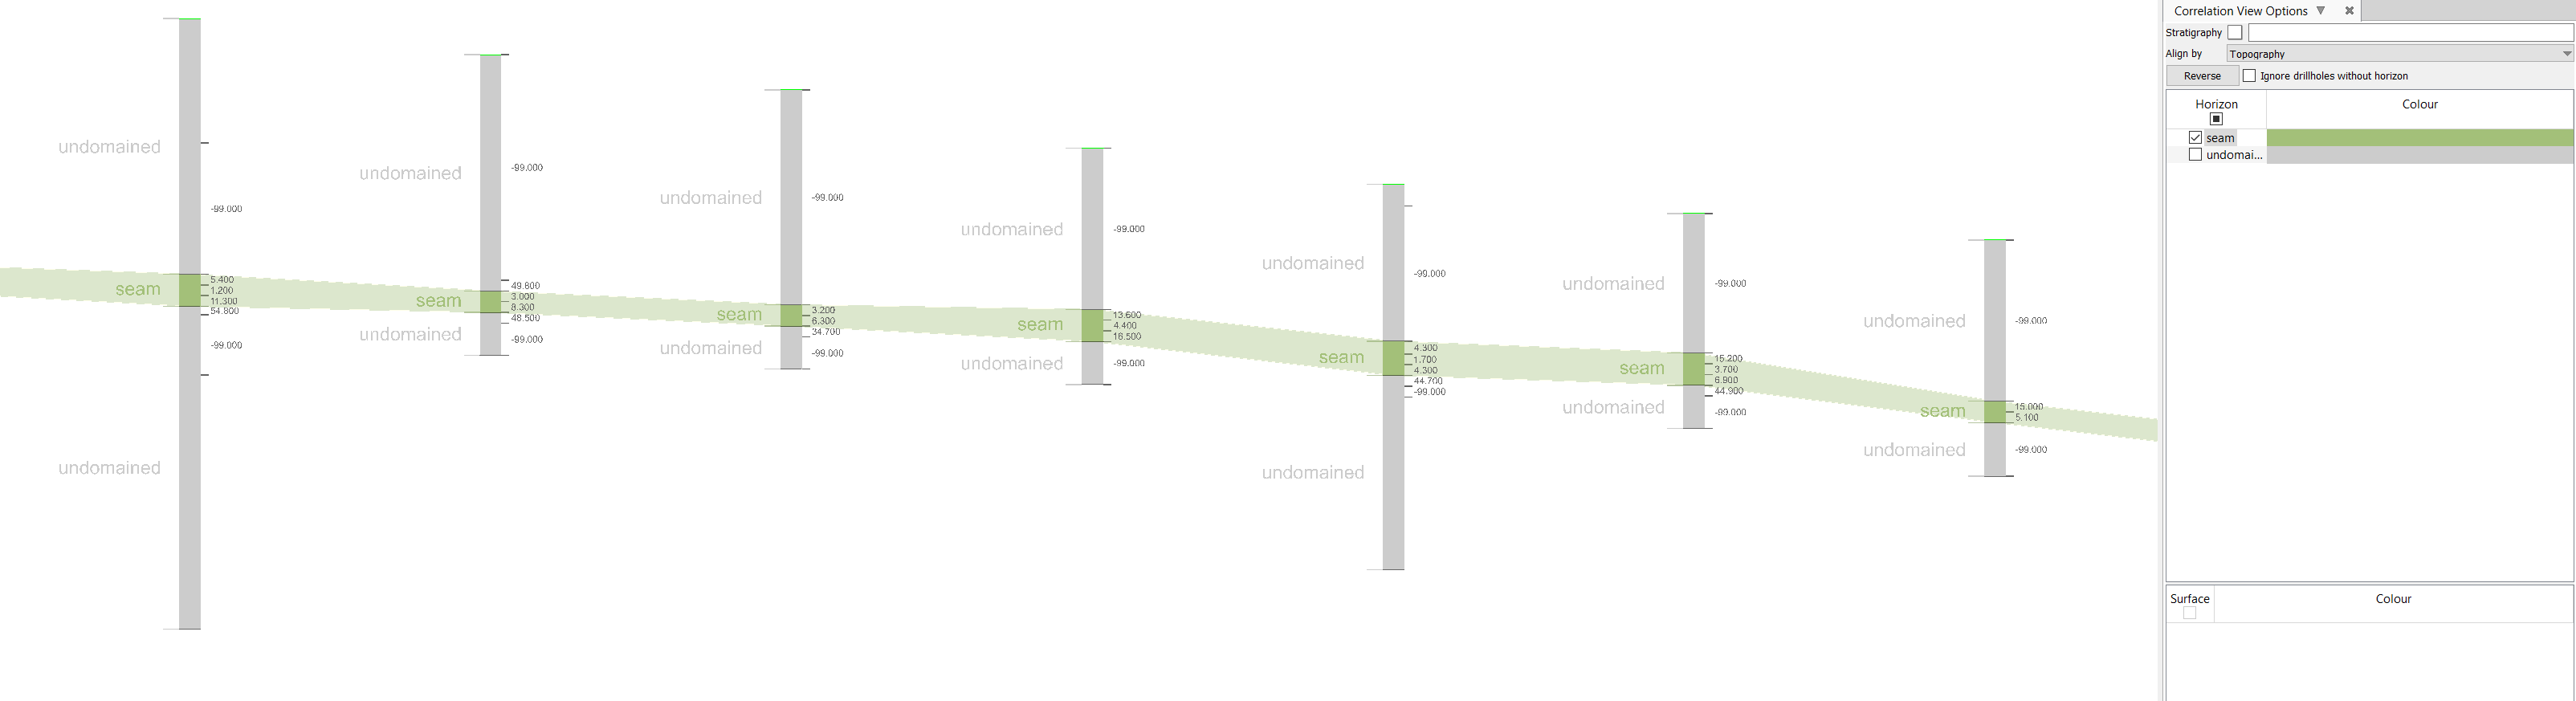
The image below shows the resulting correlation of the TOP seam, displaying the splits into the TOPUPP and TOPLOW child seams.

Correlation View
The Correlation View tool is used to create a display of the selected drillholes to assist in the correlation of units . The information regarding the stratigraphic sequence is obtained from a stratigraphy. The selected drillholes may then be aligned upon different datums to check logging of units.
-
Select the drillholes, and geophysical logs for the section.
-
Select Stratigraphic > Correlation > Correlation View. A separate view window will open with the drillholes displayed in section orientation.
-
Using the middle mouse button, drag and drop the associated Stratigraphy into the top field, if correlation via Stratigraphy is required. Alternatively, it is possible to align the units based just on the legend in use on the drillholes at the time of display.
-
Select the unit or datum on which to align the drillholes, via the drop-down menu.
-
Place a check mark in the relevant check box for each unit to be displayed as a correlated unit in the section view. Corresponding correlation lines will be drawn connecting nominated units in adjacent drillholes.
Stratigraphy Editor
A stratigraphy is a form of text legend which also contains information regarding the sequence of horizons, including parent-child relationships of coal seams.
The Stratigraphy will act as a text legend and can be created from a text legend as a starting point. (Right-click on a text legend and select Convert to stratigraphy.)
Horizons defined as being non-stratigraphic surfaces will not be listed in options which use the horizon sequence.
A text legend can be used to populate the horizon colours of a stratigraphy by dragging and dropping the legend into the table using the middle mouse button. Horizon names which match those in the table will be coloured according to the legend. This may be necessary to populate colours in a Vulcan .gdc_glob file.
-
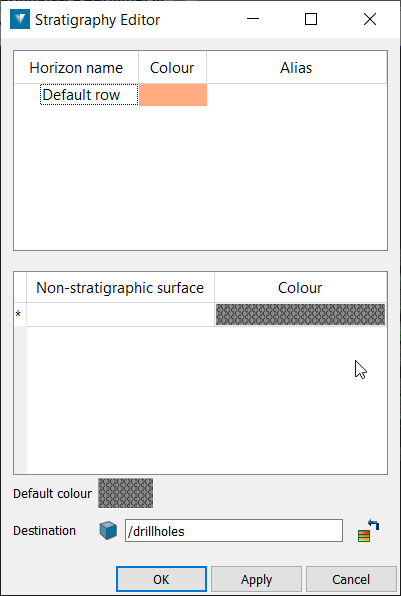
Select Stratigraphic > Correlation > Stratigraphy editor.
-
To populate the stratigraphy drag and drop a legend or stratigraphy into the Horizon list.
-
The sequence of horizons can be changed by dragging and dropping with the middle mouse. Parent-child relationships can be established between coal seams by dropping the child seams on top of the parent seam.
-
If non-stratigraphic intervals exist, such as weathering surfaces, drag them into the Non-stratigraphic surface table using the middle mouse button.
-
Select a name for the stratigraphy in the Save as field. Dragging and dropping a stratigraphy or legend into this field updates to the new legend, until the legend is edited.
-
Click OK to create the stratigraphy.
The Alias column can be used to match up horizons which have been named under a different convention, or have been incorrectly named during logging. These connections are made by typing in the name of the misnamed unit in the alias field corresponding with the correctly named unit. If multiple aliases exist, separate with a comma.
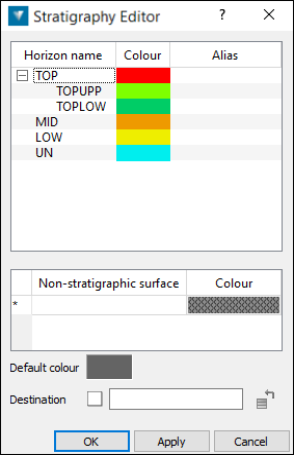
In the above example, the TOPUPP and TOPLOW child seams have been associated with the TOP parent seam, and the RE seam has been recognised as being the same as the TOP seam so has been coupled as an alias.
Associate Geophysical Log
Associate geophysical log is used to manually link geophysical data ![]() with the appropriate drillholes
with the appropriate drillholes ![]() . This allows the trace from downhole geophysical data to be displayed and labelled when viewing drillholes. Multiple logs can be associated with a single drillhole.
. This allows the trace from downhole geophysical data to be displayed and labelled when viewing drillholes. Multiple logs can be associated with a single drillhole.
The software will attempt to match geophysical logs with drillholes automatically on import if naming between the Hole ID and .las file is similar.
Automatic associations
-
Select Stratigraphic > Correlate > Associate geophysical log.
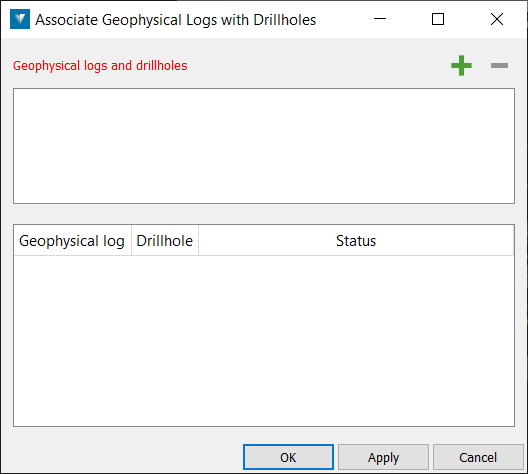
-
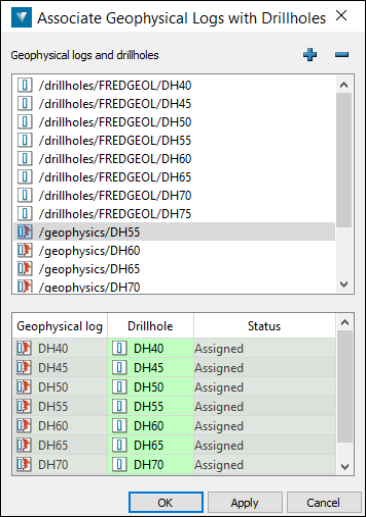
Drag and drop the required drillhole database, or individual drillholes, and geophysical logs into the Geophysical logs and drillholes field using the middle mouse button.
-
The predicted associations are showed in the bottom table. Successful predictions have a Status set as Assigned, and are highlighted green.
Geophysical logs and drillholes associations are predicted by matching the file names. The Well name in the .las file is also used for association. Predicted associations are displayed in the table. If predictions are incorrect, they may be manually associated as documented below.
-
Click OK.
Manual associations
Drillholes may be manually associated with geophysical logs.
-
Drag and drop the required drillhole database, or individual drillholes, and geophysical logs into the Geophysical logs and drillholes field using the middle mouse button.
-
The predicted associations are showed in the bottom table.
-
Using the middle mouse button, drag and drop the associated drillhole into the Drillholes column of the table corresponding with the geophysical log. Manual associations have a Status set to Edited and are highlighted Yellow.
-
Click OK.
The Drillhole Visualisation panel may then be used to display the trace.
Note: Using this visualisation as a guide, the drillhole interval data may be edited if required by right-clicking a drillhole and selecting Edit.
