Scanning to USB |
FieldHHC provides the most extensive controllability and functionality for the majority of scanning scenarios. However, the scanner can also quickly acquire simple scans directly to a USB flash drive at the push of a button. Alternatively, it can be controlled via a Wi-Fi-enabled smartphone or tablet, allowing for basic settings adjustments.
If the FieldHHC tablet is not used to control the scanner and acquire scans, you can still use the scanner to capture points and photographic data using the following methods:
In both cases, a flash drive connected to the scanner is required to save scans. Scans are saved in the folder Maptek scans.
Taking a pushbutton scan
To take a pushbutton scan, simply place the scanner onto an appropriate mount, such as a tripod, then follow these steps:
The scan settings for a pushbutton scan cannot be adjusted. The following settings are used:
-
Scan mode: Fast (2x)
-
Point density: 2
-
Insert a battery into the scanner.
-
Press the power button to turn the scanner on. Wait until the indicator light on the power button is a steady green.
-
Insert a FAT32-formatted flash drive with sufficient storage space into the scanner’s USB port. For best results, use the 32 GB compact USB drive (Part # 0102028) supplied with the scanner kit.
-
Press and hold the power button until you see the light turn red, then release the power button. The scan will proceed.
Note: If the power button blinks red once when starting a pushbutton scan, the flash drive may either be full, not inserted, not formatted as FAT32, or damaged. If necessary, try an alternate flash drive.
Note: The photo exposure setting is set to the last-used FieldHHC setting. It can only be changed by connecting the scanner to FieldHHC or by a web browser on a smartphone, tablet, or PC with a Wi-Fi connection.
-
To cancel scanning, press the power button once.
-
To take additional scans, repeat step 4 as needed.
-
You can remove the USB flash drive after scanning is completed.
Taking a scan with a mobile device
You can expand your scanning options with minimal setup by using a browser on your smartphone, tablet, or PC by connecting to the scanner over Wi-Fi. To connect to the scanner, follow these steps:
-
Power up the scanner and confirm Wi-Fi is enabled at the scanner by checking the power button status light.
-
Insert a FAT32-formatted USB flash drive into the scanner’s USB port.
-
Open the Wi-Fi settings on your device to list them and select the item matching your scanner name. An example scanner name is
XR3_C60T_B01_XR3_1234. -
Tap to select the scanner and start the connection.
-
Open a browser on your device. In the navigation or search bar, type the following:
maptek.scanner/
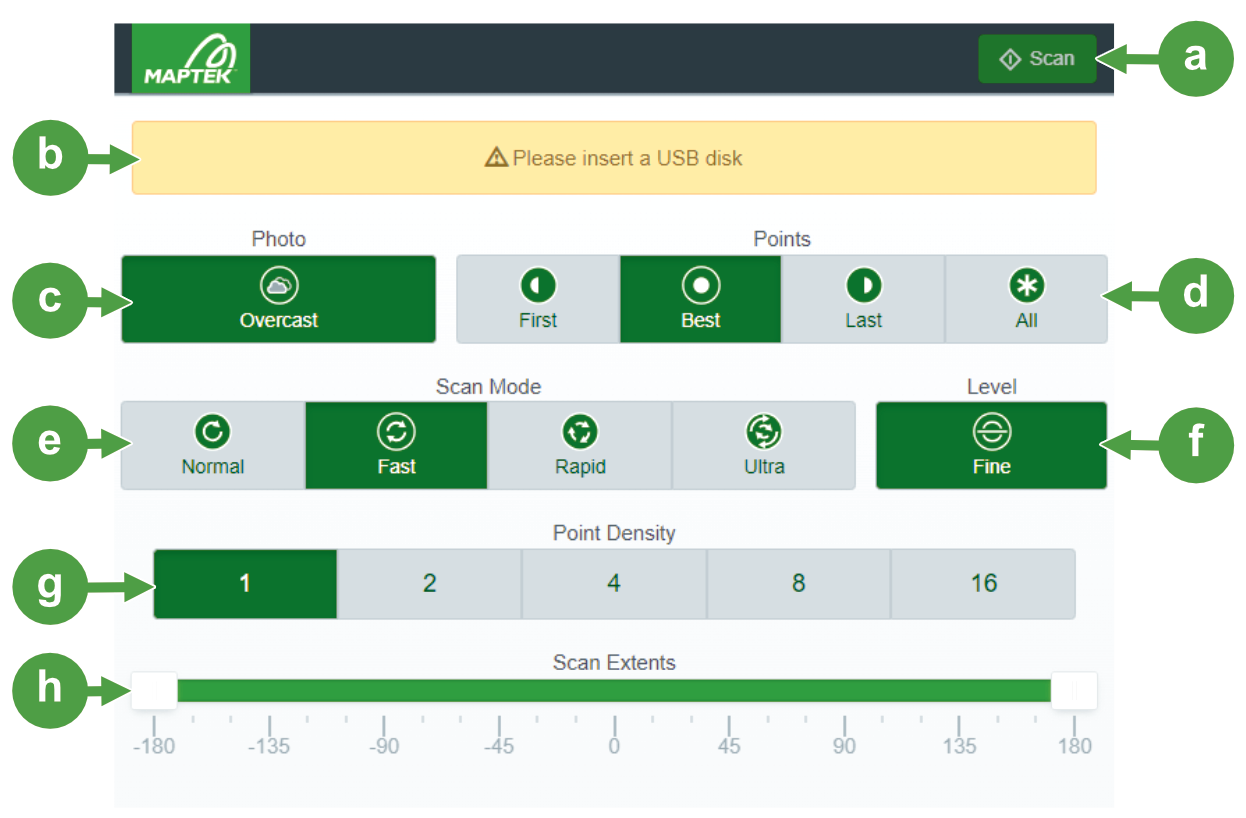
Then tap off or press Enter to load the mobile controller web page. Figure 6-1 illustrates the browser interface that opens.
Note: The available controls depend on the model of scanner.
To take a scan, adjust the required settings as needed. Note that the selected button or setting is highlighted in green.

|
Tap |

|
The status bar displays notifications, prompts, or error conditions. |

|
Photo exposure mode (if equipped with a camera). Tap this button display the following options:
|

|
Points determines which laser pulse returns are included in the scan if more that one return is detected in that pulse. To learn more, see Scan point selection. Select from the following:
|

|
Scan mode sets the scanning speed. To learn more, see Scan mode. Select from the following:
|

|
Level sets the precision of the scanner’s self-levelling system. To learn more, see Level correction. Tap the button to toggle between the following:
The default setting is Fine. |

|
Point Density sets the scan resolution. To learn more, see Point density. Select from the following:
|

|
Scan extents: Drag either handle on the extents bar to set the start and finish points of a scan as illustrated.
Note: Photographic data is only captured across the 180° range of the front scanner head window (if equipped). |
 to begin scanning with the currently selected settings. Tap
  any at time to scan to stop.
 Off turns the camera off. No image is saved with the scan.
 Dim (SR3 only) provides the maximum underground exposure when using the underground light.
  Average (SR3 only) sets a medium underground exposure when using the underground light.
 Bright (SR3 only) sets the minimum underground exposure when using the underground light.
 Indoor provides the maximum exposure for indoor lighting or poor outdoor light.
 Sunset sets the outdoor exposure for low-level lighting.
 Overcast sets the outdoor exposure for cloud-filtered light.
 Sunny (XR3, UR3) or Clear (SR3) sets the minimum exposure setting for light cloud and sunny conditions.
 First: The first point received is retained. All subsequent points are ignored.
 Best: The point retained is determined by an intelligent algorithm.
 Last: Only the last point picked up from a given return pulse is retained.
 All: All points are retained. They can later be filtered in PointStudio using the Multi-return type tool in PointStudio.
 Normal (except SR3 scanner): Select normal speed to maximise the range of points received.
 Fast: Select fast speed to double the normal speed scan.
 Rapid: Select rapid speed to acquire scans at 3x the normal rate.
 Ultra: Select ultra speed to acquire scans at 4x the normal rate. The maximum range of points received is most affected at this speed setting.
 Fine: Applies accurate level compensation to scans.
 Coarse: Applies rudimentary level compensation to scans.
 1 is the lowest resolution producing the greatest point spacing.
 2 doubles the point density 1 scan resolution.
 4 doubles the point density 2 scan resolution.
 8 doubles the point density 4 scan resolution.
 16 (excludes SR3 scanner) doubles the point density 8 scan resolution, producing the smallest point spacing.
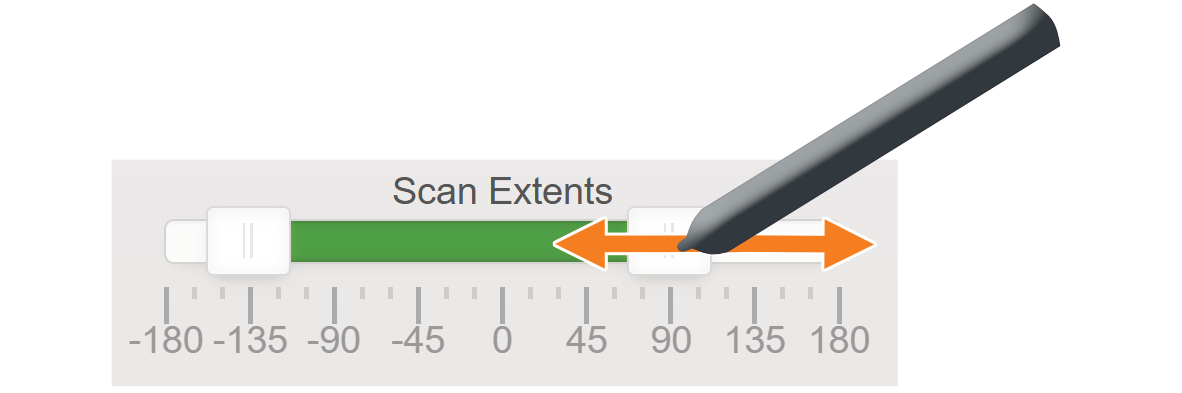
 Front & Back
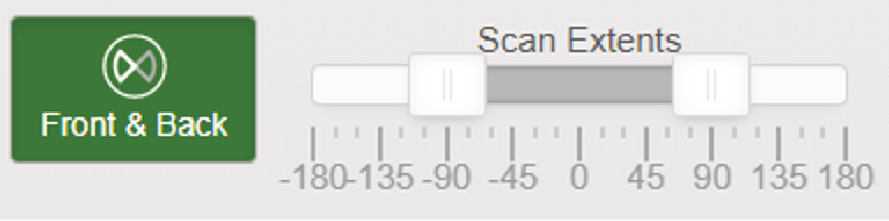
Tip: You can remove the flash drive any time after you have finished scanning.
