Getting Started
To access your licence entitlements, you must first register and set up your user account at account.maptek.com, per the instructions below.
Initial organisation setup
Firstly, your organisation must have an account with Maptek for the purpose of supplying software licences. Maptek will set up a Maptek Account Organisation A Maptek Account Organisation is a space within the Maptek Account platform where administrators can manage how an organisation uses its Maptek products. for the organisation, usually based on a corporate domain email identity. This allows users with a corporate email address to register with the organisation’s Maptek Account and access software licences according to groups set up by the organisation’s IT administration. Non-corporate email addresses must be set up individually.
Tip: Configure Single Sign On (SSO) to streamline Maptek Account access. For details, download the Single Sign On (SSO) for Maptek Account instructions.
User registration
When your organisation is set up with a Maptek Account Organisation, you can register as a Maptek Account user.
To register a user for Maptek Account, follow these steps:
-
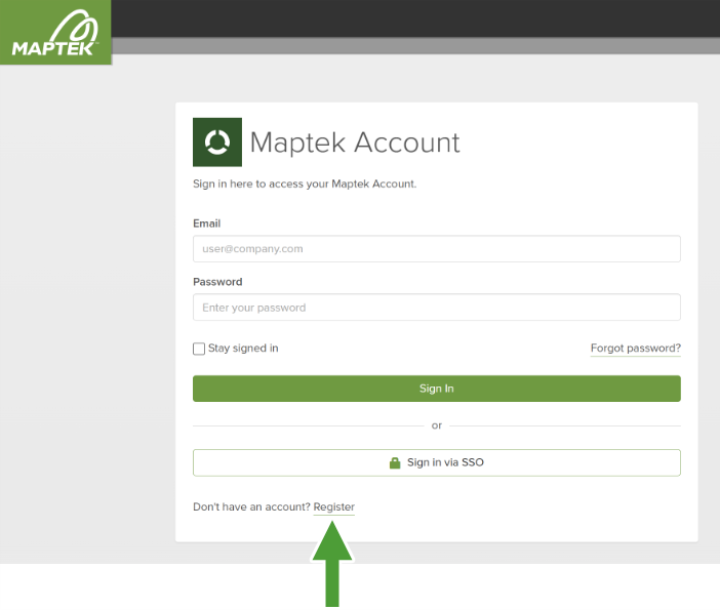
Go to account.maptek.com and click Register at the bottom of the page.
-
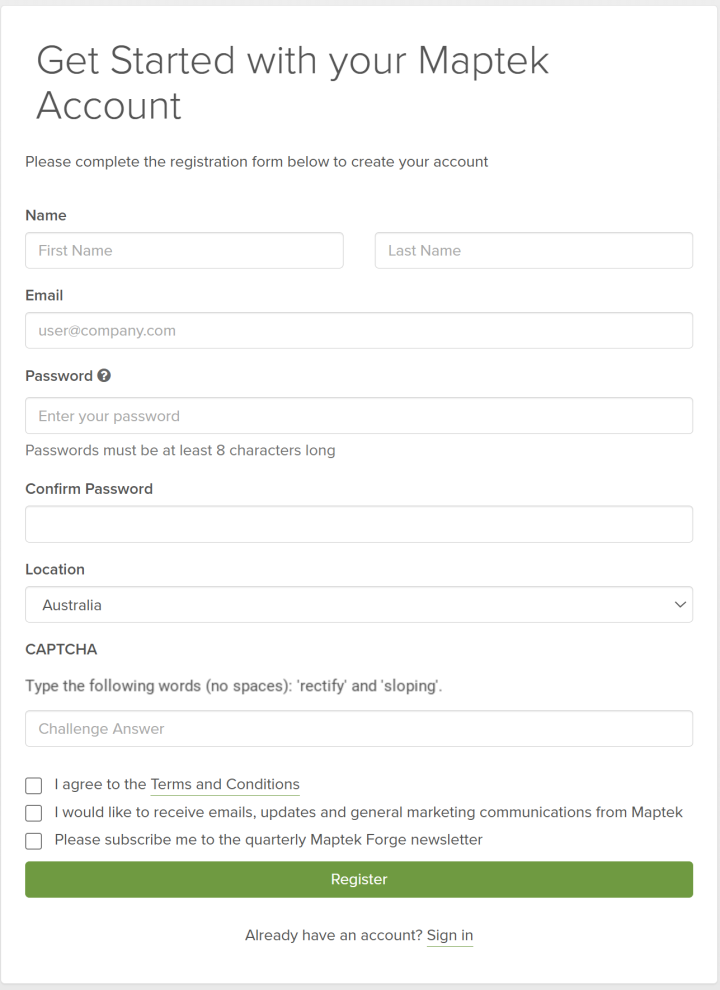
Enter your details.
You will need to enter your personal details and choose a password.
-
To view the password policy for Maptek Account, click
 (Password Policy) above the password fields.
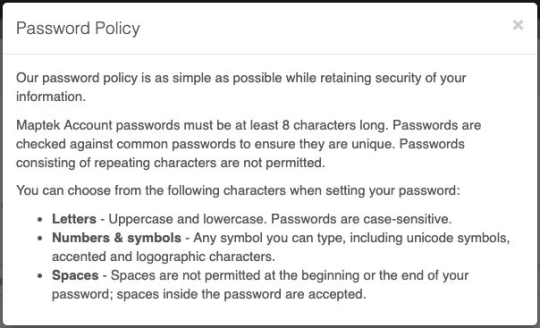
-
-
Read and agree to the Terms and Conditions.
-
To view the terms and conditions, click on Terms and Conditions.

-
-
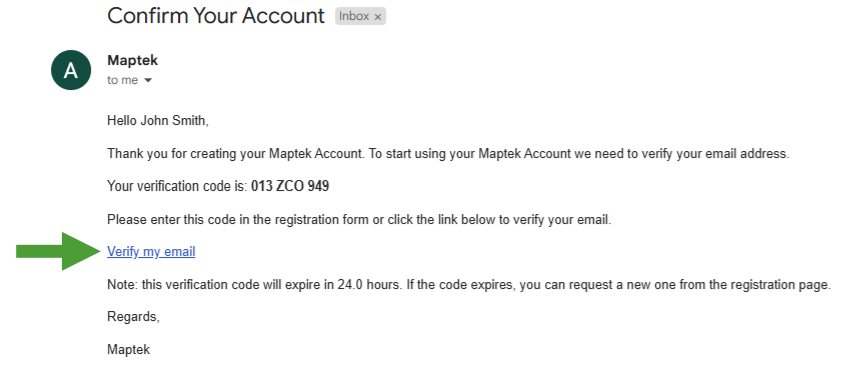
Confirm your account.
An email will be sent to the email address you provided in the registration details. Click on the link in the email to confirm your account.
Logging in
Once registered, you can access your Maptek Account whenever you wish to manage your software licences, change information, or monitor your sessions and activities. Log in to your account as follows:
-
Go to account.maptek.com.
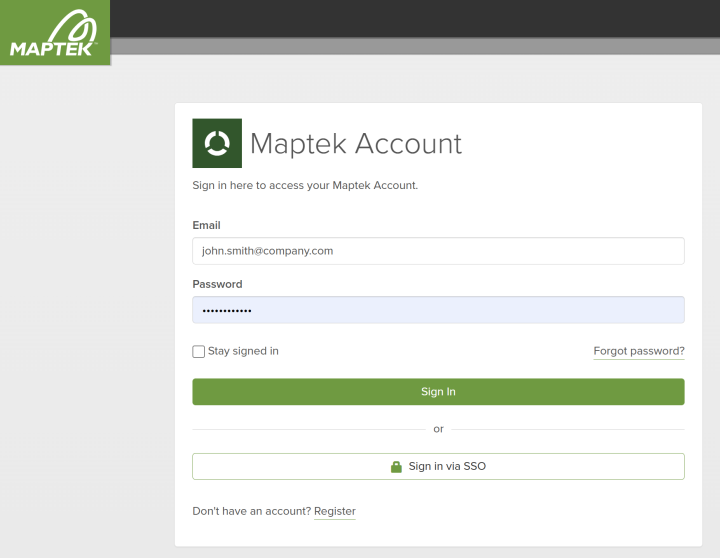
-
Enter your registered email address and password.
-
(Optional) select Stay signed in to remain signed in for the next 30 days.
-
Click Sign In.
Tip: Alternatively, if Single Sign On has been enabled for your organisation, click Sign in via SSO. In the next screen, enter your organisation name and click Continue.
What next?
Once you have your account set up, you can access all the features that are available to you.
-
To learn about your account features, continue to the next topic, Individual User Account.
If you have administrator rights, you will be able to manage users, groups and more within your organisation.
-
To learn about the administrative functions, go to Administration Account.
