3D Text
3D text is a text label at a given location with an orientation and size in 3D space that are maintained when zooming in and out. That is, it behaves like a 3D object.
The Text3D class represents a single 3D text label.
Text3D properties
All properties for 2D Text objects are applicable to 3D text objects. Additionally, use these properties to customise the look of your 3D text object:
| Set the direction of the label in space. The direction is defined from the start of the first character to the end of the last character. This property is a 3D vector [X, Y, Z]. | |
| Set the direction from the bottom of the text to the top. | |
| Set this boolean property to control whether the label should be visible or not when there are other 3D objects in front of the label. | |
|
Use this enum property to set where the text is facing. It can be set to the following values: |
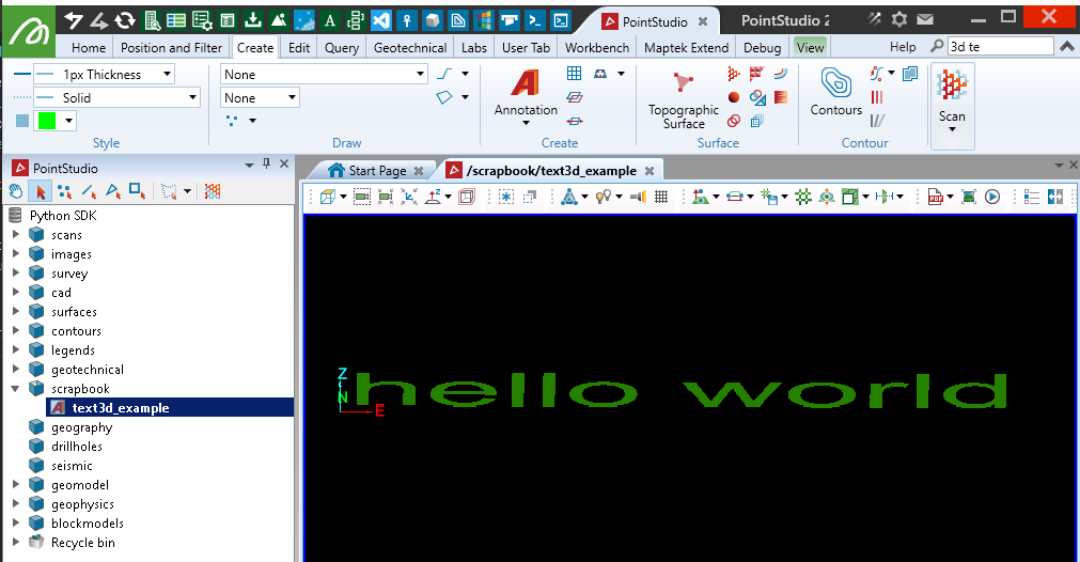
Creating a Text3D object
from mapteksdk.project import Project
from mapteksdk.data import Text3D
proj = Project() # Connect to default project

object_path = "scrapbook/text3d_example"

# Create Text
with proj.new(object_path, Text3D, overwrite=True) as text:
    text.text = 'hello world'
    text.location = [0, 0, 0]
    # Colours are R,G,B,A, where A is Alpha (255 = opaque)
    text.colour = [38, 128, 0, 255] # Light Green
    text.size = 100
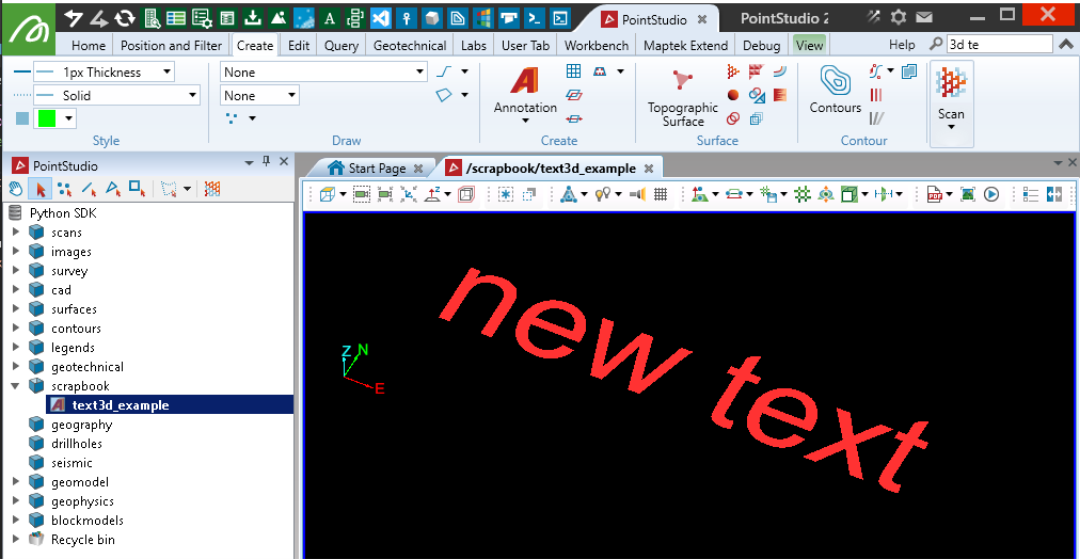
Editing Text3D properties
The following example will modify the colour, size, text, and position of the text object created in the last example.
from mapteksdk.project import Project
from mapteksdk.data import Text3D
proj = Project() # Connect to default project

object_path = "scrapbook/text3d_example"

# Create Text
with proj.edit(object_path) as text:
    text.text = 'new text'
    text.location = [50, 50, 50]
    # Colours are R,G,B,A, where A is Alpha (255 = opaque)
    text.colour = [255, 50, 50, 255]
    text.size = 150
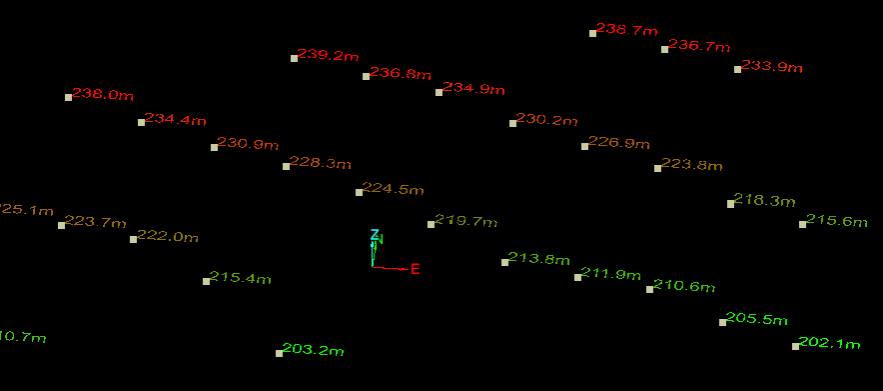
Labelling points at a particular height
The following example will add 3D text at each point, with its height, in any selected object that has point primitives.
from mapteksdk.project import Project
from mapteksdk.data import Text3D, Surface
import numpy as np

def colour_by_height(z_coordinates):
    # Sets a basic colour map over points based on height value within height range
    lowest, highest = np.min(z_coordinates), np.max(z_coordinates)
    ratio = 2 * (z_coordinates - lowest) / (highest - lowest)
    b = np.clip((255*(1-ratio)), 0, 255).astype(np.uint8)
    r = np.clip((255*(ratio-1)), 0, 255).astype(np.uint8)
    g = np.clip((255 - b - r), 0, 255).astype(np.uint8)
    a = np.full(z_coordinates.shape, 255, dtype=np.uint8)
    return np.column_stack((r,g,b,a))

proj = Project() # Connect to default project
selection = proj.get_selected()
for item in selection:
    with proj.read(item) as obj:
        if hasattr(obj, 'points'):
            # Append _facet_index_labels/ to the surface path as the container to
            # store the text objects in
            parent_path = f"{obj.id.path}_point_heights"
            for i in range(obj.point_count):
                # For convenience, get z coordinates as an array
                z = obj.points[: ,2]
                # Create colours to assign to each value based on height in range
                colours = colour_by_height(z)
                with proj.new_or_edit(f"{parent_path}/{i}", Text3D, overwrite=True) as label:
                    # Position on the point
                    label.location = obj.points[i]
                    # Set label to point z coordinate
                    label.text = str(f"{round(z[i],1)}m")
                    label.size = 3
                    label.colour = colours[i]
Labelling point indices
The following example will add 3D text at each point, with its index position in the points array in any selected object that has point primitives.
from mapteksdk.project import Project
from mapteksdk.data import Text3D
import numpy as np

proj = Project() # Connect to default project
selection = proj.get_selected()
for item in selection:
    with proj.read(item) as obj:
        if hasattr(obj, 'points'): # Support anything with points
            # Append _edge_index_labels/ to the surface path as the container to
            # store the text objects in
            parent_path = f"{obj.id.path}_point_index_labels"
            for i in range(obj.point_count):
                with proj.new_or_edit(f"{parent_path}/{i}", Text3D, overwrite=True) as label:
                    # Position on the point
                    label.location = obj.points[i]
                    # Set label to point index
                    label.text = str(i)
                    label.size = 1
                    label.colour = [0, 255, 0, 255]
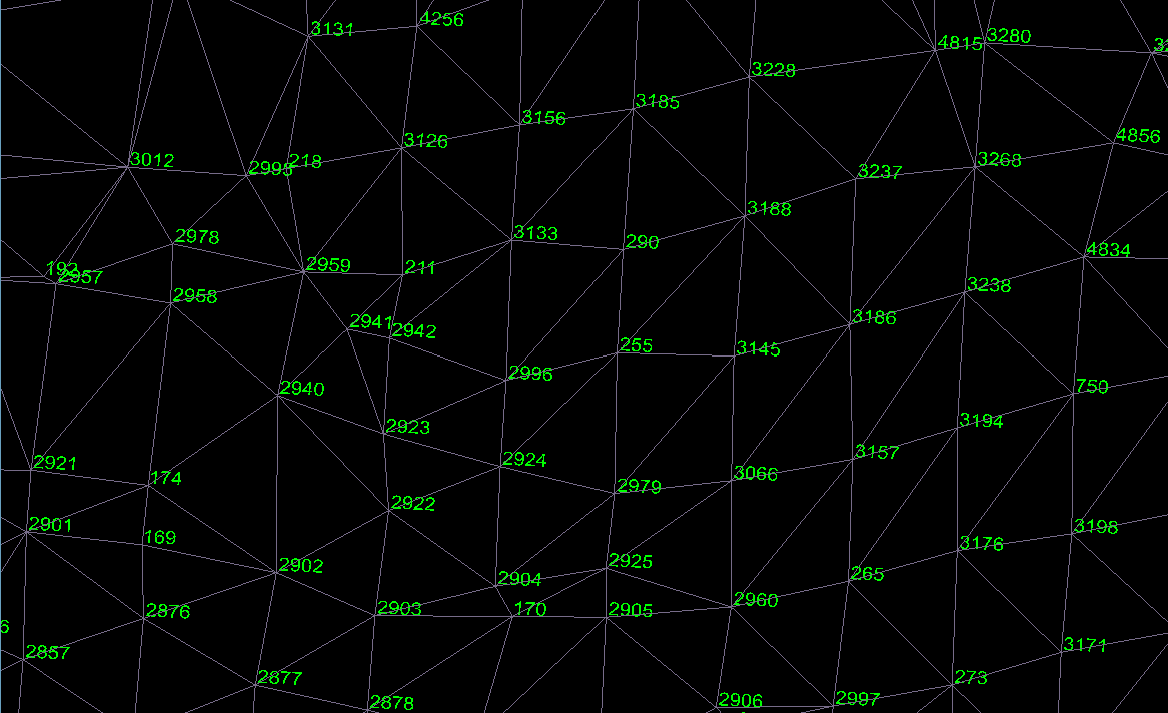
Labelling edge indices
The following example will add 3D text at the centre of each edge, with its index position in the edges array in any selected object that has edges primitives.
from mapteksdk.project import Project
from mapteksdk.data import Text3D
import numpy as np

def edge_distances(edge_lines:np.ndarray) -> np.ndarray:
    # Calculate distance for each edge
    p1, p2 = edge_lines[:, 0, :], edge_lines[:, 1, :]
    line_lengths = np.sqrt((p2-p1)**2)
    return np.sum(line_lengths, axis=1)

proj = Project() # Connect to default project
selection = proj.get_selected()
for item in selection:
    with proj.read(item) as obj:
        if hasattr(obj, 'edges'): # Support lines or surfaces
            # Append _edge_index_labels/ to the surface path as the container to
            # store the text objects in
            parent_path = f"{obj.id.path}_edge_index_labels"
            edge_lines = obj.points[obj.edges]
            edge_lengths = edge_distances(edge_lines)
            edge_centres = np.mean(edge_lines, axis=1)
            for i in range(edge_lines.shape[0]):
                with proj.new_or_edit(f"{parent_path}/{i}", Text3D, overwrite=True) as label:
                    # Position in the centre of the edge
                    label.location = edge_centres[i]
                    # Set label to edge index
                    label.text = str(i)
                    # Variably size the text based on the length of the edge
                    label.size = edge_lengths[i] / 10
                    label.colour = [255, 0, 0, 255]
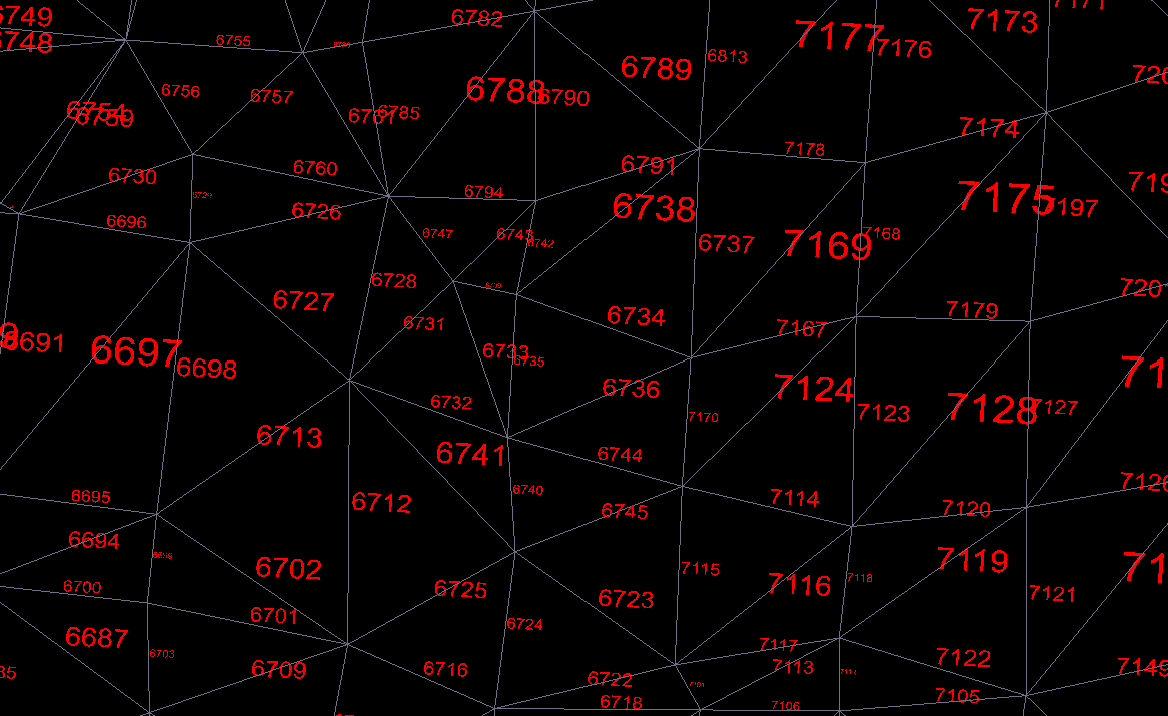
Labelling facet indices
The following example will add 3D text at the centre of each facet, with its index position in the facets array in any selected Surface.
from mapteksdk.project import Project
from mapteksdk.data import Text3D, Surface
import numpy as np

def triangle_perimeters(triangles:np.ndarray) -> np.ndarray:
    # Calculate perimeter for each triangle
    p1, p2, p3 = triangles[:, 0, :], triangles[:, 1, :], triangles[:, 2, :]
    line_lengths = np.sqrt((p2-p1)**2 + (p3-p2)**2 + (p3-p1)**2)
    return np.sum(line_lengths, axis=1)

proj = Project() # Connect to default project
selection = proj.get_selected()
for item in selection:
    if item.is_a(Surface):
        with proj.read(item) as surface:
            # Append _facet_index_labels/ to the surface path as the container to
            # store the text objects in
            parent_path = f"{surface.id.path}_facet_index_labels"
            triangles = surface.points[surface.facets]
            perimiters = triangle_perimeters(triangles)
            centroids = np.mean(triangles, axis=1)
            for i in range(triangles.shape[0]):
                with proj.new_or_edit(f"{parent_path}/{i}", Text3D, overwrite=True) as label:
                    # Position in the centre of the facet
                    label.location = centroids[i]
                    # Set label to facet index
                    label.text = str(i)
                    # Variably size the text based on the perimeter of the facet
                    label.size = perimiters[i] / 15

