Working with Selections
A selection represents a collection of objects in the project, typically used for performing some operation on those objects. The active selection in an application is the set of currently selected objects, which are highlighted in both the project explorer and any view window where they appear. The active selection is under the control of the user, but it can also be changed programmatically within a script. A selection is represented in the SDK using the Selection class.
Important: It is not advisable to rely on the order of objects within a selection as being significant. If the selection is user-generated (through the active selection), the order does not necessarily correspond to the sequence in which the user selected the objects.
Selection operations
The following section covers the basics of working with selections.
Getting and setting the active selection
To create a selection from the connected application’s active selection, use the Project.get_selected() or Selection.active_selection() functions.
Note: The Selection object returned by these functions is a copy of the active selection; if the user subsequently changes the active selection, the set of objects in the Selection object will remain unchanged.
To set the active selection, use Project.set_selected().
Adding to a selection
Add an object to a selection using the Selection.append() method. Add multiple objects using the Selection.extend() methods.
Clearing a selection
Remove all objects from a selection using the Selection.clear() method.
Filtering a selection by object type
Selections can be filtered by object type using the Selection.where() and Selection.where_not() instance methods. These methods return a new selection with the applied filter, rather than modifying the original selection in place.
These methods serve as a shorthand for performing a list comprehension over a selection to check whether each object matches one of the specified types. This can be useful when a function expects objects of only a given type.
The following code snippet demonstrates how to obtain a selection that contains only Topology objects:
topologies = project.get_selected().where(Topology)
Partitioning the selection by type
You can use the Selection.partition() method to partition a selection by a given set of types into separate selections, one for each specified type.
The following code snippet demonstrates partitioning a selection of polygon and polyline objects into two new selections, one containing only the polygons and the other only the polylines:
cad_children = Selection(project.get_children('cad').ids()))
polygons, lines = selection.partition(Polygon, Polyline)
In this example, objects of any other type would be discarded from the result. To return other object types, you can supply the optional parameter with_remainder=True.
Querying the roots of a selection
The root objects of a selection are the objects whose parents are not part of that selection. You can obtain the root objects by accessing the Selection.roots property of a selection. This is useful when you only need the container objects themselves and not the individual objects within them.
See Working with Projects > Recycle bin for an example that uses Selection.roots.
Useful code snippets using selections
Creating a selection from the children of a container
The following snippet creates a selection containing all the child objects within the cad container:
cad_children = Selection(project.get_children('cad').ids()))
Creating a selection representing objects of a given type
The following snippet creates a selection containing all polyline objects located within the cad container:
cad_children = Selection(project.get_children('cad').ids()))
polylines = cad_children.where(Polyline)
Creating separate selections based on type
The following snippet creates two selections, one containing all polyline objects located within the cad container, and the other containing all polygon objects located within the cad container:
cad_children = Selection(project.get_children('cad').ids()))
polygons, lines = selection.partition(Polygon, Polyline)
Setting the active selection to a given type
The following snippet sets the active selection to only polygons located within the cad container:
cad_children = Selection(project.get_children('cad').ids()))
project.set_selected(cad_children.where(Polygon))
Selection groups
A selection group is a container-like object that can be used to quickly select all objects within the group, even if they are located in different containers. There are two types of selection group:
-
Mixed selection groups, which can contain a mix of objects of any type.
-
Drillhole selection groups, which only contain drillholes and are only supported in GeologyCore.
Adding a single object to a mixed selection group
When creating a new selection group or editing an existing one, the add() function can be used to add a single object. For example, the following script adds the first object in the active selection to a new SelectionGroup object:
from mapteksdk.data import SelectionGroup
from mapteksdk.project import Project, OverwriteMode
from mapteksdk.operations import show_message, Severity

def main(project: Project):
    selection = project.get_selected()
    if not selection:
        show_message(
            "Example Python Script",
            "This operation requires one object selected.",
            Severity.ERROR,
        )
    object_id = selection[0]
    with project.new(
        f"documentation/group_of_{object_id.name}",
        SelectionGroup,
        overwrite=OverwriteMode.UNIQUE_NAME,
    ) as new_group:
        new_group.add(object_id)

if __name__ == "__main__":
    with Project() as main_project:
        main(main_project)
Running this script with a single line object selected creates the following selection group:
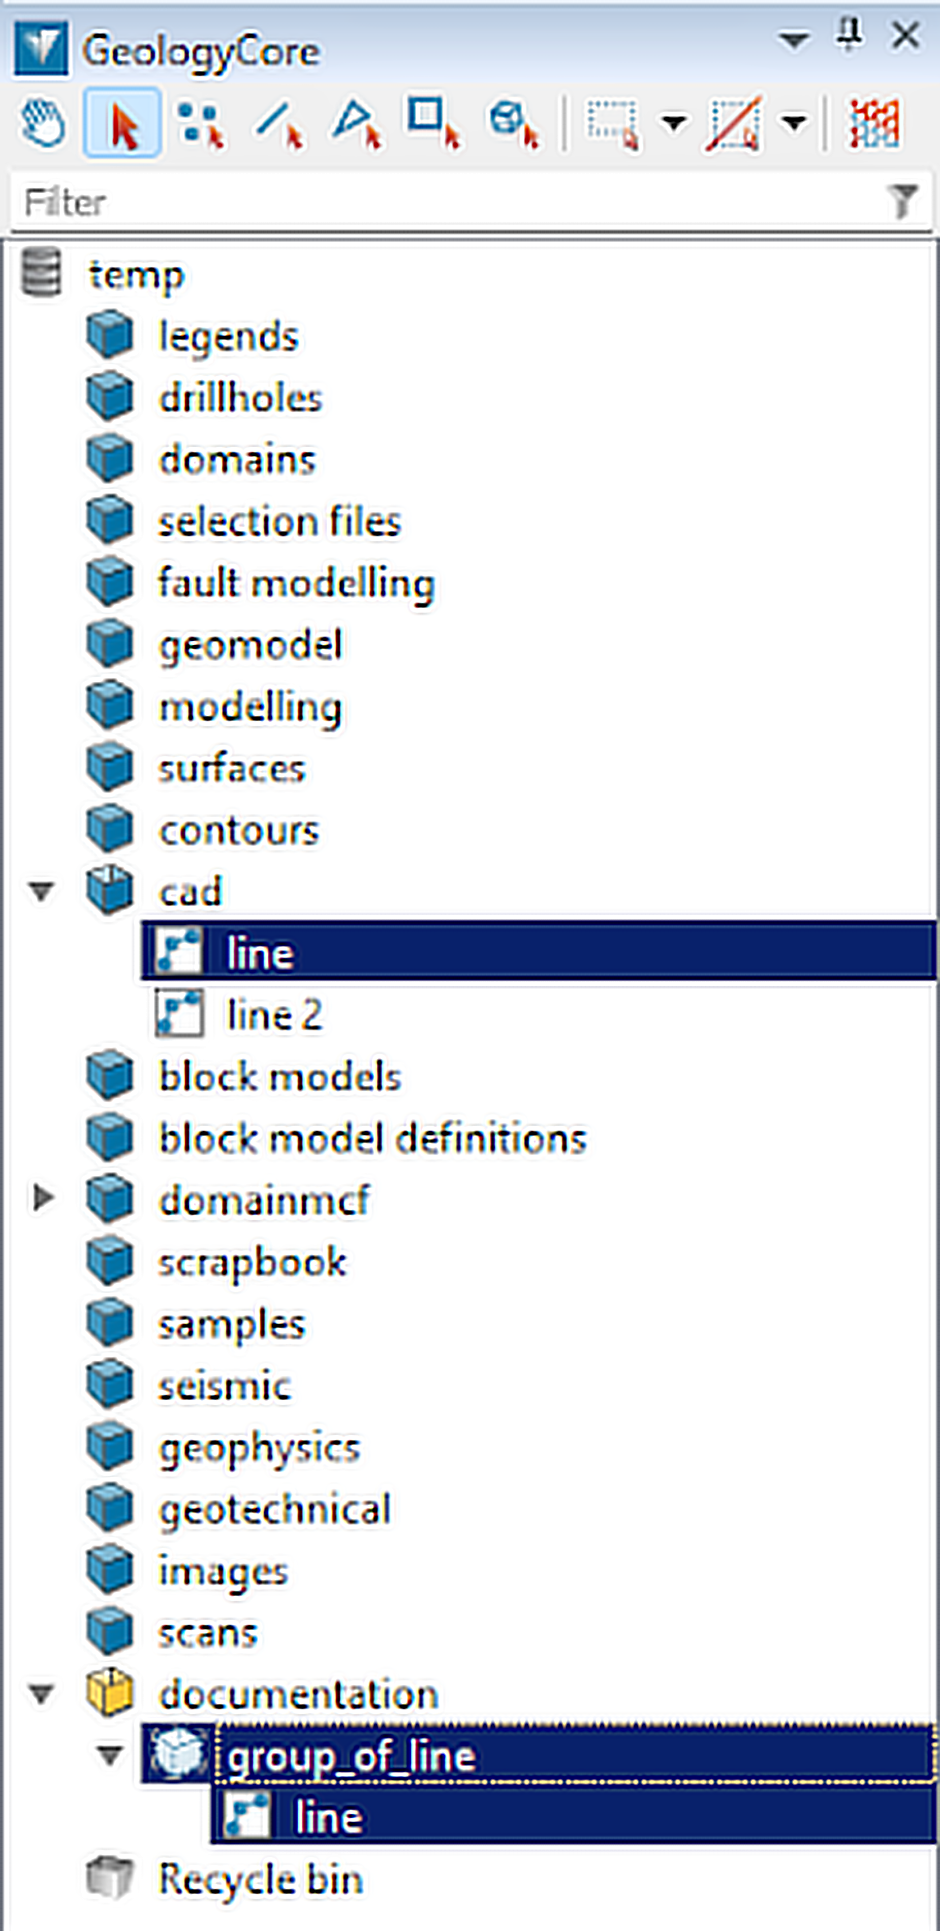
The group_of_line object is the selection group. It contains a single line object. Note that selecting the group_of_line object causes the line object (the sole object in the group) to be selected in the cad container.
The add() function only accepts a single object. This object can be a container or selection group, in which case all child objects will be added. For example, selecting the cad container and running the script adds the line and line 2 objects to the group_of_cad selection group:

Adding multiple objects to a mixed selection group
To add the contents of multiple containers to a selection group at once, use the extend() function. The following script is modified so that it adds the entirety of the active selection to the newly created selection group using extend() rather than only the first object:
from mapteksdk.data import SelectionGroup
from mapteksdk.project import Project, OverwriteMode
from mapteksdk.operations import show_message, Severity

def main(project: Project):
    selection = project.get_selected()
    if not selection:
        show_message(
            "Example Python Script",
            "This operation requires a selection.",
            Severity.ERROR,
        )
    with project.new(
        "documentation/group_of_selection",
        SelectionGroup,
        overwrite=OverwriteMode.UNIQUE_NAME,
    ) as new_group:
        new_group.extend(selection)

if __name__ == "__main__":
    with Project() as main_project:
        main(main_project)
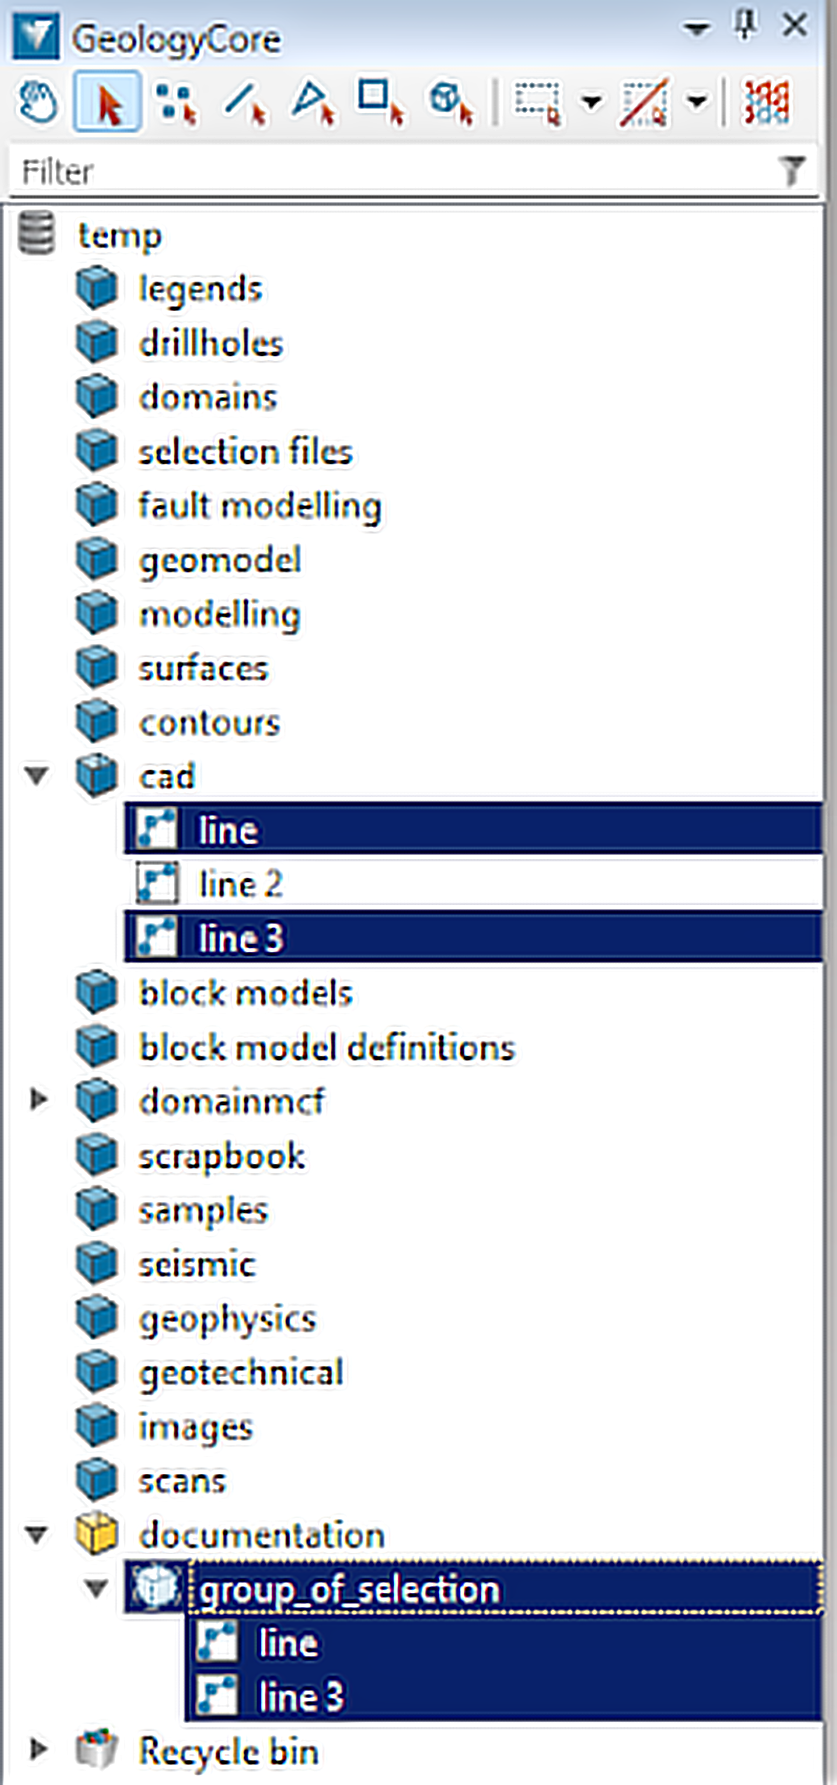
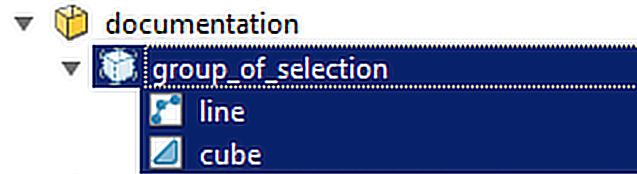
Running this script with two the objects selected creates the following group:
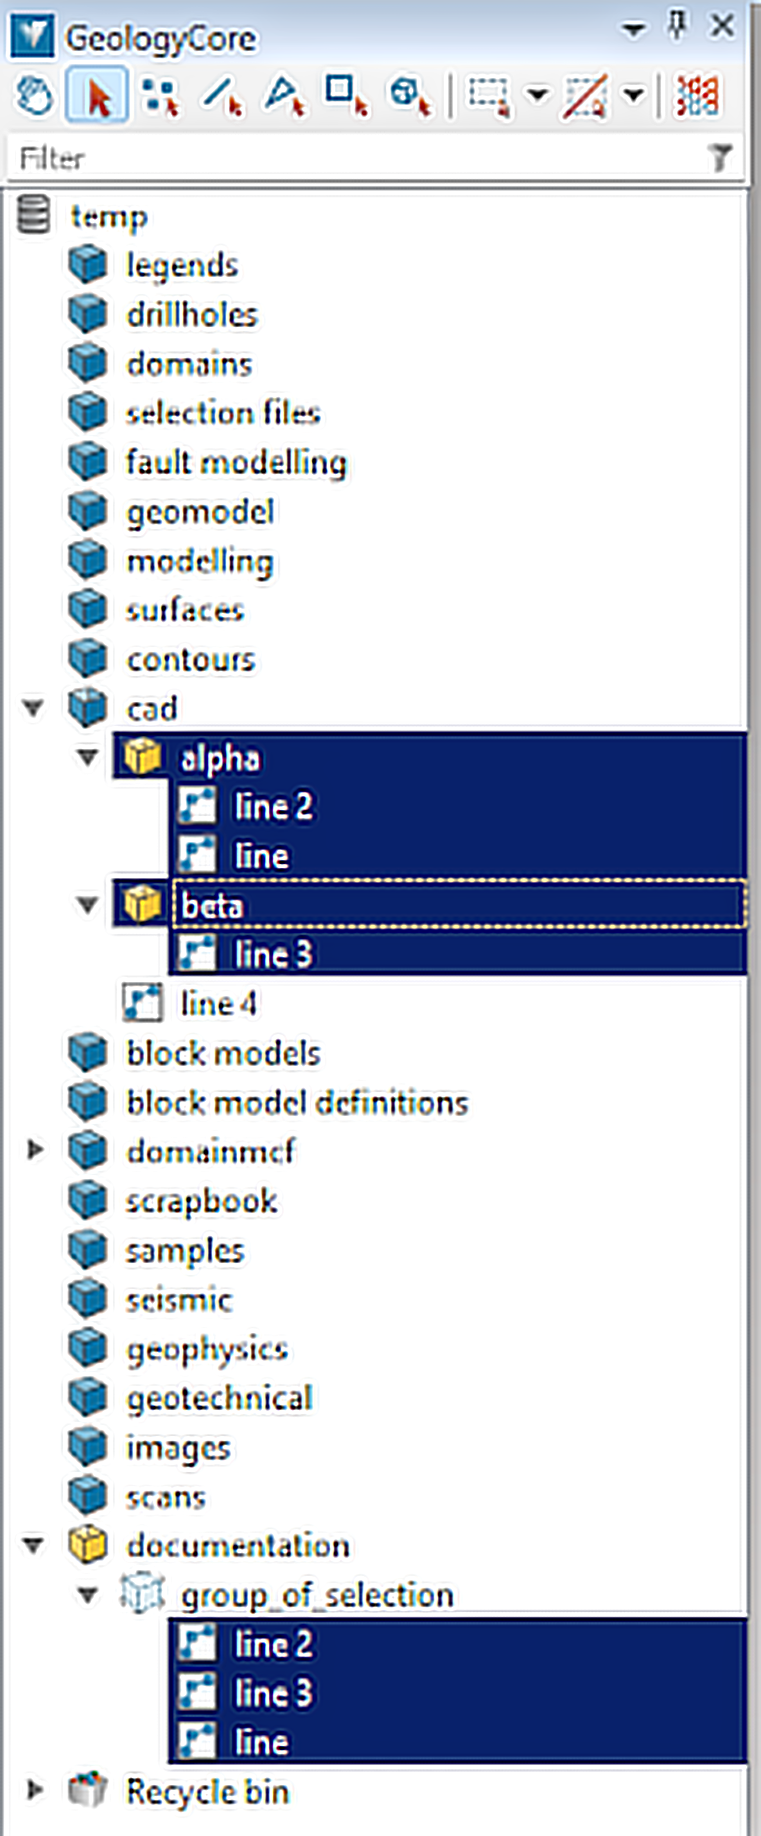
As with extend(), if a container is selected when the script is run, add() adds the child objects of that container to the group, as shown below:
Removing objects from a mixed selection group
The remove() function deletes a single object from a selection group. For example, the following script removes the last object from a selection group:
from mapteksdk.data import SelectionGroup
from mapteksdk.project import Project
from mapteksdk.operations import show_message, Severity

def main(project: Project):
    selection = project.get_selected().where(SelectionGroup)
    if not selection:
        show_message(
            "Example Python Script",
            "This operation a selection group to be selected.",
            Severity.ERROR,
        )
    with project.edit(
        selection[0],
        SelectionGroup,
    ) as group:
        if len(group.contents) == 0:
            # Nothing to remove.
            return
        group.remove(group.contents[-1])

if __name__ == "__main__":
    with Project() as main_project:
        main(main_project)
Clearing the contents of a mixed selection group
The clear() function removes all of the contents of a selection group.
|
|
|
An example screenshot of a selection group before and after clearing. |
|
Iterating over the contents of a mixed selection group
The contents property of a SelectionGroup can be used to access a sequence of the contents of the selection group. Iterating over this allows for an operation to be applied to each item in the selection file. For example, the following script iterates over each object in the selection group and reports its type:
from mapteksdk.data import SelectionGroup
from mapteksdk.project import Project
from mapteksdk.operations import show_message, Severity, write_report

def main(project: Project):
    selection = project.get_selected().where(SelectionGroup)
    if not selection:
        show_message(
            "Example Python Script",
            "This operation a selection group to be selected.",
            Severity.ERROR,
        )
    group_id = selection[0]
    with project.read(
        group_id,
        SelectionGroup,
    ) as group:
        group_contents = group.contents

    lines: list[str] = []
    for object_id in group_contents:
        lines.append(f"* {object_id.name} - {object_id.type_name}")

    write_report(f"Summary of {group_id.name}", "\n".join(lines))

if __name__ == "__main__":
    with Project() as main_project:
        main(main_project)
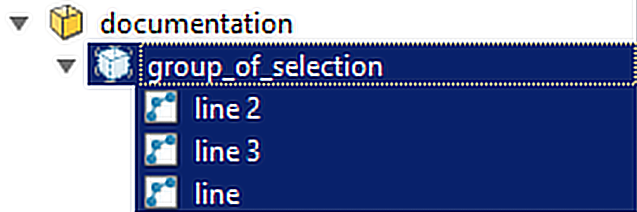
For example, if this script were run on the following selection group:
the following report would be created:

Note: Selection groups cannot contain containers or other selection groups to prevent infinite loops, duplicate objects, and potential crashes when iterating over their contents.
Drillhole selection groups
A drillhole selection group behaves similarly to a mixed selection group but can only contain GeologyCore Drillhole objects. Attempting to add any other object will cause an error.
By default, all newly created selection groups are mixed selection groups. Use the change_group_type() function to change a group type to drillhole, as demonstrated in the following script:
from mapteksdk.data import SelectionGroup, SelectionGroupType
from mapteksdk.project import Project

def main(project: Project):
    with project.new(
        "documentation/drillhole_group",
        SelectionGroup,
    ) as new_group:
        new_group.change_group_type(SelectionGroupType.DRILLHOLE)

        # The other functions can then be used to add drillholes to the hole.

if __name__ == "__main__":
    with Project() as main_project:
        main(main_project)
This creates the following empty group:
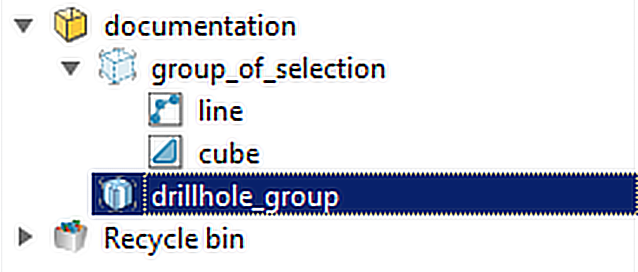
Note that drillhole groups added to the explorer use a different icon to distinguish them from mixed groups.
Typically, you would not manually populate a drillhole selection group with functions like add() and extend(). Instead, use a drillhole database and one or more selection files, as is demonstrated in Populating a drillhole selection group from a database and selection file.
Recommended: Set the group type before adding any objects to the selection group.
Set the group type before adding any objects to the selection group.It is possible to change the type of an existing selection group using the SelectionGroup.change_group_type() function, but this is not recommended for the following reasons:
-
Changing a MIXED group to a DRILLHOLE group removes all non-drillholes from the group.
-
Changing a DRILLHOLE group to a MIXED group allows non-drillholes to be included in the group, which will prevent the group from being used in operations that require a drillhole group.
Populating a drillhole selection group from a database and selection file
Note: The following feature requires GeologyCore 2025.1 or later.
These examples make use of the chess board drillhole database. Before running the example scripts, download and import the database and make sure the database object is located at drillholes/chess_board in your project. This database does not contain realistic data, it is simply intended to provide clear examples. The database with collar labels enabled looks like this when viewed from above:
To populate a drillhole selection group based on a database and a selection file, your script should do the following:
-
Use the template property to access the template.
template = new_group.template
-
Set the target database of the template.
template.target = target_id
-
Add a selection file to use.
template.add_selection_item(selection_file_id)
-
Call refresh to update the contents of the selection file.
template.refresh()
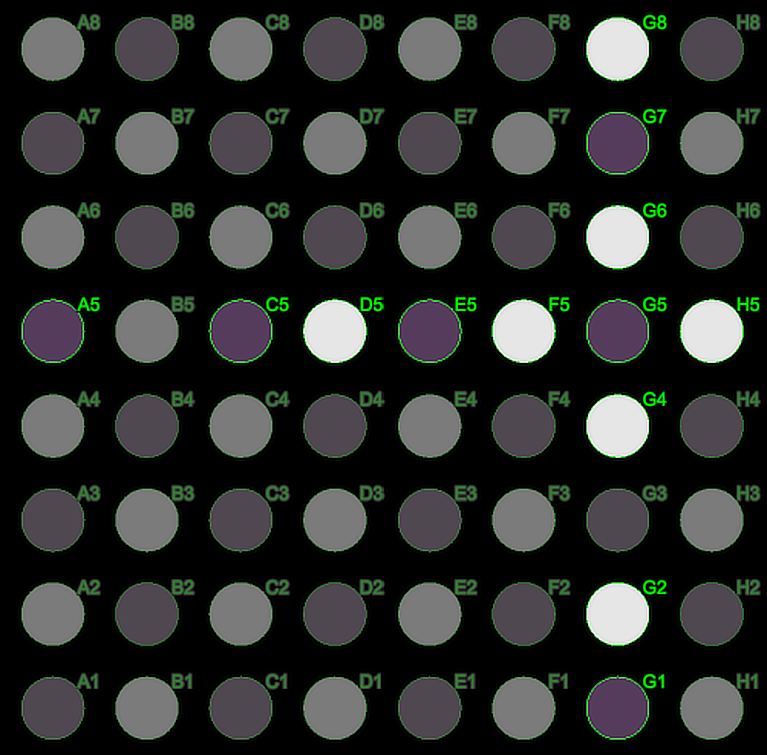
For example, the following script creates a selection group containing all drillholes in the database where their name starts with G or ends in 5:
from mapteksdk.data import SelectionGroup, SelectionGroupType, SelectionFile
from mapteksdk.project import Project, OverwriteMode
from mapteksdk.operations import show_message, Severity

TARGET_PATH = "drillholes/chess_board"
SELECTION_FILE_PATH = "documentation/file_g_and_rank_5"

def main(project: Project):
    target_id = project.find_object(TARGET_PATH)

    if not target_id:
        show_message(
            "Selection file / group example script",
            f"This script requires the chess board drillhole to be imported"
            f"and placed at {TARGET_PATH}",
            severity=Severity.ERROR,
        )
    selection_file_id = project.find_object(SELECTION_FILE_PATH)

    if not selection_file_id:
        # Only create the selection file the first time the script is run.
        with project.new(
            SELECTION_FILE_PATH,
            SelectionFile,
        ) as selection_file:
            selection_file.is_inclusion = True
            selection_file.extend(["G?", "?5"])
        selection_file_id = selection_file.id

    with project.new(
        "documentation/g_and_5",
        SelectionGroup,
        overwrite=OverwriteMode.UNIQUE_NAME,
    ) as new_group:
        new_group.change_group_type(SelectionGroupType.DRILLHOLE)
        template = new_group.template
        template.add_selection_item(selection_file_id)
        template.target = target_id
        template.refresh()

if __name__ == "__main__":
    with Project() as main_project:
        main(main_project)
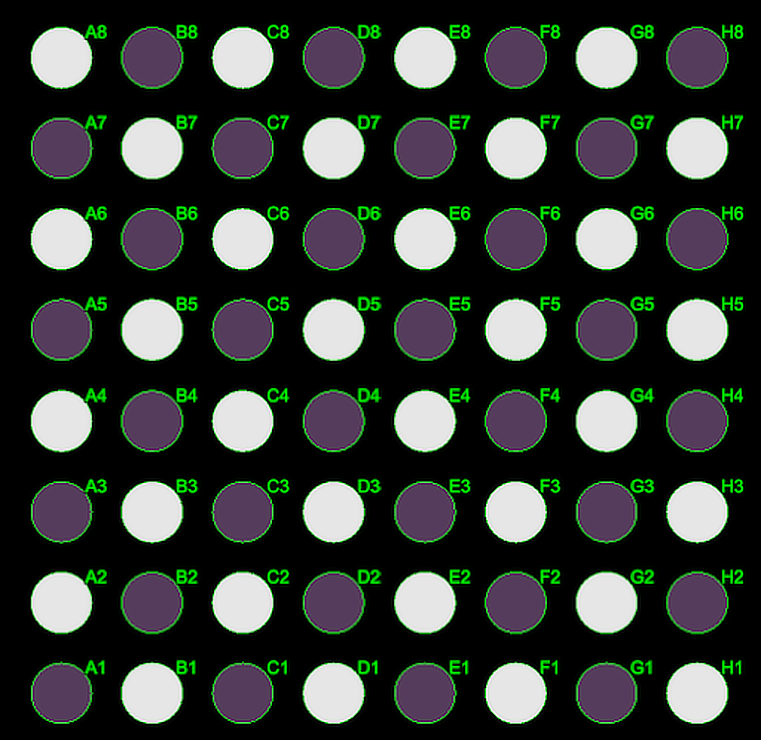
This results in a selection group which, when selected, includes the drillholes as highlighted in the following screenshot:
Note: You can also call DrillholeGroupTemplate.refresh() to re-apply the selection files after changes to the database or the files, so the existing selection group updates correctly.
Alternatively, if you want to use multiple selection files to define the drillhole selection group, you can use the DrillholeGroupTemplate.extend_selection_items() function to add multiple to the template at once. For example:
template.extend_selection_items([inclusion_file_id, exclusion_file_id])
You can modify the previous script to use an inclusion and exclusion selection file, as demonstrated in the script below. As in the previous example, the inclusion file includes any drillhole whose name starts with G or ends with 5. The exclusion file removes any drillhole whose name starts with B or ends in 3.
from mapteksdk.data import SelectionGroup, SelectionGroupType, SelectionFile
from mapteksdk.project import Project, OverwriteMode
from mapteksdk.operations import show_message, Severity

TARGET_PATH = "drillholes/chess_board"

def main(project: Project):
    target_id = project.find_object(TARGET_PATH)

    if not target_id:
        show_message(
            "Selection file / group example script",
            f"This script requires the chess board drillhole to be imported"
            f"and placed at {TARGET_PATH}",
            severity=Severity.ERROR,
        )
    inclusion_file_id = load_or_create_selection_file(project, "documentation/inclusion", ["G?", "?5"], True)
    exclusion_file_id = load_or_create_selection_file(project, "documentation/exclusion", ["B?", "?3"], False)

    with project.new(
        "documentation/from_two_selection_files",
        SelectionGroup,
        overwrite=OverwriteMode.UNIQUE_NAME,
    ) as new_group:
        new_group.change_group_type(SelectionGroupType.DRILLHOLE)
        template = new_group.template
        template.extend_selection_items([inclusion_file_id, exclusion_file_id])
        template.target = target_id
        template.refresh()

def load_or_create_selection_file(
    project: Project, name: str, patterns: list[str], is_inclusion: bool
):
    selection_file_id = project.find_object(name)

    if not selection_file_id:
        # Only create the selection file the first time the script is run.
        with project.new(
            name,
            SelectionFile,
        ) as selection_file:
            selection_file.is_inclusion = is_inclusion
            selection_file.extend(patterns)
        selection_file_id = selection_file.id
    return selection_file_id

if __name__ == "__main__":
    with Project() as main_project:
        main(main_project)
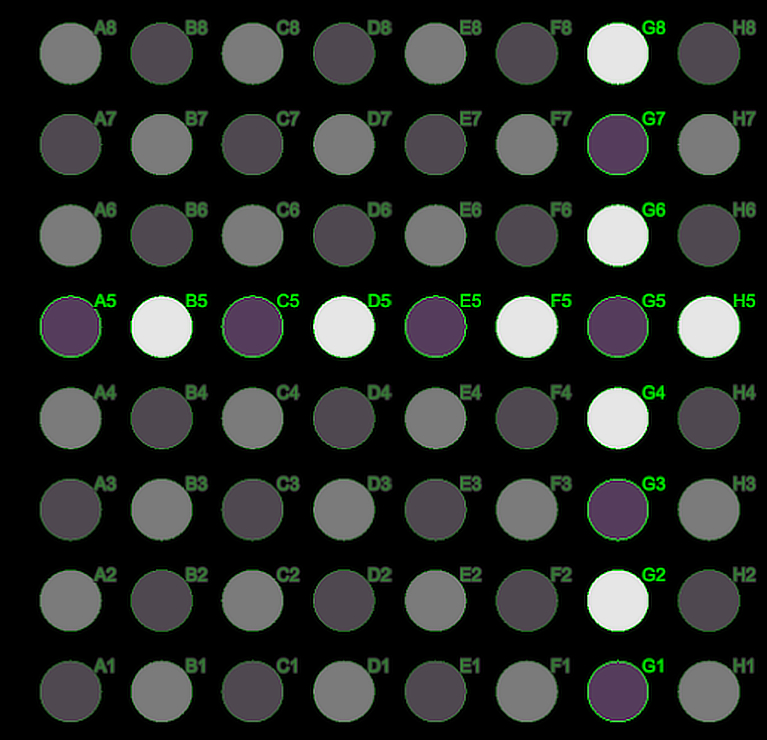
This results in the following drillholes being selected (note the exclusion of B5 and G3):
-
In GeologyCore 2025.1, renamed databases or selections are ignored when Python loads a selection group and are removed from the template on save.
-
The DrillholeGroupTemplate.remove_selection_file() function can be used to remove a selection file from the template.
-
If no inclusion selection files defined, all drillholes are included by default, allowing exclusions to be used independently.
-
Inclusion and exclusion selection only operates with drillholes.
