Style
Source file: edit-line-style.htm
The Style group provides options for setting line thickness and style (solid or dot and dash combinations).
-
Select the line in the view window.
-
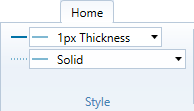
On the Home ribbon tab, go to the Style group and click either the line thickness or line style field.
-
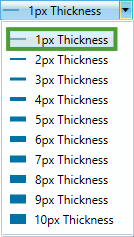
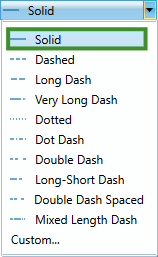
Select from the self-explanatory options presented in the respective drop-down list.
-
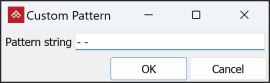
To create your own pattern, click the Custom... option at the bottom of the Line Style drop-down list.
-
Type in the new custom pattern.
Note: The tool produces a linear On-Off pattern along a line. Characters equate to On, or visible segments, taking the assigned line colour. Spaces equate to Off segments or gaps between the visible segments.
-
Click OK.
Alternative methods of editing the line style
You can also access line style editing via one of the following methods:
-
Right-click on a line to open its context menu, then hover over
 Edit and select
  Line Style....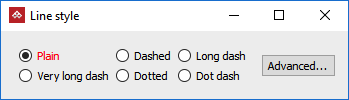
-
On the Edit ribbon tab, go to the Properties group and select
 Properties. See here.
In either case, the Advanced... button opens a panel for more comprehensive line style editing.
Advanced line style settings
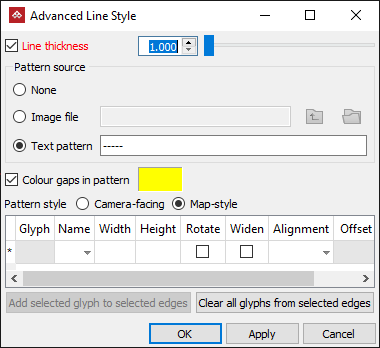
Line thickness
To alter the thickness of a line, select Line thickness and move the slider or enter a value then click Apply.
Pattern source
Use Pattern source to change the line style pattern. Select from one of these options:
-
None: Make the line solid (i.e. no pattern).
-
Image file: Click
 and browse to open an image file as the basis for the line pattern.
 -
Text pattern: Type a pattern in the text field.
Note: The tool produces a linear On-Off pattern along a line. Dark colours and letters equate to On, or visible segments, taking the assigned line colour. Light colours and spaces equate to Off segments or gaps between the visible segments.
Colour gaps in pattern
Select Colour gaps in pattern to nominate a colour for the Off segments instead of using invisible gaps. Click the colour box to select a colour from the palette. Double click to open the advanced Select a colour tool.
Pattern style
Choose the behaviour of the pattern when changing viewing angle.
-
Camera-facing means that the pattern is created from the viewpoint of the camera. This can result in the pattern appearing to slide along slightly as the camera moves around.
-
Map-style means the pattern is fixed with respect to the background, as if drawn directly onto a map. This style of pattern remains static on the background as the camera moves around.
Glyphs
Glyphs are basic shapes that can be incorporated into the line pattern. The glyph control table provides a wide range of settings such as Width, Height, Rotate, Widen, Alignment and Offset distance. These allow tight control on placement of the glyphs as well as behaviour in the image, such as whether the glyphs are attached to the line or can rotate freely around the line.
Tip:
You can select
individual line segments using the edge selection tool  and add or clear
glyphs on them by selecting glyphs and clicking the appropriate
Add selected glyph to selected edges button or Clear
all glyphs from selected edges button.
and add or clear
glyphs on them by selecting glyphs and clicking the appropriate
Add selected glyph to selected edges button or Clear
all glyphs from selected edges button.
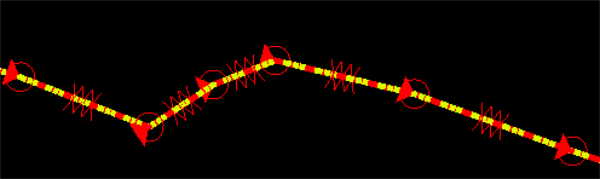
Example 1. A red line based on a text pattern and utilising glyphs. Transparent spaces have been replaced with the colour yellow.
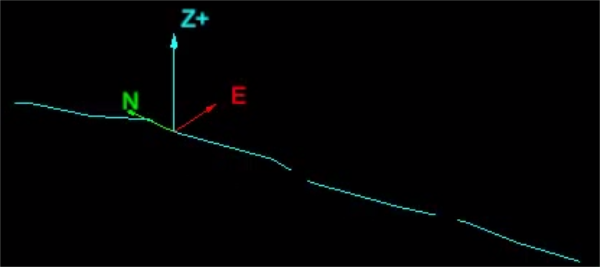
Example 2. A light blue line based on an image file shown below. The black section in the image file is replaced by the line colour (light blue), and the white section represents the transparent space between the coloured line regions.
The image file used with the line style tool. It is just a thin strip with black and white regions.

The final line style shows the light blue line with short gaps. The gaps correspond to the white sections in the original image file.
