Project
Source file: project-to-group.htm
The Project tools enable you to project primitives onto other objects.

|
|
Project to Surface Project selected points or lines vertically to a surface. |
|
|
Project to Plane Project selected points to a plane. |
|
|
Project to Edges Project selected points to a set of edges, if within specified tolerance. |
Project to Surface
The Project to Surface tool enables you to project 2D lines and polygons onto a topographic surface. This can be useful if, for example, you are creating a topographic surface and want to select the Split triangulation along edge constraints option. See Topographic Surface.
-
To project a line of polygon to a surface:
-
On the Edit tab, in the Project group, click
 Project to Surface.
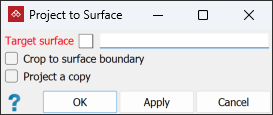
-
Select the Target surface for the lines and or polygons.
-
Select the lines
 or polygons
  to project.
 -
Select the Crop to surface boundary to trim the lines at the surface boundary or scale polygons to fit the outer edge of the surface.
-
Select Project a copy to leave the original points in place, and create copies projected to the edge. Clear this option if the points are to be moved.
-
Click OK or Apply. The line or polygon will be draped to the selected surface.
-
|
|
|
|
|
A projection applied to a polygon outside the surface boundary. Before (left). After - cropped to surface boundary (centre). After - not cropped (right). |
||


Project to Plane
The Project to Plane tool enables you to fill small holes in data, such as projecting toes on benches or behind windrows. Create lines, then project them at suitable angles to create surfaces of greater accuracy.
-
To project objects to a plane:
-
Select the objects (lines or points) to be projected.
-
On the Edit tab, in the Project group, click
 Project to Plane.
-
Select the Projection plane type using one of the options from the drop-down list.
The projection plane options are:

Three points
Define the plane by specifying three points.

Point and normal
Define the plane by specifying one point and defining its normal direction.

Point and orientation
Define the plane by specifying one point and orienting the plane so the current view is its normal.

Facet and offset
Pick a triangle to define the plane's orientation, and then specify how far above or below that facet the plane should be.

Point, strike and dip
Define the plane by specifying a point and then providing dip/strike angles to specify the orientation of the plane through that point.

Axis aligned
Define the plane by selecting an axis pair then picking a point to define the offset along the third axis.

Action plane
Use the action plane of the current view.
-
Specify a Projection direction for the lines or points.
The projection direction options are:

Two points
Define the direction by specifying two points.

Facet
Make the direction perpendicular to a selected facet.

Axis aligned
Define the direction by an axis of the view window.

Bearing and inclination
Define the direction by a bearing and inclination angles.

Action plane axis
Define the direction by an axis of the action plane.
-
Select Project a copy to leave the original points in place, and create copies projected to the edge. Clear this option if the points are to be moved.
-
Click OK or Apply.
-
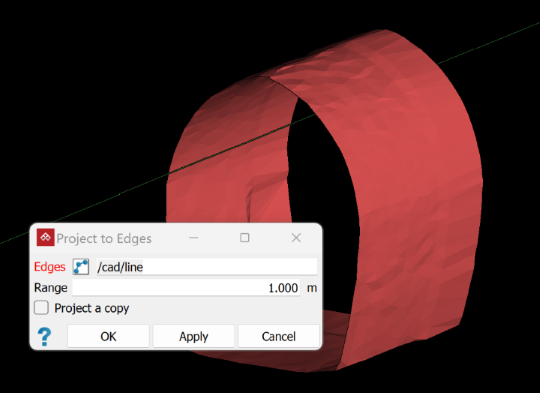
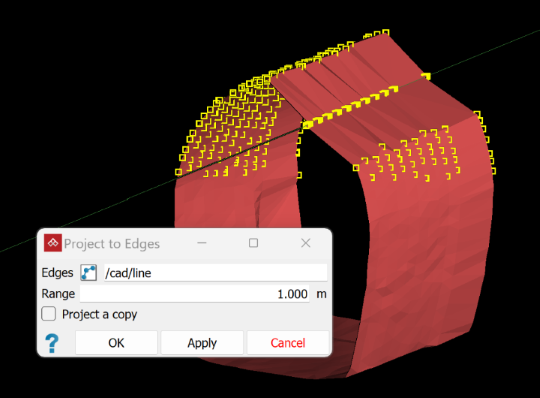
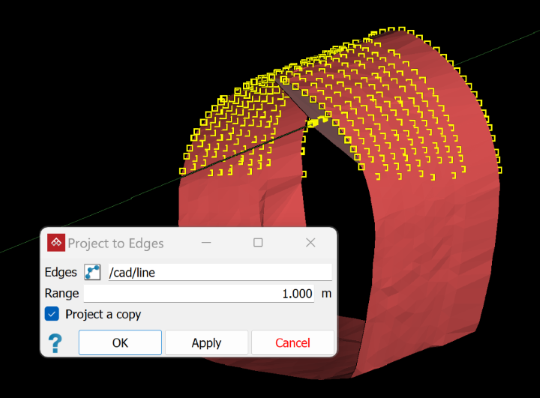
Project to Edges
The Project to Edges tool enables you to project a set of selected points, within a specific range, to an edge or set of edges.
-
To project to edges:
-
On the Edit tab, in the Project group, click
 Project to Edges.
 -
With
 (Select object) or
  (Select points), select the projection edge object, to populate the Edges field. Alternatively, drag the object from the project explorer into the Edges field.
Note: The Edges field will only accept a single object. If you drag in a new object it will replace the previous one.
-
Enter the maximum distance in the Range field.
Tip: If you are unsure of the distance, measure it with the
 Distance query tool. See Distance.
 -
With the
(Select points) type, select the group of points to project to
the line or edge of the polygon.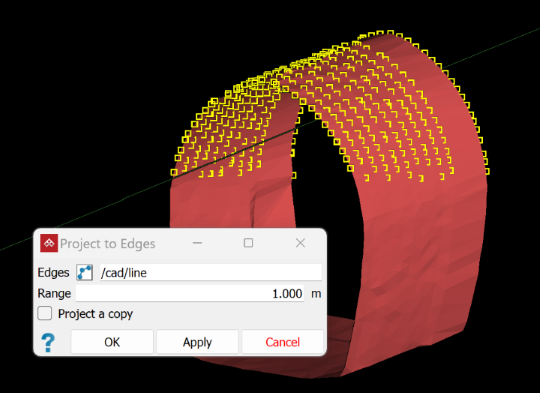
Select a group of points (left) or a whole surface (right).
Note: The project to edges tool cannot be used on scans.
-
Select Project a copy to leave the original points in place, and create copies projected to the edge. Clear this option if the points are to be moved.
-
Click OK or Apply.
-
|
|
|
|
Points projection without copying (left), or with copying (right) |
|
|
|
|
|
Surface projection without copying (left) or with copying (right) |
|
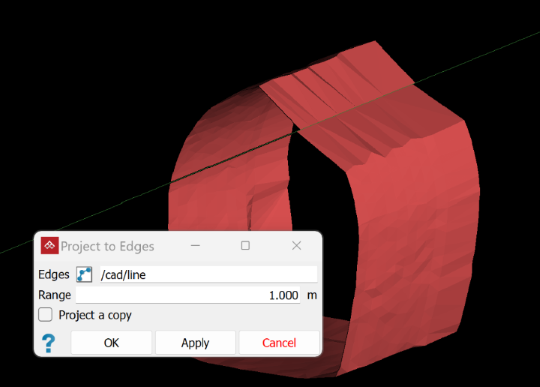
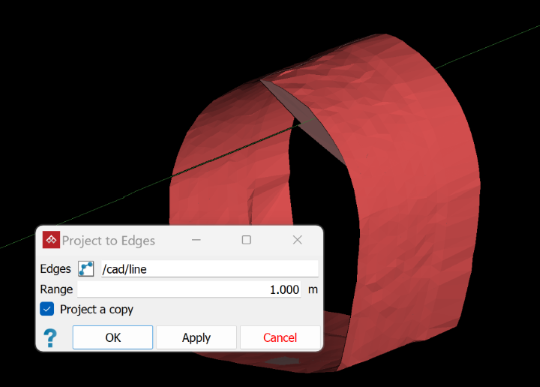
Note: Only points or vertices within the specified range (1 m in this example) are projected.
