Apply Image to Object
How to apply imported images and photographs to objects using Two-point or Multi-point methods.
These instructions explain methods for applying imported images to the surface of objects.
Firstly, images
(including photographs) are imported using the ![]() Import command.
Import command.
The import process will end with panels for applying the image to an object. There are two methods available for aligning the image onto the surface of the object:
- Two-point method
- Multi-point method
Two-point method
Two points positioning uses two representative points on the input image and aligns them onto two points in the 3D view selected by the user. This approach maps the input image straight onto the object as if it was illuminated by a projector. There a options to assist placement and orientation of the input image during the mapping process. A coordinates table lists the corresponding image points with respect to their equivalent points on the surface in the 3D view window. These can be manually edited or automatically entered by selecting points on either the image or surface.
-
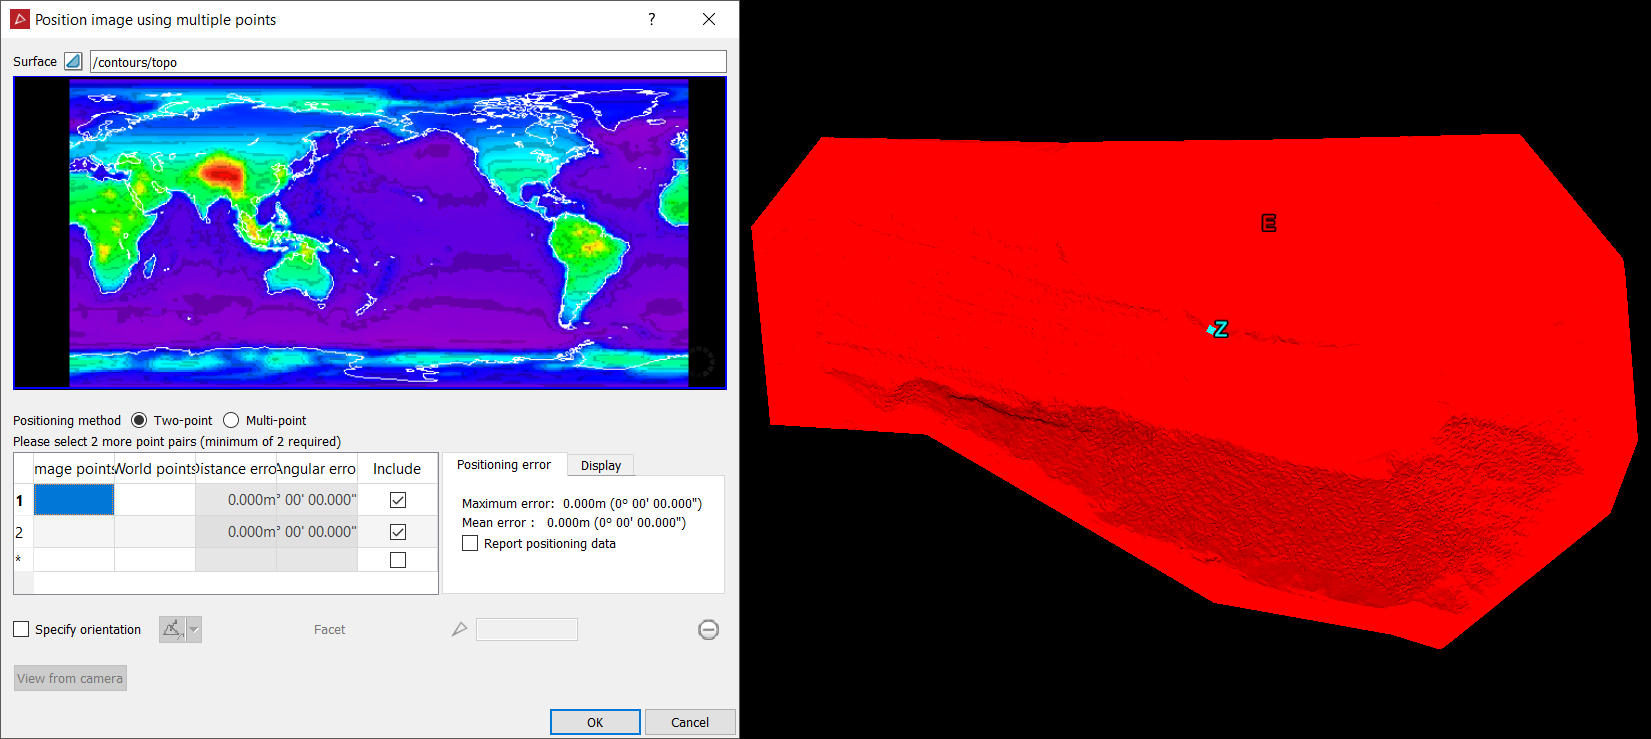
Select the surface to map the input image onto.
-
Two reference points are used to align the image - Points "1" and "2". Click into the first row of the coordinates table in the Position image panel to select where Point 1 will be positioned on the surface in the 3D view window. Manually input the coordinates, or move the cursor to the location on the surface and click at that point (the coordinates will be transferred to the coordinates table).
-
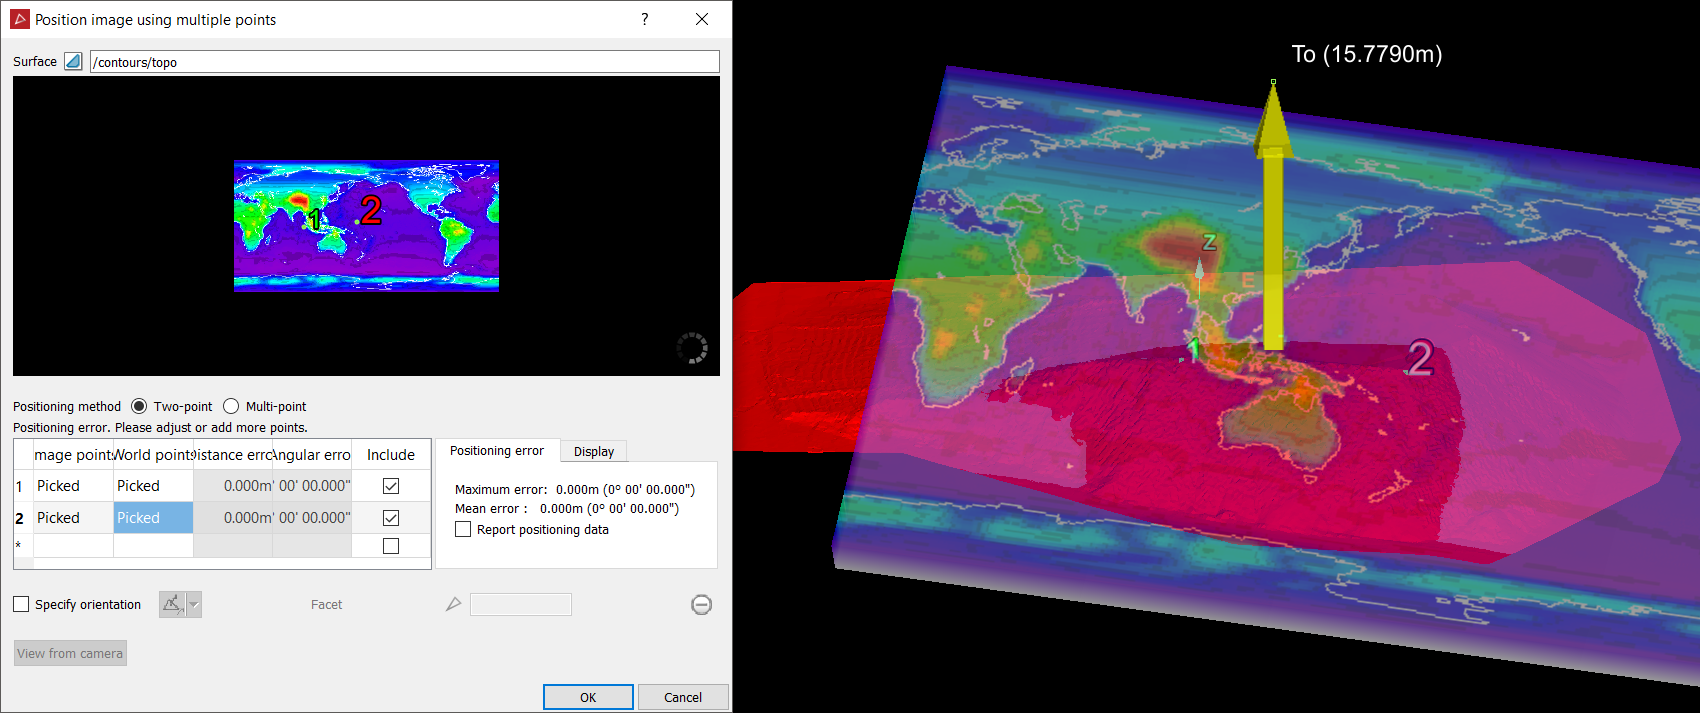
Then manually enter values for Point 2, or click on the desired point on the surface in the 3D view window. The points are indicated with their appropriate numbers on the surface and a filtered version of the input image is applied to the surface.

-
Specify orientation provides other methods to apply to the mapping of the image - given the initial positioning of the reference points Point 1 and Point 2. These points will always remain fixed.
-
 Two points - the
user can create a vector, which will swivel the image around the reference
points
Two points - the
user can create a vector, which will swivel the image around the reference
points -
 Facet - will align
the mapping image with the plane of a selected facet.
Facet - will align
the mapping image with the plane of a selected facet. -
 Axis aligned - aligns
the mapping image with either the X,Y or Z axis.
Axis aligned - aligns
the mapping image with either the X,Y or Z axis. -
 Bearing and inclination
- this creates a vector using bearing and orientation directions,
which will result in swivelling the mapping image around the reference
points.
Bearing and inclination
- this creates a vector using bearing and orientation directions,
which will result in swivelling the mapping image around the reference
points. -
 Action plane of active view aligns the mapping image with either the
X or Y axis.
Action plane of active view aligns the mapping image with either the
X or Y axis.
-
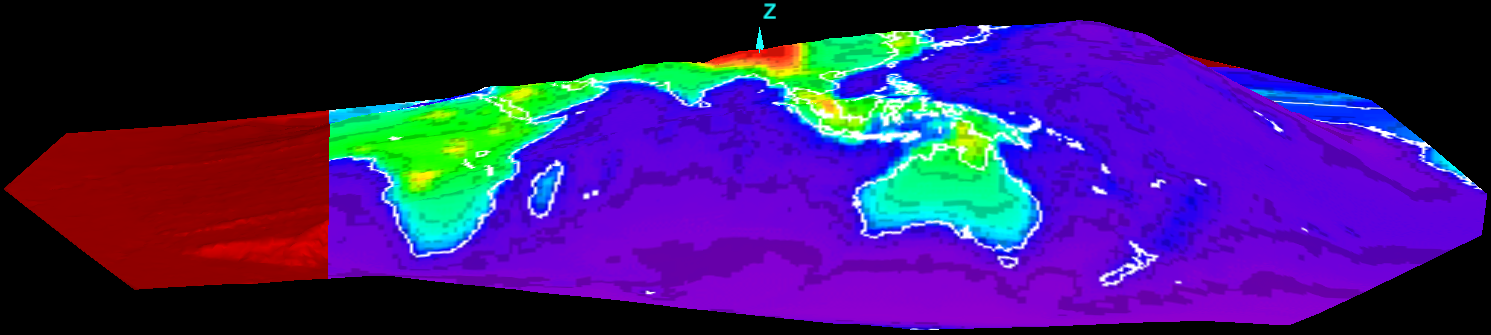
Click OK to complete the mapping process.
Multi-point method
Multi-points mapping applies a camera lens algorithm to the input image and attempts to undo the lens distortion, then apply the image onto a surface. The user must select at least eight matching points corresponding between the input image and the surface to be mapped onto. The algorithm will benefit from more points to improve accuracy. A coordinates table lists these corresponding values, which can be manually entered or points can be directly selected on the image and surface. Positioning error gives an indication of the variation between the actual points selected by the user and the estimation of points determined by the algorithm. Display options allow the user to see the difference between actual selected points and the algorithm mapping of these points, allowing for visual fine tuning of the positioning of these points.
-
Select eight or more points on the image and corresponding points on the surface to be applied, similar to the procedure above for Two points. Zoom in on the image and 3D view window to examine the point locations in detail.
-
Click OK to complete the mapping process.
Using the Display options provides a visual guide to the algorithm process and allows comparison between the user inputs and equivalent points determined by the algorithm.