Fix
Source file: fix-group.htm
The Fix group tools enable you to make various repairs to surfaces, scans or selections.

|
|
Join and Close (Alt+S) Close selected edges or surfaces to join adjacent objects. |
|
|
Despike (Ctrl+Shift+D) Remove spikes from surfaces. |
|
|
Fix Surface Automatically fix common issue with surfaces. |
|
|
Fill Holes (Ctrl+Shift+F) Fill holes in a surface. |
|
|
Snap Points Snap points together if within a specified tolerance of each other. |
|
|
Explode (Ctrl+Shift+E) Break apart edge and facet networks into individual components. |
|
|
Smooth Scan Reduce noise in scans and point clouds by smoothing points. |
Join and close
The Join and close tool (Alt+S) allows you to connect
groups of lines together.
-
Select the ends of the lines
 to be joined.
 -
On the Edit tab, in the Fix group, click
 Join and Close.
The closest end points of the selected lines will be joined together.
Note: If any end points were not correctly
joined, select those end points with ![]() (Select points)
and run the tool again.
(Select points)
and run the tool again.

Contours with removed edges (left) and the edges reconnected (right).
Despike
The Despike tool (Ctrl+Shift+D) removes spikes caused by dust, vegetation and other artefacts that can appear when creating a data model.
-
Select the surface

 to despike.
 -
On the Edit tab, in the Fix group, click
 Despike.
The tool will remove all the spikes that it can. Results are presented in the report window.
Note: If unwanted spikes remain after running the despike tool, these must be manually deleted. Follow the next steps.
-
Select
 (Facet selection) type.
 -
Select the facets that form the unwanted spikes by drawing selection boxes around them. Hold Shift down to select multiple areas.
-
Press Delete to remove the selected facets.
-
Run
 Fill Holes to close the holes that remain. See Fill Holes.


A data model before (left) and after (right) despiking.
Fix Surface
The Fix surface tool enables you to repair self-intersections and inconsistent normals on surfaces.
- Select
the surfaces that need repair.
- On the
Edit tab, in the Fix group, click
 Fix Surface.
 - Select or clear the fix options, as required:
- Fix self intersections: Fix cases where the surface intersects itself.
- Fix trifurcations: Fix cases where there are more than two facets sharing the same edge on a surface.
- Fix facet normals: Orient facet normals to point in the same direction; up for surfaces, out for solids.
- Collapse vertical facets: Remove vertical facets and close the resulting hole. This is done by either moving the points along the bottom of the vertical region upwards or the points along the top downwards, adding points as necessary to neighbouring non-vertical facets to maintain a consistent surface. Select Collapse direction as appropriate.
-
Click OK or Apply.
A progress panel will display while the surfaces are repaired. Results are presented in the report window.

Fill Holes
The Fill Holes tool (Ctrl+Shift+F) closes in a surface. Holes can appear when editing a surface.
-
Select the surface
to be repaired. -
On the Edit tab, in the Fix group, click
Fill Holes.

The above example
shows a data model before and after filling holes.
Snap Points
The Snap Points tool enables you to move points that are close together to the same position.
Corresponding points can be very close but not in exactly the same position as a result of:
-
Using the
 Extend tool
on fitted planes. Numerical rounding means the points are very close
but not exactly on the same point.
Extend tool
on fitted planes. Numerical rounding means the points are very close
but not exactly on the same point.Or
-
Importing data from other software packages. This data can have points that should be in the same position, but are not quite.
-
To snap points together:
-
On the Edit tab, in the Fix group, click
 Snap Points.
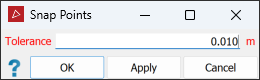
-
Select the two points to be snapped.
-
In the Tolerance field , enter the required snap tolerance to define the maximum distance between points for a snap to occur.
-

Close up of two planes with a result after snapping the points
Explode
The Explode tool (Ctrl+Shift+E) breaks single objects such as surfaces and edge networks into multiple objects, such as individual lines, loops or networks, and surfaces, based on edge connectivity.
-
To explode objects:
-
Select the object to be exploded.
-
On the Edit tab, in the Fix group, click
 Explode.
 The object is exploded and replaced with a new secondary container storing the resulting objects. The new container takes the name of the original object while the resulting objects are named fragment, fragment 2, fragment 3 etc.
-

Before and after exploding an edge network.
Smooth Scan
The Smooth Scan tool reduces the noise or range error in scans and point clouds. This can be useful for clear identification of features.
Note: Use Smooth Scan with caution as it moves points from their measured positions and can round edges or corners.
-
To smooth a scan:
-
Select the scan

 to be smoothed.
 -
On the Edit tab, in the Fix group, click
 Smooth Scan.
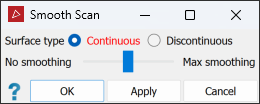
-
Select the appropriate Surface type option:
Select Continuous if the data to be smoothed has no sharp corners or edges.
Select Discontinuous if the data to be smoothed includes sharp corners or edges. This decreases the rounding of edges and corners.
-
Use the smoothing slider to set the optimum degree of smoothing.
-
Click OK or Apply.
Tip: If there are objects in front of the main surface, select Discontinuous for better results.
-

Before smoothing (left), and smoothing applied (right).
