View
Source file: home-view-group.htm
The View group provides quick access to tools for creating and saving views.

|
|
New View (Ctrl+Shift+N) Open an empty new view window. |
|
|
View Selection (Ctrl+N) Open a new view window containing the current selection. |
|
|
Saved Views Save a view, open and manage saved views. |
New View
Click ![]() New View tool (Ctrl+Shift+N) to create a blank view window ready for dragging objects into or creating new objects.
New View tool (Ctrl+Shift+N) to create a blank view window ready for dragging objects into or creating new objects.
To create a blank view window go to the
Home tab, navigate to the View group, click ![]() New View.
New View.
|
A new view window will be created with the tab labelled <Empty>. This window will have no data loaded. |

|
Load data in the new blank window with one of the following methods. Expand below for details.
The object will be displayed in the new window and its tab will rename to the object in display. For example:
|
|

|
|
The object will be displayed in the new window and its tab will rename to the object in display. For example:
|

|
View Selection
The View Selection tool (Ctrl+N) allows you to open a new view window loaded with a combination of selected objects in the project explorer, from within another view window, or from both.
Tip: This is handy if there are multiple objects displayed in the same view window. Instead of looking for the objects in the project explorer, you can quickly identify and select the objects that require further independent work in the new view window.
For example further independent work may be needed if:
- You need to run through different scenarios or rehabilitation derived by using a different set of tools and to be able to compare the end results.
- You have been working on a set of objects and now you need to use a tool from a different Maptek application, such as Vulcan or GeologyCore in a new window.
- You have multiple view windows open displaying different domains of the mine site and you would like to view them all together in the one window.
-
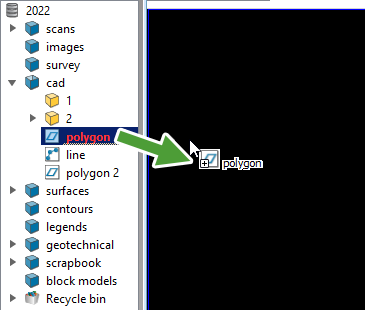
Follow these steps to make and view selections:
-
Identify the objects in the view window and or in the project explorer that you would like to view together in a new window.
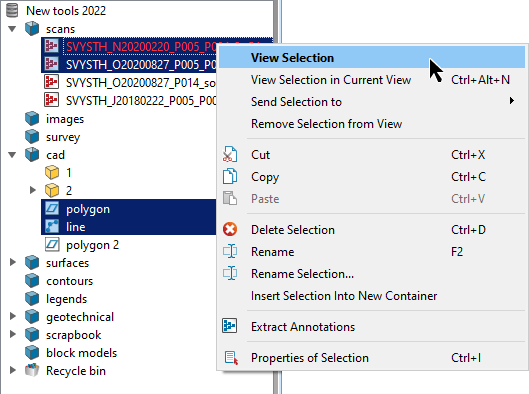
- Select the identified objects.Tip
Use the
 (Select objects) type for selections.
To make multiple selections from the view window press and hold the Shift key while making your selections.
To add selections from the project explorer release the Shift key and press and hold the Ctrl key while making your selections.
-
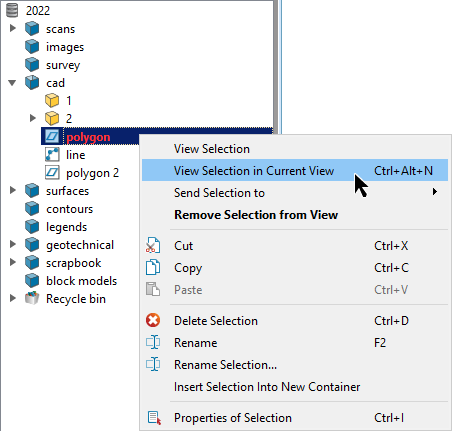
On the Home tab, in the View group, click
 View Selection.
Alternatively, select View Selection from the context menu.
The selected objects are displayed in a new view window.
Saved views
Save views to return to commonly used or important working areas. Saving a view records the objects currently loaded in a view window so they can be recalled later.
Saving a view
-
To save a view for recall later:
-
Load the required objects in a view window.
-
Set the view position and orientation as required.
-
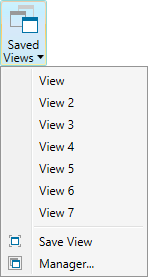
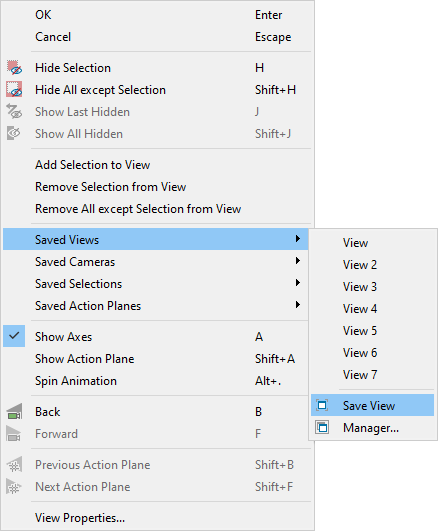
On the Home tab, go to the View group. From the
 Saved Views drop-down list select
  Save View.
Or
Right-click in the view window hover over Saved Views then click Save View.
-
Saved views are listed under the Saved view menu.
Views saved in this manner are named View, View 2, View 3 etc.
Loading a saved view
-
To load a saved view, do either of the following:
-
On the Home tab, go to the View group. From the
Saved Views drop-down list select a view from the list.Or
-
Right-click in the view window hover over Saved Views then select a saved view from the list.
-
A new view
window
will open, containing the objects recorded in the saved view.
Managing saved views
To manage saved views:
-
Load the required objects in a view window.
-
On the Home tab, go to the View group. From the
Saved Views drop-down list select  Manager....
Or
Right-click in the view window hover over Saved Views then select
Manager....Apply the following options, as required:
-
Enter a new name for the saved view in the Name field.
-
Click
 to save the current view. The new
view will be added to the Saved Views name list.
to save the current view. The new
view will be added to the Saved Views name list. -
Select a view in the list then click
 to remove it from the list.
 -
Import or export views using the
 and
and  buttons. Click
either button to open a browser window. Browse to the save location. Views are saved with the file extension
buttons. Click
either button to open a browser window. Browse to the save location. Views are saved with the file extension *.vwr.
-
