Map Section To Plan
Present a Section to Plan/Convert Section to Plan
The Map Section to Plan option to select objects in section view and copy them into plan view for drafting purposes.
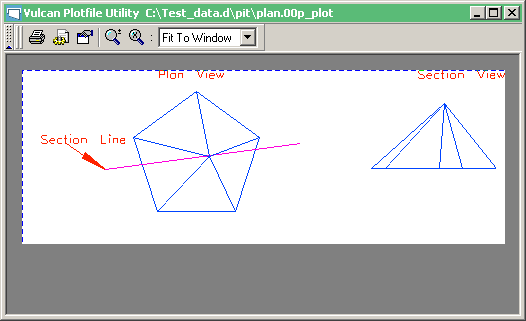
Figure 1 : Plot showing a section being mapped to plan view
Instructions
On the Design menu, click Map Section to Plan to display the Allocate Layer panel.
Layer
Select the layer from the drop-down list, or enter a new name to create a new layer. If you select an existing layer that is already loaded, subsequent digitising will be appended to this layer. If you select an existing layer that is not loaded, you will be prompted to specify whether you want to load the existing layer or overwrite its existing content.
Description
Enter a description of this layer. The description can contain up to 80 alphanumeric characters and can include spaces. If a description is not entered, a default description will be used instead. If the selected layer already has an assigned description, it displays when the layer is selected. Existing layer descriptions can be overwritten.
Click OK.
You will then be prompted to select a section line. This can be any line currently visible on the screen. Diagram 2 illustrates how a section view can be added to supplement the current plan view. This option was used twice to create the two sections views in diagram 2.
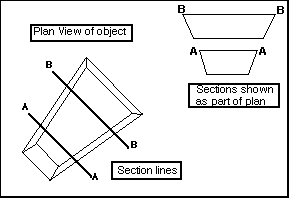
Figure 2 : Adding a Sectional View
Once you have selected a section line, you are prompted to indicate left position. This is the left position for the section view.
The Multiple Selection box is then displayed. From this box choose your method of selecting the objects to be mapped to Plan view and select the objects.
Once you have selected your objects, cancel to exit the selecting mode. The objects are then copied and displayed in Plan view.
Convert section to 2D

