Layer 
Create a New Layer
Use the Layer option to define a new (or existing) design layer to which subsequent digitising will be assigned. Changes to existing layers, including additions, can be made by opening the required layer. Refer to the File > Layers > Load option for more information on how to load existing layers.
This option can also be accessed by selecting the New Layer button ![]() from the Design toolbar.
from the Design toolbar.
Instructions
On the Design menu, point to Create, and then click Layer to display the Allocate layer panel.
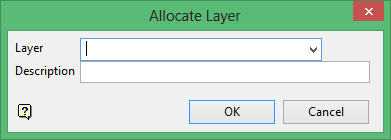
Name
Select the name of the layer from the Name drop-down list, or enter a new name to create a new layer. The name can contain up to 40 alphanumeric characters (spaces are not allowed). If you select an existing layer that is already loaded, subsequent digitising will be appended to this layer. If you select an existing layer that is not loaded, you will be prompted to specify whether you want to load the existing layer or overwrite its existing content.
Description
Enter a description of this layer. The description can contain up to 80 alphanumeric characters and can include spaces. If a description is not entered, a default description will be used instead. If the selected layer already has an assigned description, it displays when the layer is selected. Existing layer descriptions can be overwritten.
Click OK.
The new layer will be opened and you are then able to begin design work. The name of the newly created layer displays through the Status toolbar.
![]()
Figure 1 : The Status toolbar
Use the File > Save option or select the ![]() Save button from the Standard toolbar to save the newly created layer.
Save button from the Standard toolbar to save the newly created layer.
Note: A newly created layer will only be listed in the Vulcan Explorer application after it has been saved.

