Line draw by hand 
Use the Line draw by hand option to create a line that consists of a string of points. While similar to the Line option, the Line draw by hand option does not require you to indicate each individual point in the resulting line. You instead indicate the object's starting point and drag the cursor to draw the line.
This option can also be accessed by selecting the Line draw by hand button from the Draw by Hand toolbar.
The Line draw by hand option uses the configuration settings assigned through the  Configure draw by hand and Preferences options.
The Keyboard Input and Bearing Input toolbars should not be used with the Line draw by hand option. We instead recommend that you use your mouse cursor, a digitiser or a Tablet PC when creating objects with this option.
The Line draw by hand option does not support Smart Snap  mode.
mode.
Instructions
On the Design menu, point to Create, and then click Line draw by hand.
Click to create the first point. If the current working layer has not been defined prior to selecting the Line draw by hand option, then the Allocate Layer panel displays first.
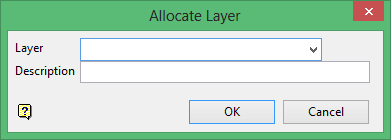
Name
Select the name of the layer from the Name drop-down list, or enter a new name to create a new layer. If you select an existing layer that is already loaded, subsequent digitising will be appended to this layer. If you select an existing layer that is not loaded, you will be prompted to specify whether you want to load the existing layer or overwrite its existing content.
Description
Enter a description of this layer. The description can contain up to 80 alphanumeric characters and can include spaces. If a description is not entered, a default description will be used instead. If the selected layer already has an assigned description, it displays when the layer is selected. Existing layer descriptions can be overwritten.
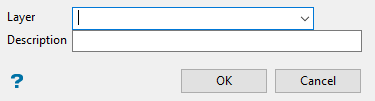
Allocate Layer panel
Name
Select the name of the layer from the Name drop-down list, or enter a new name to create a new layer. If you select an existing layer that is already loaded, subsequent digitising will be appended to this layer. If you select an existing layer that is not loaded, you will be prompted to specify whether you want to load the existing layer or overwrite its existing content.
Description
Enter a description of this layer. The description can contain up to 80 alphanumeric characters and can include spaces. If a description is not entered, a default description will be used instead. If the selected layer already has an assigned description, it displays when the layer is selected. Existing layer descriptions can be overwritten.
Click OK.
Once the first point has been created, drag the mouse cursor to draw the line. Right-click with the mouse to create a break in your line. If you are using a digitiser to create the line, or you are using the Right-click starts a new object preference, then cancelling with the right mouse button will result in the creation of a new object rather than a line break. Refer to the Graphics : Input section of the Tools > Preferences option for more information on the Right-click starts a new object preference.
If you chose to use the Interactive digitising setting (see Configure draw by hand option), then you will need to confirm whether you want to replace the contents of the nominated layer with the new object or append the new object to the chosen layer. If you chose to use the Non interactive digitising setting, then the new object will be appended to the chosen layer.
The line will be assigned the default colour and line type (set through the Status toolbar).
The line will have the name LINE_<n> where <n> is an integer that increases each time a new object is created. Use the Name option (under the Design > Attribute Edit submenu) to change the default line name. The new line will also have a default description consisting of the date and time of creation.

