Transfer
Use the Transfer option allows you to create pexel control points by copying points from a Vulcan object that represents the real-world points. The Vulcan object must be displayed on the screen.The pexel control points will be stored in a nominated pexel file ( <name>.pexel ). This file should be in your current working directory.
Only the real-world locations are copied. The normalised image locations are set to the real-world locations. This means that after the transfer, you will need to modify the normalised image locations ( Modify option).
Instructions
On the Design menu, point to Pexel Control Points, and then click Transfer.
The Multiple Selection box displays. Use the Multiple Selection box to choose your method of selecting the objects and select the objects.
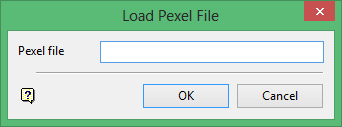
The following panel is then displayed.

Pexel file
Enter, or select from the drop-down list, the name part (<name>) of the pexel file into which the newly created control points will be stored. If the chosen file already contains control points, then you will be asked whether or not you want to overwrite these points.
Click OK.
Select a colour for the control points. Once selected, a message is then displayed informing you that the pixel points will need to be modified.
Click OK to accept the message.
The pexel file is then saved.

