Multi-Replace String
Insert Extra Points into Multiple Line Segments
The Multi-Replace String option to replace a section of an existing string. Unlike the Replace String option, which only inserts points into a single line segment, the Multi-Replace String option will insert points into all line segments that fall in the same X, Y and Z location. The line segments that fall in the X, Y and Z location can be from one or more objects.
Note
The Multi-Replace String option will only affect design objects that are stored in the same layer, i.e. design objects stored in another loaded layer that happen to share the same X, Y and Z location will not be altered.
Instructions
- Select Design menu
- Select Point Insert submenu
- Select Multi-Replace String option
Select the object that contains the string you want to replace.
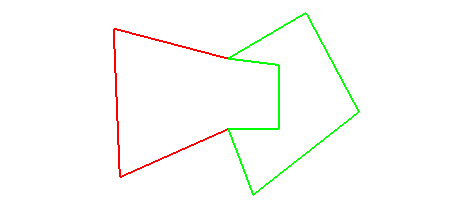
Figure 1 : The Original Objects
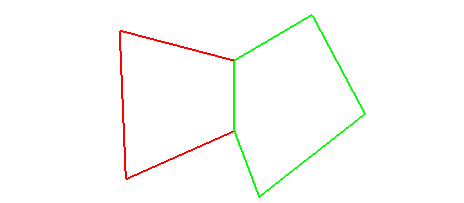
Select the first point of the section of the string that you want to replace. This point will be labelled " S ".
Select the end point of the string. This point will be labelled " E ".
Figure 2 : Indicating the Start and End Points
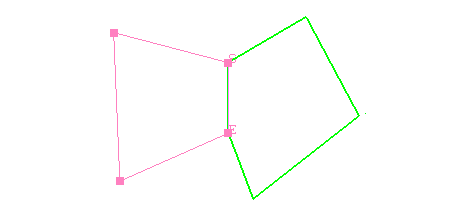
Using any of the available design entry modes, select the points that you would like to include in the string. These points will be placed in the string in the order they are selected. To avoid crossovers, ensure that the direction of these points is the same as the line. Use the [Backspace] key to clear a recently indicated point.
Note
- A polygon that isn't closed will be treated as a line and the incorrect sides may be moved. To ensure that a polygon is closed, use the Close Polygon option (under the Design > Attribute Edit submenu).
- If you have selected a polygon, then you will need to specify which string you want to replace rather than indicate the points to insert.
Figure 3 : Inserting the Extra Points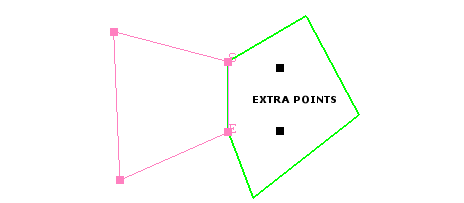
Cancel when you have finished indicating the new points. All line segments including the newly created ones will be highlighted.
Specify whether or not to interpolate the newly inserted points. Select Do not interpolate Z to assign the default Z value, which is defined through the toolbar, to the inserted points. Select Interpolate to assign Z values that are equally spaced between the start and end elevations.
You will then be asked whether you want to retain or reject the changes.
Figure 4 : The Updated Objects