Expand 
Use the Expand option to increase (expand) or decrease (shrink) proportionally the size of a polygon by a given distance. It is possible to maintain the original polygon and create another polygon at the increased or decreased size. You can also specify the plane in which you want to work.
The expansion or contraction is performed such that the perpendicular distance between a line segment on the original polygon and the corresponding line segment on the expanded polygon is the user-defined distance.
If you maintain the original polygon and create an expanded copy, then you can check the perpendicular distance through using the Analyse/Angle Distance button ![]() on the Analyse toolbar.
on the Analyse toolbar.
This option can also be accessed by selecting the Expand button ![]() from the Modify toolbar.
from the Modify toolbar.
Instructions
On the Design menu, point to Polygon Edit, and then click Expand to display the following panel.
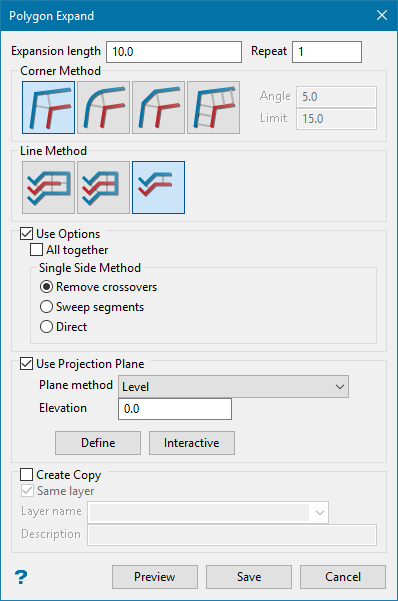
Expansion length
Enter the length by which to increase or decrease the polygon. A positive number will increase the size of the polygon, while a negative number will decrease it. When using a negative number, the resultant shape of the object may change if the specified value is greater than the object's actual width/radius. The unit of measurement does not need to be entered, as this will be the same as the units used in the database.
Repeat
Enter the number of consecutive polygons that are to be created. Each polygon will be created at a separation distance specified in Expansion length.
. 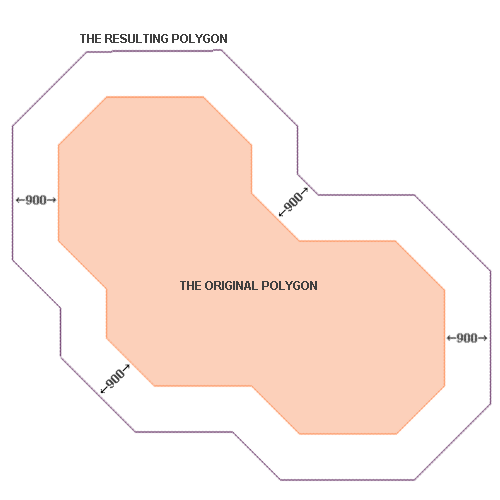
Figure 1 : Increasing the Original Polygon by 900m
Corner Method

|
Connect offset edges with the intersection. Note that in some cases this could generate spikes. |

|
Connect offset edges with an arc, the discretisation of the arc will be based on the angle parameter below. |

|
Connect offset edges with a mitre, the maximum length (from the offset point) to the mitre is specified in limit below. |
Line Method

|
Both sides past end.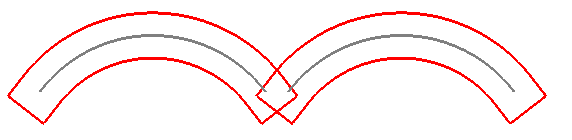 |

|
Both sides up to the end.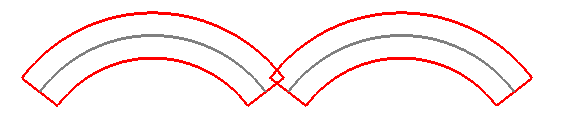 |

|
Single side.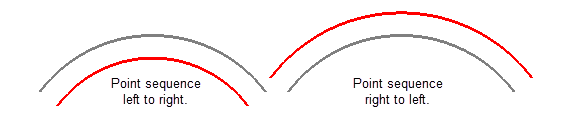 |
Use Options
All together

All together disabled
With All together disabled the polygons will be expanded individually, and their orientation will be ignored. (Clockwise / counter clockwise polygons will both expand out if the expansion length is positive and both "expand" in if the expansion length is negative). Also, with all together disabled they are allowed to expand on top of each other.

All together enabled
With All together enabled, clockwise polygons will expand out and counter clockwise polygons will shrink in with positive expansion length. They will also join together.
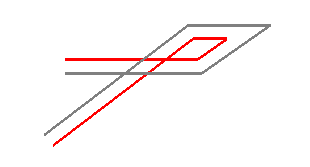
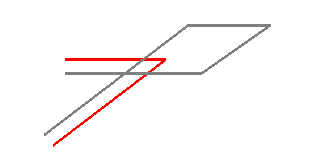
Remove crossovers
Within a single layer, if a section exists where the line crosses itself then this option will remove the portion that is beyond the intersection point.
Remove crossovers disabled
Remove crossovers enabled
Use Projection Plane
Select this option to work in a plane other than plan view. Select the Plane method from the drop-down list to define a plane with the selected method. See below for explanations of the available plane methods.
A flat plane at the given elevation.
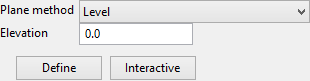
Elevation
The elevation can be defined two ways:
-
Type the elevation into the textbox.
-
Click the Define button and then digitise the elevation on the screen.
Interactive
The Interactive button can be used to display the current plane definition or change it by dragging the handles around.
A vertical plane at the given easting.
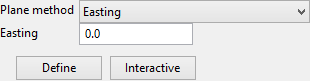
Easting
The easting can be defined two ways:
-
Type the easting into the textbox.
-
Click the Define button and then digitise the easting on the screen.
Interactive
The Interactive button can be used to display the current plane definition or change it by dragging the handles around.
A vertical plane at the given northing.
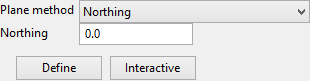
Northing
The northing can be defined two ways:
-
Type the northing into the textbox.
-
Click the Define button and then digitise the northing on the screen.
Interactive
The Interactive button can be used to display the current plane definition or change it by dragging the handles around.
A plane defined along a selected line segment at the given angle (dip).
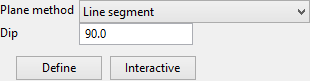
Dip
Enter the dip angle.
Define
Click this button to select a line segment of an existing object.
Interactive
The Interactive button can be used to display the current plane definition or change it by dragging the handles around.
Similar to the Line Segment option, except the segment is defined by interactively defining two points.
Dip
Enter the dip angle.
Define
Click this button to digitise the two points.
Interactive
The Interactive button can be used to display the current plane definition or change it by dragging the handles around.
A plane defined by interactively defining three points.
Define
Click this button to digitise the plane, defined by three points.
Interactive
The Interactive button can be used to display the current plane definition or change it by dragging the handles around.
A plane defined by the strike and dip.

Strike
Enter the strike angle.
Dip
Enter the dip angle.
X, Y, Z
These fields show the coordinates of the origin of the plane. The origin can be defined by clicking the Define button and digitising it on screen or by entering the coordinates directly into the textboxes.
Define
Click this button to digitise the origin of the plane.
Interactive
The Interactive button can be used to display the current plane definition or change it by dragging the handles around.
A plane determined to be the best fit, in a least squares sense, to a selected point cloud.
Define
Click this button to select the point cloud.
Interactive
The Interactive button can be used to display the current plane definition or change it by dragging the handles around.
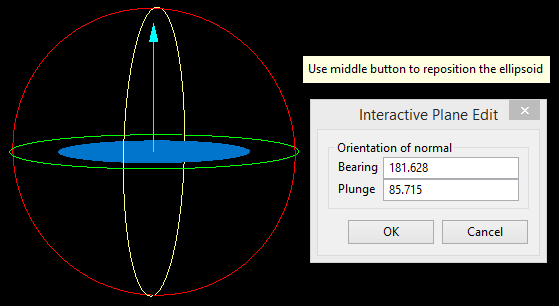
A plane defined interactively within Vulcan.
Bearing / Plunge
Enter the bearing and plunge angles, or click the Interactive button to select the bearing and plunge interactively.
Interactive
The Interactive button can be used to display the current plane definition or change it by dragging the handles around.
The current view in Vulcan.

Interactive
The interactive button can be used to display the current plane definition or change it by dragging the handles around.
A plane defined by the equation of the plane.
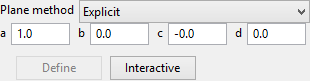
The equation of the plane is ax + by + cz + d = 0.
a, b, c, d
Click the Interactive button to digitise the bearing and plunge, or enter the values for the equation directly into the textboxes.
Interactive
The Interactive button can be used to display the current plane definition or change it by dragging the handles around.
To create a copy of a polygon, follow these steps:
-
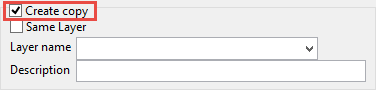
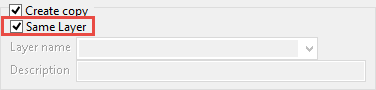
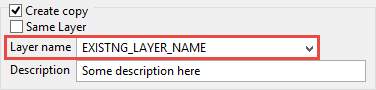
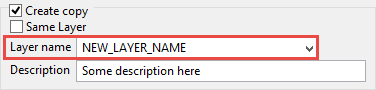
Click Create copy.
-
Choosing a destination. You have three choices: the same layer, another existing layer, or a new layer.
-
Same layer: Select the option to save it to the same layer by clicking Same layer.
-
An existing layer: Leave the option Same layer unchecked. Use the drop-down list to select another existing layer the object will be copied to.
-
A new layer: Leave the option Same layer unchecked. Type a new layer name into the Layer name textbox.
-
-
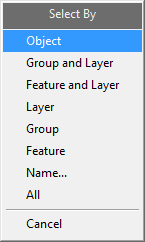
Click the Select button, then select the object(s) you want to copy.

-
Click Cancel on the context menu, or right-click anywhere in the Vulcan workspace to exit the Select mode and return to the Filter panel.
-
Click the Save button.

Important: Be sure to save the changes to your Workbench session. If you do not save the changes any edits will be lost.

