Pairs
Use the Pairs option to manipulate a pair of polygons that share the same points. The Pairs option incorporates all of the Point Insert and Point Edit functions while allowing two polygons that share the same points to be manipulated at once. For example, when the first polygon is manipulated, the shared points in the second polygon will be manipulated in the same way.
The Pairs option is useful when updating geologic contacts or pit layouts.
Instructions
On the Design menu, point to Polygon Edit, and then click Pairs option to display the Edit Polygon Pairs selection box.
Select the necessary polygons. Once both polygons have been selected, the Edit Polygon Pairs dialog box displays.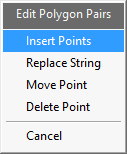
Insert Points
Use this option to insert extra points into a particular line segment of a string.
Replace String
Use this option to replace a section of an existing string.
Move Point
Use this option to move a point to a new position.
Delete Point
Use this option to remove individual points from an object.
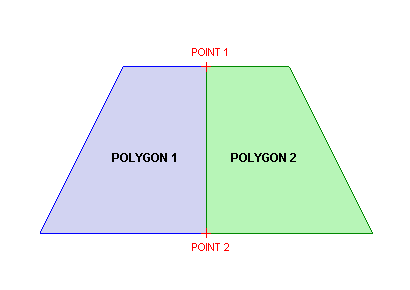
Figure 1 : The Original Polygons
Select the point that you want to delete. Once selected, the chosen point is deleted.
Figure 2 : The Selected Point
You are then prompted to select another point. Cancel when you have finished deleting points.
Cancel again to exit the Edit Polygon Pairs dialog box. You are then asked whether you want to retain or reject the changes.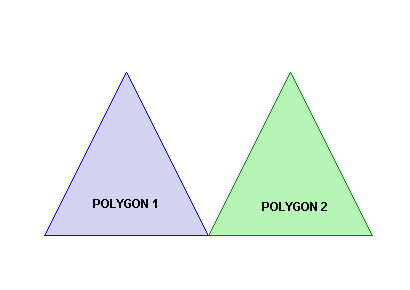
Figure 3 : The Resulting Polygons
Figure 4 : The Original Polygons
Select the point that you want to move.
Figure 5 : The Selected Point
Using any of the design entry modes, indicate the point's new position. Once indicated, the point is then shifted to its new position.
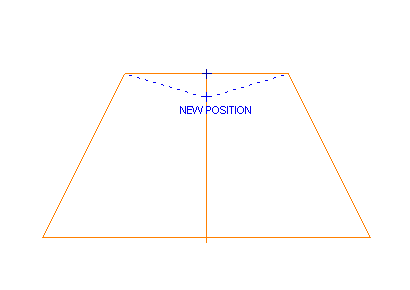
Figure 6 : Indicating the New Position
You are then prompted to select another point. Cancel when you have finished moving points.
Cancel again to exit the Edit Polygon Pairs dialog box. You are then asked whether you want to retain or reject the changes.
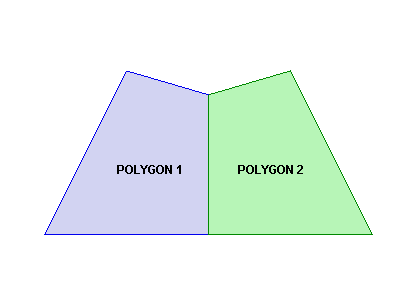
Figure 7 : The Resulting Polygons
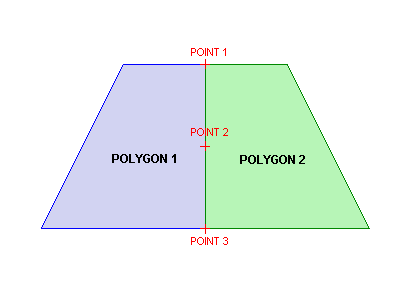
Figure 8 : The Original Polygons
Using any of the design entry modes, select the first point of the section of the string that you want to replace. This point will be labelled S.
Select the end point of the string. This point, which must be a point that was digitised after the start point, will be labelled E.
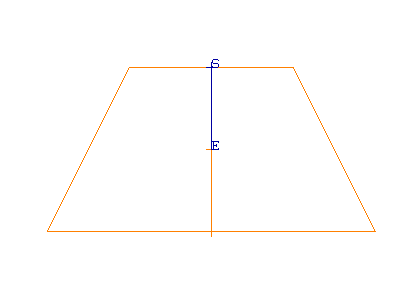
Figure 9 : The Chosen Line Segment
Using any of the design entry modes, indicate the points that you want to include in the string. These points will be placed in the string in the order they are selected. To avoid crossovers, ensure that the direction of these points is the same as the line.
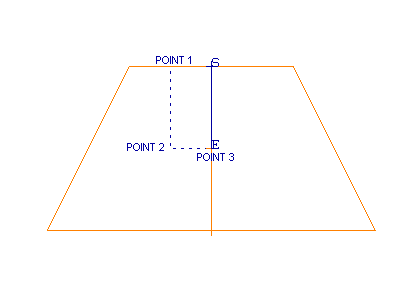
Figure 10 : Indicating the New Segment
Cancel when you have finished indicating the new points. All line segments including the newly created ones will be highlighted.
Select whether or not to interpolate the points. Do not interpolate Z assigns the default Z value to the inserted points. Interpolate assigns Z values to the inserted points that are equally spaced between the start and end elevations.
You are then prompted to select another segment, i.e. indicate the first point followed by the second point. Cancel when you have finished indicating points.
Cancel again to exit the Edit Polygon Pairs dialog box. You are then asked whether you want to retain or reject the changes.
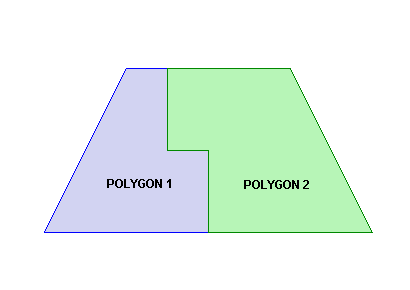
Figure 11 : The Resulting Polygons
Figure 12 : The Original Polygons
Select the line segment, The start of the line segment (the first point in the digitised sequence) will be labelled with an s and the end with an e.
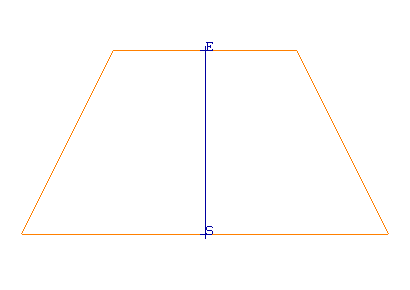
Figure 13 : The Chosen Line Segment
Using any of the design entry modes, indicate the points to insert. These points will be placed into the string in the order that they are selected. To avoid crossovers, insert these points using the same direction as the original line.

Figure 14 : Inserting Points into the Line Segment
Cancel when you have finished indicating new points.
You are then asked whether or not to interpolate the points. Do not interpolate Z assigns the default Z value to the inserted points. Interpolate assigns a Z value to the inserted points that is derived from the start and end points of the selected line segment. If the Z value of the start and end points are different, then Vulcan finds the equation of the line joining the two points and assigns the inserted points interpolated (or extrapolated) Z values based on their X and Y coordinates.
You are then prompted to select another line segment. Cancel when have finished inserting points.
Cancel again to exit the Edit Polygon Pairs dialog box. You are then asked whether you want to retain or reject the changes.

Figure 15 : The Resulting Polygons

