Tessellate
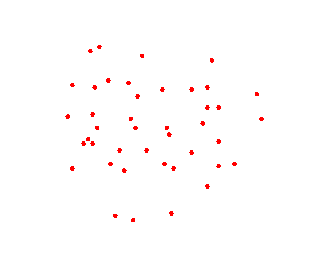
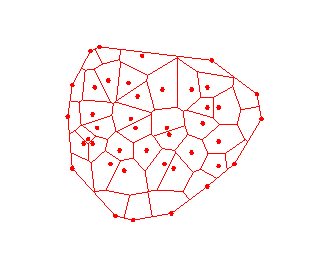
This option creates a voronoi diagram from a set of points.
On the Design menu, point to Polygon Edit, then click Tessellate to display the following panel.
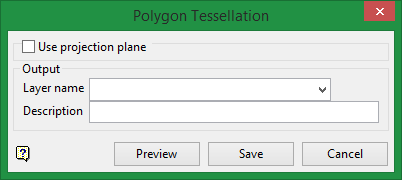
Clicking Use projection plane causes the panel to expand to reveal selection controls.
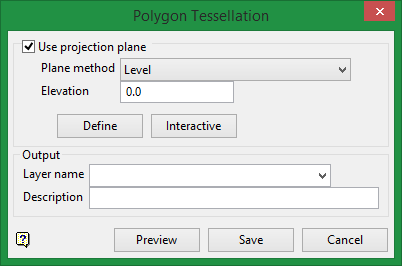
Use projection plane
Plane method
Select from the drop-down list to define a plane with the selected method. See below for explanations of the available plane methods.
A flat plane at the given elevation.

Elevation
The elevation can be defined two ways:
-
Type the elevation into the textbox.
-
Click the Define button and then digitise the elevation on the screen.
Interactive
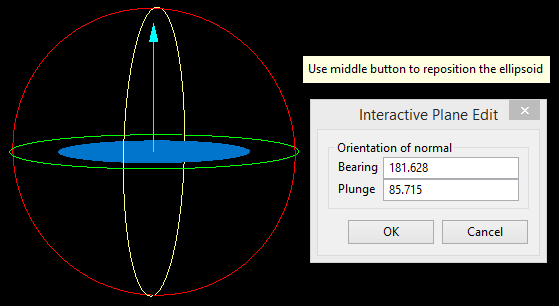
The Interactive button can be used to display the current plane definition or change it by dragging the handles around.
A vertical plane at the given easting.

Easting
The easting can be defined two ways:
-
Type the easting into the textbox.
-
Click the Define button and then digitise the easting on the screen.
Interactive
The Interactive button can be used to display the current plane definition or change it by dragging the handles around.

A vertical plane at the given northing.

Northing
The northing can be defined two ways:
-
Type the northing into the textbox.
-
Click the Define button and then digitise the northing on the screen.
Interactive
The Interactive button can be used to display the current plane definition or change it by dragging the handles around.

A plane defined along a selected line segment at the given angle (dip).

Dip
Enter the dip angle.
Define
Click this button to select a line segment of an existing object.
Interactive
The Interactive button can be used to display the current plane definition or change it by dragging the handles around.

Similar to the Line Segment option, except the segment is defined by interactively defining two points.

Dip
Enter the dip angle.
Define
Click this button to digitise the two points.
Interactive
The Interactive button can be used to display the current plane definition or change it by dragging the handles around.

A plane defined by interactively defining three points.

Define
Click this button to digitise the plane, defined by three points.
Interactive
The Interactive button can be used to display the current plane definition or change it by dragging the handles around.

A plane defined by the strike and dip.
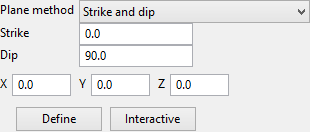
Strike
Enter the strike angle.
Dip
Enter the dip angle.
X, Y, Z
These fields show the coordinates of the origin of the plane. The origin can be defined by clicking the Define button and digitising it on screen or by entering the coordinates directly into the textboxes.
Define
Click this button to digitise the origin of the plane.
Interactive
The Interactive button can be used to display the current plane definition or change it by dragging the handles around.

A plane determined to be the best fit, in a least squares sense, to a selected point cloud.

Define
Click this button to select the point cloud.
Interactive
The Interactive button can be used to display the current plane definition or change it by dragging the handles around.

A plane defined interactively within Vulcan.

Bearing / Plunge
Enter the bearing and plunge angles, or click the Interactive button to select the bearing and plunge interactively.
Interactive
The Interactive button can be used to display the current plane definition or change it by dragging the handles around.

The current view in Vulcan.

Interactive
The interactive button can be used to display the current plane definition or change it by dragging the handles around.

A plane defined by the equation of the plane.

The equation of the plane is ax + by + cz + d = 0.
a, b, c, d
Click the Interactive button to digitise the bearing and plunge, or enter the values for the equation directly into the textboxes.
Interactive
The Interactive button can be used to display the current plane definition or change it by dragging the handles around.

Output
Layer name
Select the layer that will be used to store the new polygons. The drop-down list contains the names of all currently loaded layers. If you select an existing layer, then the resulting data will be appended to the nominated layer. If you enter the name of an existing layer that is not currently loaded, then you will need to confirm whether you want to load the layer or replace it.
To create a new layer, enter the layer name using the following parameters:
- up to 40 characters
- must begin with an alphanumeric character
- can include hyphens [ - ], plus signs [ + ], underscores [ _ ], periods/dots [. ]
- no spaces
- can include the special characters of ÁÂÃÀÇÉÊÍÓÔÕÚÜÑ that are used in the Spanish and Portuguese languages
Layer description
Enter a description to further describe the contents of this layer. The description can be up to 80 alphanumeric characters and may include spaces. If a description is not entered, then a default description will be used instead. If the chosen layer already has an assigned description, the description displays when the layer is selected. Existing layer descriptions can be overwritten.
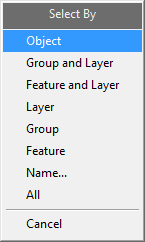
Click the Select button to bring up the context menu.

Click the option of choice on the context menu to select the set of points on the screen.
Click Cancel or right-click anywhere in the Vulcan workspace to exit the Select mode and return to the panel.
Click the Save button when you have completed your selection.

