Overview
Drafting sheets specify the location of various items, such as title block and north point, on plots.
Drafting sheets, which are also known as plot templates or border styles, are stored in your drafting database (drafting.dgd.isis), which resides in your $ENVIS_RESO area ($VULCAN/etc/resources). If the database does not exist, then it will be created as soon as you start to create a drafting sheet. Alternatively, you can copy the default drafting database in $VULCAN/etc/defaults to the $ENVIS_RESO area and change the copy to meet your requirements. As the default design database in $VULCAN/etc/defaults contains the default drafting sheets delivered with Vulcan, do not modify it.
When a drafting sheet is created or edited, a 1cm grid displays showing the outlines of A0 sheets (portrait and landscape). This grid can be made invisible or shadowed through using the Grid Properties button ![]() on the Graphics toolbar.
on the Graphics toolbar.
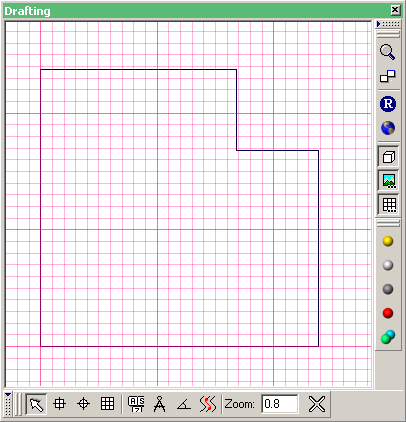
Figure 1 : Drafting Grid
The editing of drafting sheets is carried out in a working layer named 'DRFT_EDT'. This layer is automatically opened when you create a new drafting sheet or load an existing one. Changes made to this layer, and consequently the drafting sheet, will be transferred to the drafting database when you save the modifications.
Creating a new drafting sheet involves setting up the following:
- The sheet area, that is a specific paper size, A0, A4 etc., or a user-defined size.
- The plot boundary area.
- Text fields, that is areas where text can be entered as part of the title box.
- The position of the scale bar.
- The position of the North point.
- The position of an optional clipping box. The clipping box allows you to put the title box anywhere on the plot, which is useful when the plot takes up the entire sheet. The clipping box can also be used to post a report onto the plot.
- Any additional information.
If you are planning on using a drafting sheet for printing (rather than plotting), then we recommend that you leave an appropriate margin between the external box (which represents the edges of the page) and the plot elements (such as title block, internal box, north point etc.) or ensure that the external box has the same dimensions as the printable region of your printer (the dimensions of the printable area of the printer are displayed as part of the plot file properties). Otherwise parts of your plot will be in the non-printable margins of the page.
If you create your drafting sheets with an appropriate margin and sections of the plot are still missing, then use the Adjust Page to Plot Origin button on the Plot Utility Application toolbar.
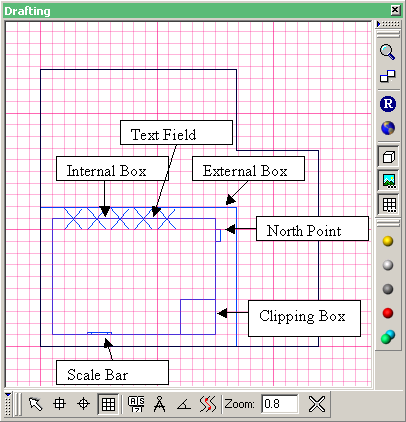
Figure 2 : Drafting Sheet
Most plotting options in Vulcan use the drafting sheet specified through the Plot All section of the Tools > Preferences option. If defaults aren't specified, then the drafting sheet that was delivered with Vulcan will be used instead. Exceptions to this are the Ring Design, Explosives and Batch Plotting options. These options allow selection of a drafting sheet from in their relevant panels and don't look at which style has been set up as the default.
You should compress your database design files on a regular basis, for example once a month, as data that is deleted is not actually deleted but marked for deletion. In the long term this will result in this data taking up considerable amount of disk space. Compressing the files will remove the data that is marked for deletion. Use the Compress and Rebuild option from the context menu in the Vulcan Explorer application to compress design files. Refer to the Compressing a Database documentation for more information on the compress/rebuild procedure.

