Rotate Channel
Use the Rotate Channel option to interactively rotate a channel. The rotation is defined by a 3D line. The first point of the line is the starting point of the channel sample, the second point is digitised by you.
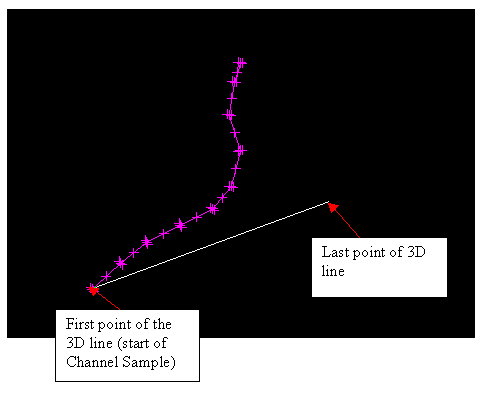
Figure 1 : Channel Sample
The channel sample, when rotated, will have the same bearing and dip as the 3D line. This may cause confusion as you might be expecting only the bearing to change and not the dip, or vice versa. The important thing to keep in mind is that you are digitising a 3D line, and you must ensure that the digitised point is in the correct position in space. To ensure that the second point is placed correctly, use the Bearing Input ![]() button. The Bearing Input button, which is available from the Digitise toolbar, allows you to create a point at a specified dip and bearing.
button. The Bearing Input button, which is available from the Digitise toolbar, allows you to create a point at a specified dip and bearing.
However, to rotate the channel sample but maintain the current dip, then use the Rotate Channel Bearing option. If you want to rotate the channel sample, but maintain the bearing, then use the Rotate Channel Dip option.
You can also access this option by right-clicking on a channel and selecting Channel - Rotate from the displayed Vulcan context menu.
Instructions
On the Geology menu, point to Channel Sampling, and then click Rotate Channel.
Select the channel to rotate.
Indicate the rotation angle by using any of the digitising tools.
Once the rotation angle is specified, the channel is rotated.
Confirm the rotation.
Upon confirmation, you can select another channel to rotate.

