Import LAS Files
Use the Import LAS Files option to import wire line data contained in individual or multiple LAS files, into an Isis database that displays using the View Traces option.
Note: This option supports version 1.2 and version 2.0 LAS files.
Instructions
On the Geology menu, point to Downhole Geophysics, and then click Import LAS Files to display the Import LAS Files panel s.
This panel contains the following tabs:
- LAS Files
- Database
- Well Fields
- Trace Fields
Use the Save button ![]() to save your import LAS specifications. In the displayed Save As panel, enter a name and browse to the directory in which to place the specifications. The file extension for the specifications is
to save your import LAS specifications. In the displayed Save As panel, enter a name and browse to the directory in which to place the specifications. The file extension for the specifications is . gil.
Use the Open button ![]() to open an existing set of LAS specifications. Browse to your specifications and select Open. The panel fields will be populated (filled in) with the values from your specification file.
to open an existing set of LAS specifications. Browse to your specifications and select Open. The panel fields will be populated (filled in) with the values from your specification file.
Click OK.
LAS Files tab
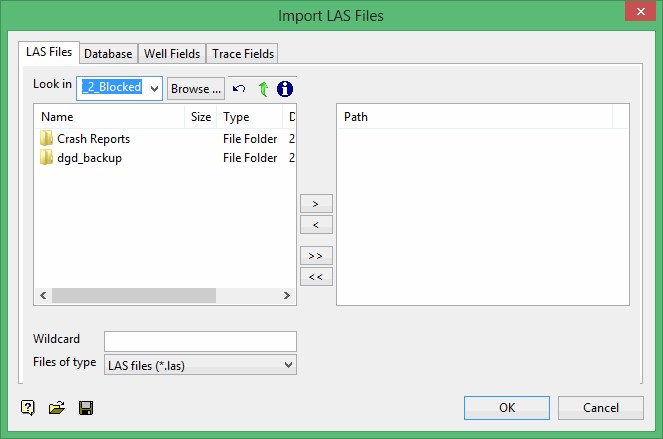
Select the LAS ( .las ) files to import. The files contained in the box on the right side are the LAS files that have been selected for importing. The first selected LAS ( .las ) file will be used to populate the field lists in the Well Fields and Trace Fields tabs.
Press the ![]() button to move highlighted files to the selection list on the right side. Files in this list will be imported once the OK button has been selected. Pressing the
button to move highlighted files to the selection list on the right side. Files in this list will be imported once the OK button has been selected. Pressing the ![]() button will move all files displayed in the left-hand side to the right side.
button will move all files displayed in the left-hand side to the right side.
To remove files from the selection list, highlight the desired files and press the ![]() button. Use the
button. Use the ![]() button to remove all files from the selection list.
button to remove all files from the selection list.
Database tab
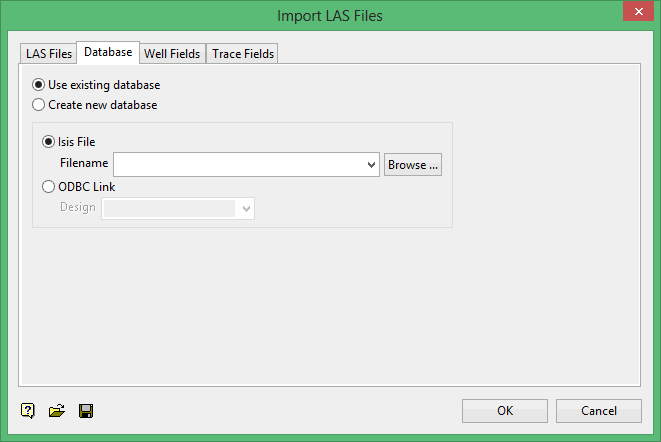
The Database tab allows you to select the database in which to import the LAS files. You can either use an existing database or, if desired, create a new database.
Well Fields tab
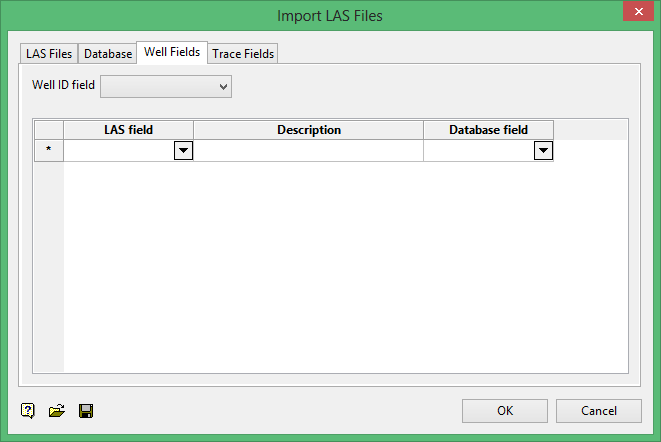
The Well Fields tab allows you to define the LAS field that contain the name of the hole into which the data will be imported. Additional LAS fields can also be imported into the header table of the database.
Well id field
Select the LAS file that contains the Well ID that corresponds to the hole name in the database.
Additional LAS fields can also be imported into the header table of the database. Simply select the applicable LAS field and nominate the database field in which to store the information.
Trace Fields tab
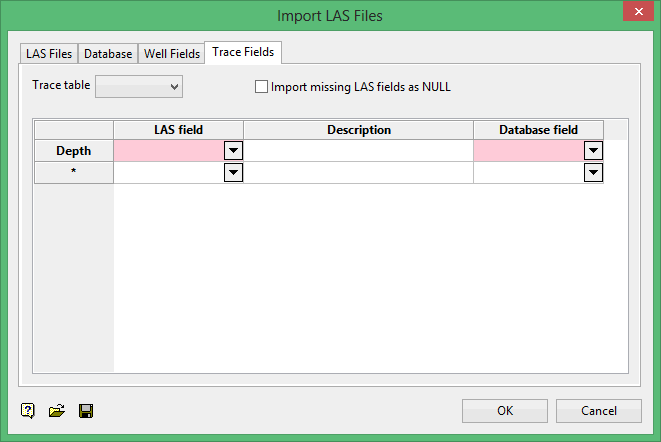
Use the Trace Fields tab to define the table in the database that will be used to store the imported trace data.
Trace table
Select the table that will be used to store the imported trace data.
Import missing LAS fields as NULL
Select this check box to assign a null value to the corresponding database field. This check box should only be used when a LAS field is missing from the LAS file. If this check box is not ticked, then the database default value will be assigned instead.
LAS field
Select the LAS trace fields that you want to import. The field description in the LAS file will be used to populate the panel's Description field.
Database field
Select the database field that will be used to store the LAS trace value.
Click OK.

