View Traces
Use the View Traces option to display a corresponding geophysical trace in Vulcan.
Instructions
On the Geology menu, point to Geophysics, and then click View Traces to display the Bore Hole Graphic Viewing panel.
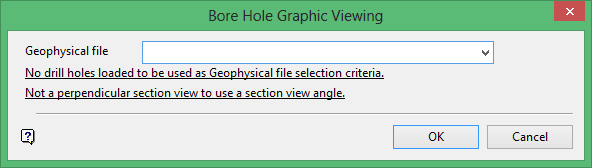
Select the name of a geophysical file ( < hole_number. ). The drop-down list will contain all . bhg_gphy files found in your current working directory.
Select OK.
The following panel displays.
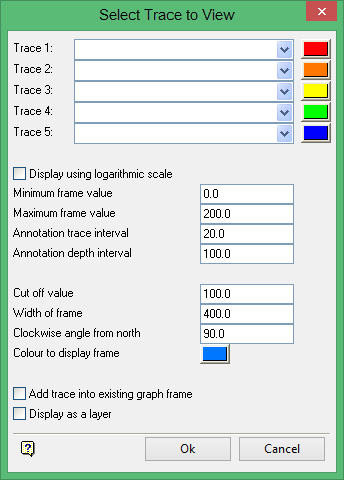
Trace
Enter, or select from the drop-down list, the name of the geophysical trace that you want to display. Up to 5 geophysical traces can be displayed. You will also need to select a colour for each trace displayed. The colours are selected from the current colour table.
Display using logarithmic scale
Select this check box to display a trace on a logarithmic scale. Some geophysical traces (i.e. resistivity and induction logs) are displayed on a logarithmic scale, as there is a wide variance in the data.
Minimum frame value
Enter the left most value to be displayed in the onscreen frame.
Maximum frame value
Enter the Geology_ri.htmost (maximum) value to be displayed in the onscreen frame.
Annotation trace interval
Enter the X-axis increment to be displayed in the onscreen frame.
Annotation depth interval
Enter the Z-value increment to be displayed in the onscreen frame.
Cut off value
A vertical line can be drawn in the onscreen frame at an X-axis location specified by the value entered.
Width of frame
Enter the width of the frame in screen units.
Clockwise angle from north
Enter the azimuth orientation of the frame in Plan view.
Colour to display frame
Select the frame colour from the colour table. The colour is selected from the current colour table.
Add trace into existing graph frame
Select this check box to append the chosen geophysical traces to an existing graph frame. If this check box is not ticked, then a new graph frame will be drawn over the existing data.
Display as a layer
Select this check box to display the geophysical traces in a Vulcan layer. If this check box is ticked, then you will need to specify the layer in which to display the geophysical traces. This is done through the Layer panel, which displays upon completing the Select Trace to View panel.
If this check box is not ticked, then the traces displays as an underlay and will be deleted upon exiting Vulcan.
Click OK.
You will then need to select the location to display the trace. The default Z value will be used for the indicated location, unless you use a snap mode to snap the trace onto a drill hole, in which case the trace is then displayed.
The first trace selected controls the vertical extents of the frame. For example if the first trace selected extends from 0 to 90 metres down hole, then the frame will be drawn from 0 to 90 metres even though other traces may extend further.
If you chose to display the geophysical traces in a Vulcan layer, then the Layer panel displays before you are asked to indicate the trace location.

Trace layer name
Enter, or select from the drop-down list, the name of the layer that will be used to store the geophysical traces. The maximum size of a layer name is 40 alphanumeric characters (spaces are not allowed).
If you select an existing layer that is loaded, then subsequent digitising will be appended to this layer. If you select an existing layer that is not loaded, then you will be asked whether you want to load the layer or replace it, i.e. overwrite it.
Description
Enter a description to further describe the contents of this layer. The description can be up to 80 alphanumeric characters and may include spaces. If a description is not entered, then a default description will be used instead. If the chosen layer already has an assigned description, the description displays when the layer is selected. Existing layer descriptions can be overwritten.
Click OK.
Use the Remove and Remove All options to remove the traces and graph frame from the screen. If the traces and graph frame are contained in a Vulcan layer, then you will need to use the Remove option (under the File > Layer submenu) or select the Remove Layer button ![]() from the Standard toolbar.
from the Standard toolbar.

