Cell Decluster
Use this option to compute weights for a set of sample data in order to control the influence of densely packed points. The area covered by the sample data is divided into 3D rectangular sections for declustering called cells. Each sample selected for declustering receives a weight inversely proportional to the number of samples that fall within the same cell. Therefore, closely spaced samples are assigned lower weights and sparse samples are assigned higher weights.
Instructions
On the Geology menu, point to Sampling, then click Cell Decluster....
Note: In order to use the Cell Decluster option, you must have a database that contains fields for the sample coordinates, grade (assay) values, and declustering weights. These fields need to be in the same table for each record.
Follow these steps:
-
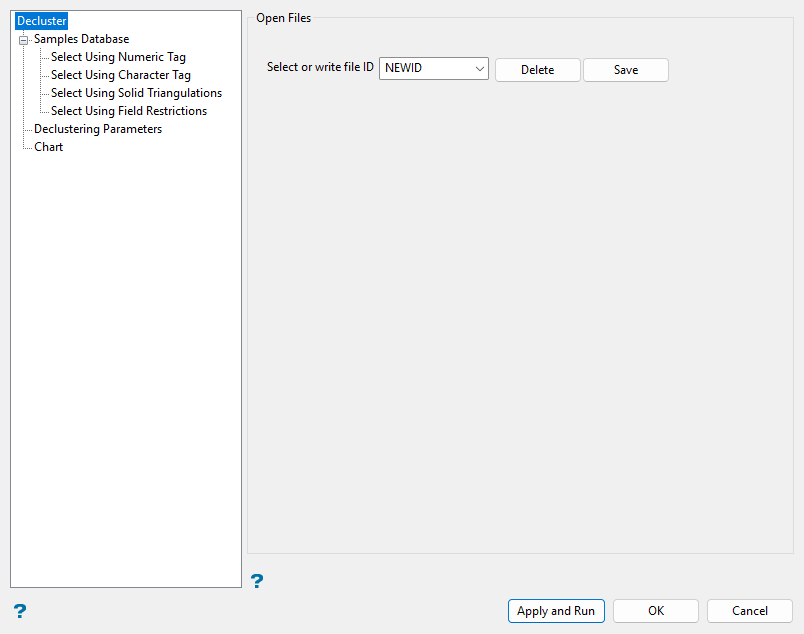
Define the file identifier in the Select or write file ID field.
Enter a new file ID name in the textbox and then click Save to add the identifier to the cell descluster specification file (
decluster.spec). Alternatively, select an existing file ID using the drop-down list to reuse or edit current settings.Click Delete to remove an existing identifier.
Tip: The Save button can also be used to copy an existing file ID and save it under a new name. Select an existing file ID from the drop-down list before entering a new name, then click Save to create the copy.
-
Go to the next section of the panel.
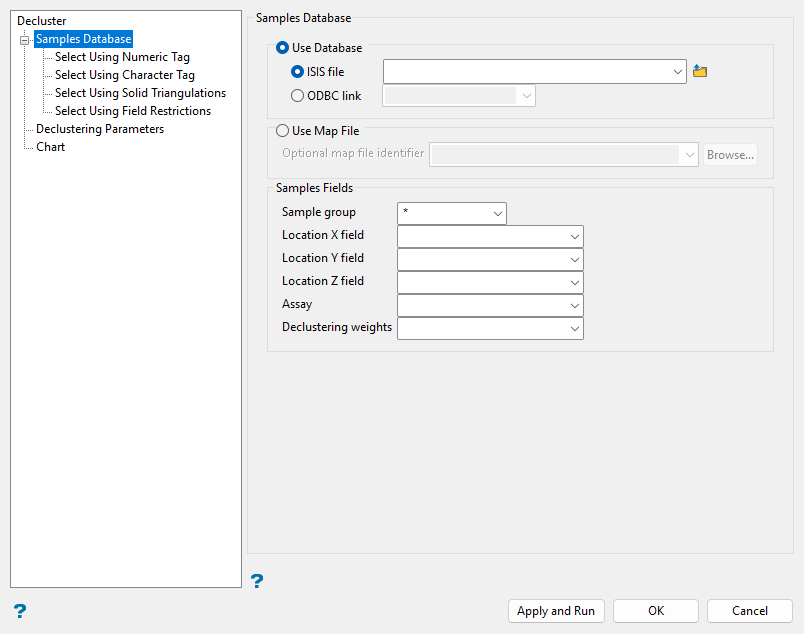
Samples Database
Follow these steps:
-
Select the Use Database option and choose an ISIS or ODBC database file from the current working directory using the drop-down lists or click the
 Browse button to select a database in another location.
Alternatively, select the Use Map File option and choose a (
.map) file from the drop-down list or click Browse... to select a file in another location. -
Select the Sample group of the database from the drop-down list, or leave the default
*wildcard entry in the field. -
Select the Location X, Y, and Z fields from the drop-down lists to identify the sample locations.
-
Select the Assay field of interest from the drop-down list for which declustering weights will be calculated.
-
Select the Declustering weights field from the drop-down list where calculated weights will be saved.
-
Set optional filtering methods to limit your data selection.
NoteThe following selection methods accumulate. If more than one method is chosen, then the samples must satisfy each selection method before being selected for declustering. Samples must meet all defined selection criteria within each method to be selected for declustering as well.
At any point, you can click Apply and Run at the bottom of the panel to run declustering with the current inputs. You can also click OK to save the file ID and close the panel without running. Click Cancel to close the panel without saving.
 Select Using Numeric Tag (Optional)
Use numeric tags as needed to filter sample data for declustering based on numeric values of a selected field.
Follow these steps:
-
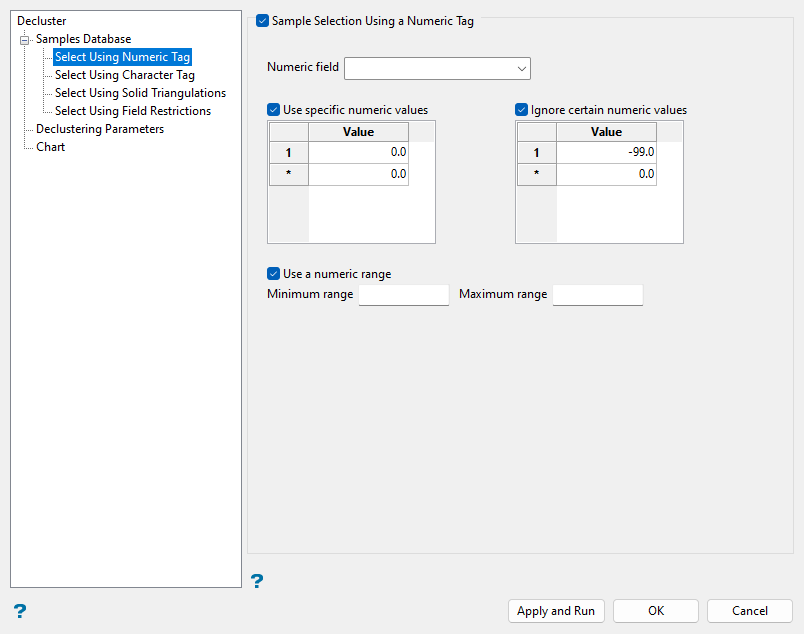
Select the Sample Selection Using a Numeric Tag checkbox.
-
Select the Numeric Field from the drop-down list to choose the field of the database to which the numeric filters will be applied. Only numeric fields will be shown in this drop-down list.
-
Select the Use specific numeric values checkbox to select samples for declustering based on specified values. Create as many entries in the Values column as needed to select desired samples.
-
Select the Ignore certain numeric values checkbox to deselect samples for declustering based on specified values. Create entries in the Values column such as
-99.0or other default or undesired values to ignore samples with these values. -
Select the Use a numeric range checkbox to select samples for declustering within specified minimum and maximum values. Enter values for the Minimum range and Maximum range fields to encompass the desired samples.
Select Using Character Tag (Optional)
Use character tags as needed to filter sample data for declustering based on character strings of a selected field.
Follow these steps:
-
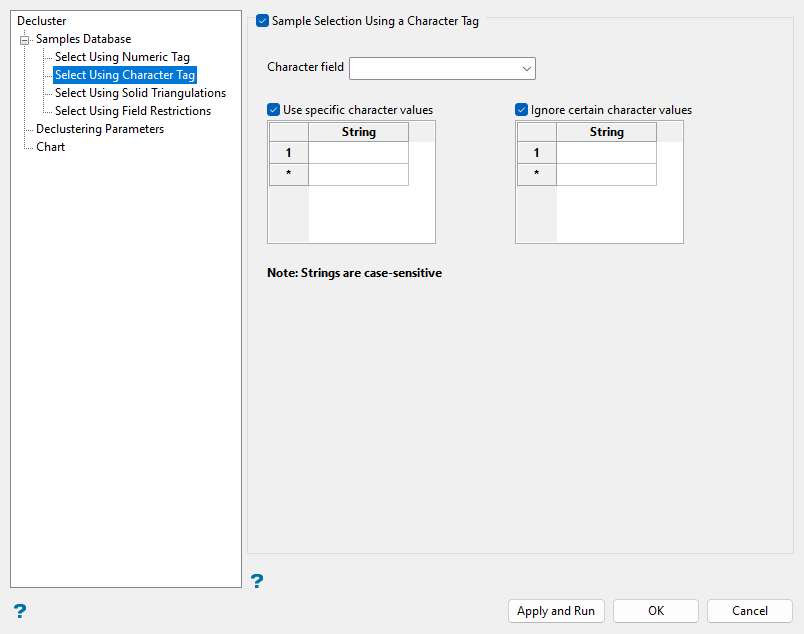
Select the Sample Selection Using a Character Tag checkbox.
-
Select the Character Field from the drop-down list to choose the field of the database to which the character filters will be applied. Only character fields will be shown in this drop-down list.
-
Select the Use specific character values checkbox to select samples for declustering based on specified strings. Create as many entries in the String column as needed to select desired samples.
-
Select the Ignore certain character values checkbox to deselect samples for declustering based on specified strings. Create entries in the String column such as
Wasteor other default or undesired characters to ignore samples with these characters.
Note: Enter strings without quotation marks in the spaces provided. The character strings are case sensitive and must be entered exactly as they appear in the selected character field. When using wildcard characters, type
*> for multi-character and?> for single character.Select Using Solid Triangulations (Optional)
Use solid triangulation selections as needed to filter sample data based on location with respect to the extents of selected triangulations.
Follow these steps:
-
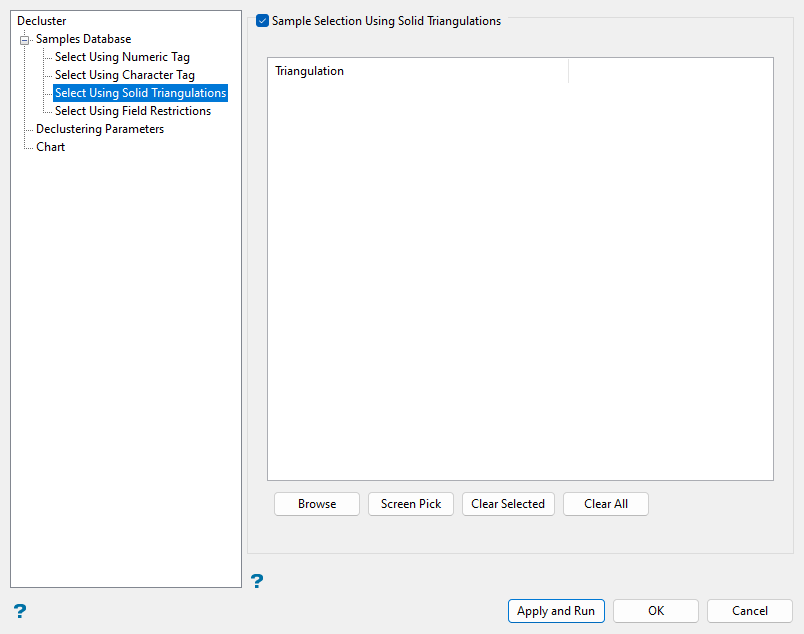
Select the Sample Selection Using Solid Triangulations checkbox.
-
Click Screen Pick to select from triangulations currently loaded in Vulcan.
Alternatively, click Browse to use File Explorer to select desired triangulation files. All triangulations found in the current working directory will be listed in the selection panel. Use the
 icons to go to the last folder visited, go up one level, or change the way details are viewed in the window, respectively. Click the Browse... button in the selection panel to search for any triangulation not found in your current working directory.
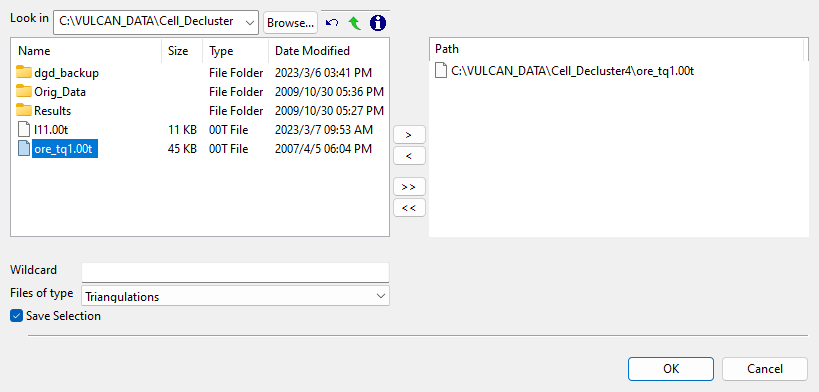
Select desired triangulations from the listed files. To highlight multiple list items at once, use the left mouse option in combination with the
Shiftkey (this is for items that are adjacent in the list; for non-adjacent items, use theCtrlkey and the left mouse option). When using wildcard characters, type*> for multi-character and?> for single character.Move the items to the selection list on the right side of the panel.
- Click the
 button to move the highlighted items to the selection list on the right.
 - Click the
 button to remove the highlighted items from the selection list on the right.
 - Click the
 button to move all items to the selection list on the right.
 - Click the
 button to remove all items from the selection list on the right.
Select the Save Selection checkbox if you would like to save a selection file (
.sel) for future use. Click OK when you are finished selecting triangulation files. - Click the
-
Click Clear Selected or Clear All to clear any selected triangulations as needed.
Note: If multiple triangulations are selected, samples within the extents of any of the selected triangulations will be selected for declustering.
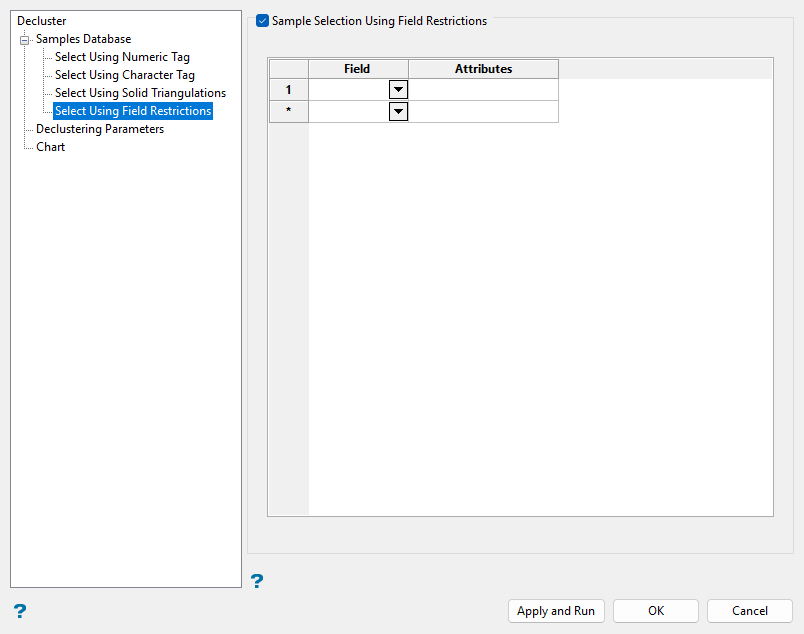
Select Using Field Restrictions (Optional)
Use field restrictions as needed to filter sample data based on field attributes.
Follow these steps:
-
Select the Sample Selection Using Field Restrictions checkbox.
-
Select the selection criteria fields in the Field column from the drop-down list.
-
Enter selection criteria in the Attributes column for the selected fields as demonstrated below.
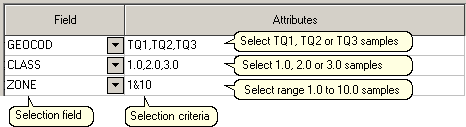
Note: A range entered in attributes must always have the smallest number specified before the largest number, for example
-792&-720, since -792 is smaller than -720.
-
Declustering Parameters
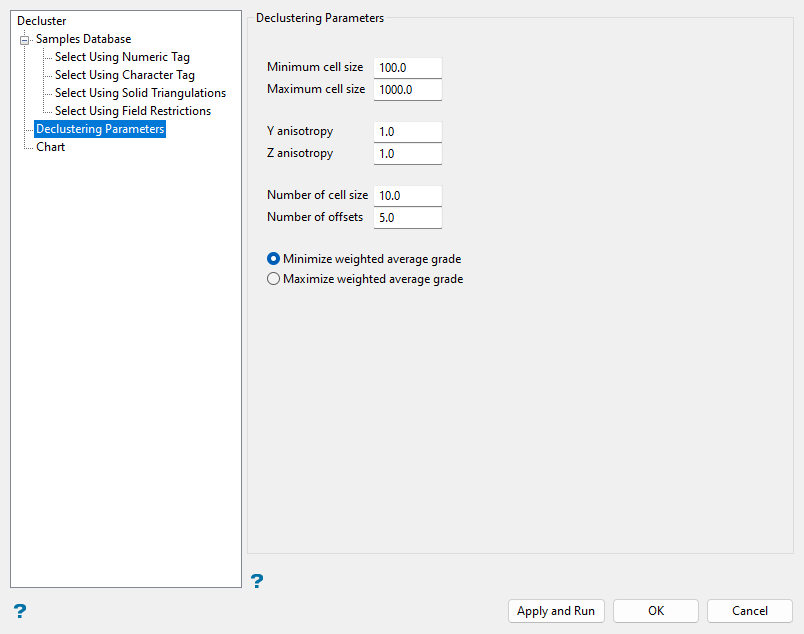
The Declustering Parameters section is used to define parameters for Vulcan to use when declustering the sample data.
Follow these steps:
-
Enter a value in the Minimum cell size field for the X dimension of the smallest possible cell size. When you run the Cell Decluster command, this will be the smallest dimension considered when Vulcan determines the appropriate cell size.
-
Enter a value in the Maximum cell size field for the X dimension of the largest possible cell size. When you run the Cell Decluster command, this will be the largest dimension considered when Vulcan determines the appropriate cell size.
-
Enter a value in the Y anisotropy field to specify the ratio of the Y dimension to the X dimension of the cell size.
Example: Enter
2.0to obtain cells with a Y dimension that is twice the X dimension. -
Enter a value in the Z anisotropy field to specify the ratio of the Z dimension to the X dimension of the cell size.
-
Enter a value in the Number of cell sizes field to define the number of different cell sizes to be considered during declustering. The potential cell sizes are equally spaced between the minimum and maximum cell sizes. Vulcan calculates the weighted average of the selected samples' assay values for each cell size and selects the cell size for declustering that has either the maximum or minimum weighted average, as specified.
-
Enter a value in the Number of offsets field. This refers to the number of cell offsets to use when calculating the declustering weights for a specific cell size. As cell boundaries are arbitrary, a data point may fall into a cell by itself even though it has many neighbours in an adjacent cell. Vulcan reduces the effect of arbitrary boundaries by calculating cell weights at a number of equally spaced offsets and averaging these weights. Using a large number of offsets may take a long time. Five or ten offsets should be sufficient in most cases.
-
Select the Minimise weighted average grade or Maximise weighted average grade option to specify how Vulcan selects the cell size for declustering between the defined minimum and maximum cell sizes. Vulcan selects the cell size that results in the minimum or maximum weighted average of the selected samples' assay values based on this option.
Note: The declustering weights are scaled to have a mean value of 1. The calculated global mean from cell declustering depends on the size of the cells. If the cells are very small, then each sample will fall into its own group and all samples will receive equal weights. If the cells are as large as the global area, then all samples will fall into the one group and will again receive equal weights. Hence, somewhere between these two extremes is the appropriate cell size. Vulcan examines a range of different cell sizes and determines the appropriate cell size to calculate the maximum or minimum weighted average of the assay field of interest. The resulting declustering weight for each sample is saved to the nominated field of the database.
Chart (Optional)
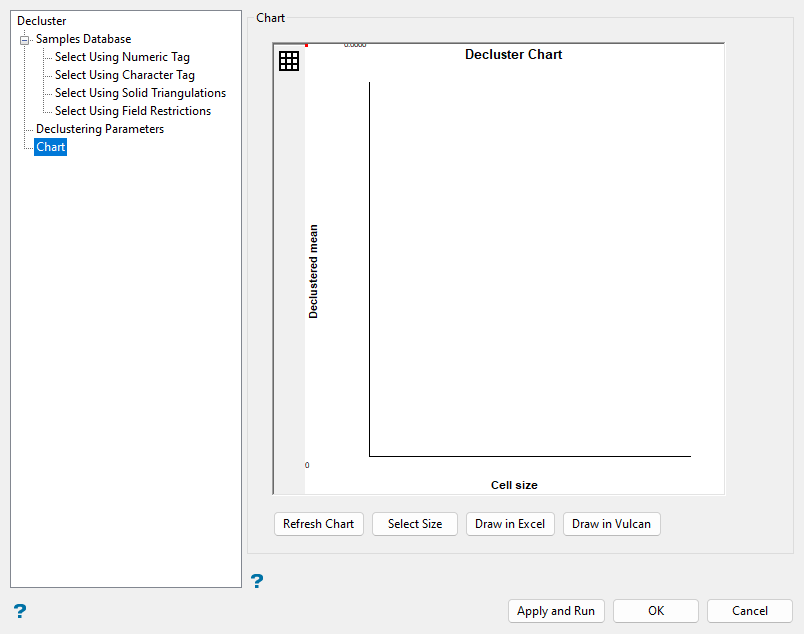
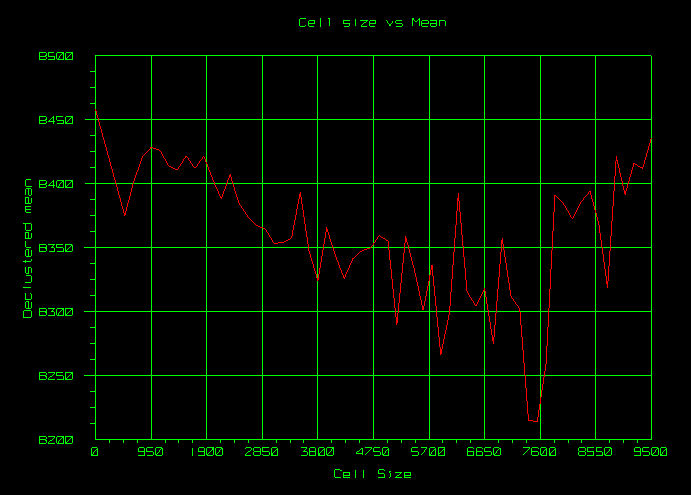
The Chart section allows you to produce a preview of the overall declustering process as well as interactively select a definitive cell size for the calculation of declustering weights.
Note: The Chart section is closely tied to the values in the Declustering Parameters section; that is, they interact with each other and changes occur in one section by making modifications in the other.
Follow these steps:
-
Click Refresh Chart to preview cell declustering graphically based on the selected samples and the inputs in the Declustering Parameters section.
-
Click Select Size to use the current position of the red graph marker as the final cell size, if desired. The location of the marker can be modified by clicking in the graph area. Only the X-axis (Cell size) is considered, so it does not matter if you select closer to the axis or closer to the line graph. Once the red marker has been moved to the desired cell size, click Select Size to update the minimum and maximum cell size to this single value (automatically updated in the Declustering Parameters section). The Number of cell sizes field will also be changed to 1.
Tip: Use the
 Toggle grid button to toggle the chart grid display on/off. When the grid display is on, the size selection will only be based on the grid's X values thus avoiding too many decimal places.
 -
Click Draw in Excel to output and display the resulting chart in Microsoft Excel, if desired. The resulting chart will be stored in a spreadsheet file named
DeclusterChart.xlsx. -
Click Draw in Vulcan to display the resulting chart in a Vulcan window. The resulting chart will be displayed as an underlay. Go to File > Underlays > Convert To Object to convert the underlay and save the information to a nominated layer.
See below for a cell declustering chart saved to a Vulcan window via the Draw in Vulcan option.