Set Up 3D Display
The Set Up 3D Display option to specify the defaults for displaying 3D structural data.
Note: Colour legends set using the Set Up 3D Display option are also applicable to Tadpole plots and Stickplots.
Instructions
On the Geotech menu, point to Display, then click Set Up 3D Display.
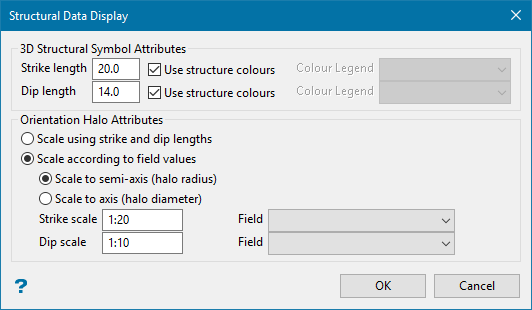
Figure 1 : Structural Data Display panel
If a structural database has not been opened prior to selecting this option, then the Open Structural Database panel displays first.
3D Structural Symbol Attributes
This section allows you to specify the dimensions to be used when displaying structural data in the Primary Window. The unit of measurement is the unit set for the Primary Window.
Strike length
Enter the length along the strike bar.
Dip length
Enter the distance from the end of the dip symbol to the strike bar.
Colour Legend
The strike and dip objects can be coloured using either the schemes contained in an existing Geotech colour legend, or the colours specified through the Geotech > Utilities > Edit Codes option. Select the desired scheme name from the Colour Legend drop-down list.
Note: If the default scheme names are found in the .scd file, then the TYPE and DIP values displays for the strike and dip schemes respectively.
Use structure colours
Check the Use structure colours checkbox (for either the strike or dip length) to colour the structural elements using the colours specified through the Edit Codes option.
This checkbox will be disabled, if the Specify colours checkbox on the Structural Code Editor panel has not been ticked.
Orientation Halo Attributes
This section allows you to specify the scaling factors to be used when displaying orientation halos (see the Load To 3D option for a description of orientation halos). Each halo can be scaled using either the strike and dip lengths or according to field values.
Note: Orientation halos are always coloured using the strike colour legend.
Scale using strike and dip lengths
Select this option to use these lengths to scale the halo attributes. Note that when using the strike and dip lengths, the displayed orientation halos will be the same size as the 3D structural symbols.
Scale according to field values
Select this option to use defined field values to scale halo attributes. You will also need to choose whether to scale to semi-axis or axis values.
Scale to semi-axis (halo radius)
Select this option to have the measured value of the axis be twice that of the corresponding value in the field.
Scale to axis (halo diameter)
Select this option to have the diameter of the halo be equal to the scaled value of the field.
Strike scale and field
Enter the scale to be used for the strike, for example, 1:20. Select the desired field name from the drop-down listing. All fields available from the currently loaded database are listed.
Dip scale and field
Enter the scale to be used for the dip, for example, 1:10. Select the desired field name from the drop-down listing. All fields available from the currently loaded database are listed.
Select OK.
The values are then changed according to your requirements, and will be applied until you either exit Vulcan or they are changed again.

