Tutorial - Creating a Samples Database.
This tutorial will show you how to create a Samples database starting with a CSV file that contains sample information at specific X, Y, Z coordinates.
Download the samples.7z dataset used in this tutorial here.
Part 1 - Preparing the CSV files
Part 2 - Creating a Samples database design file
Part 3 - Populating a Samples database
Part 4 - Displaying the samples in Vulcan
Part 1 - Preparing the CSV files
You will need two CSV files to create a Samples database. The first CSV file will contain the actual data that you want to display. Normally, this is the CSV file that you should already have showing the drillhole or sample ID, point location, assay data, etc.
The second file will contain the metadata, or basic information about the data. This CSV will need to be created. It will show information about the composite type, date, time, and a brief description. Populating these fields is optional.
- Open up the data.csv file and notice that we have five columns of data: dhid, x, y, z, and assay. This is the minimum data that is needed to create a database. Each row of data shows the name of a sample, the location, and the information about that sample that we want to display.
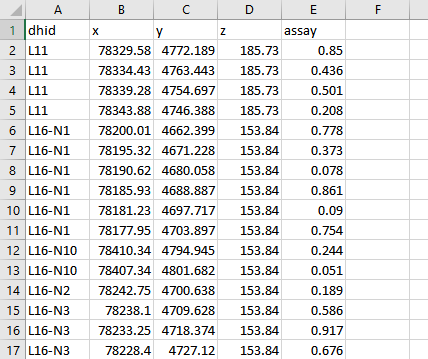
Figure 1 : CSV showing assay information. This is the starting point for creating the samples database.
- There needs to be a link between the two CSV files that we will be using. That link is called a Primary Key. Create a new column called COMPID and insert it in Column A, shifting the other columns to the right. We can name the primary key anything, but in this case we will call it ‘SAMP’. Enter ‘SAMP’ into the COMPID column and copy it down the entire column.
Note: The primary key is case sensitive. For example, the words ‘SAMP’ and ‘samp’ will not be treated as the same word.
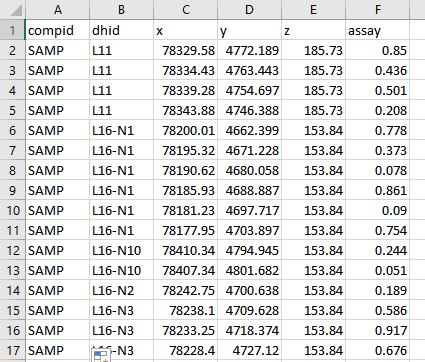
Figure 2 : A new column has been inserted at the beginning of the spreadsheet called COMPID, adding a primary key to link the two CSV files together.
Save this CSV file as sample_ENTRY.csv and store it in your working directory.
- Create a new CSV file and enter the following headings in the top row: compid, ctype, date, time, descrp. Under the heading ‘compid’, enter the primary key name SAMP.
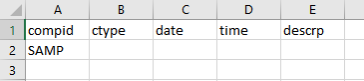
Figure 3 : A new CSV file with the key name SAMP.
Note: COMPID is the only required field. All other fields are optional. Similarly, you may add additional fields as needed. Such fields might include logger, lab, siteID, source, etc.
Save this CSV file as s ample_GROUP.csv and store it in your working directory.
Part 2 - Creating a Samples database design file (DSF file)
In this section, you will learn how to create a new ISIS database design file.
- From the Workbench, open ISIS in one of three ways:
- Clicking on the large ISIS icon on the Start Page;
- Clicking the small ISIS icon on the title bar at the top of the Workbench dialog;
- From the Maptek logo, pointing to Tools, and clicking the ISIS icon.
When the dialog displays asking which database you want to open, click Cancel.
- On the File menu, click New Design to display the New Database Design panel.
- Enter the design name using 3 characters, then click OK. For this tutorial, enter smp.
Note: If a design file already exists with that name, simply select another 3 character name.
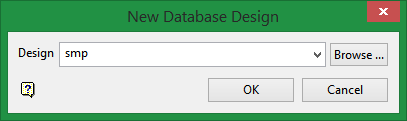
Figure 4 : Enter smp into the New Database Design dialog, then click OK.
- A new design tab is then opened and the design name appears on the tab.

Figure 5 : Header of new design window showing the design name on the tab.
The Description is optional, and allows a maximum of 40 alphanumeric characters. The Type field displays the type of data that will be contained in the database. Use the Attributes button to edit the design type properties. Once clicked, the Design Type panel displays. The design type selected will affect which synonyms are present in the synonym drop-down lists, and whether or not any properties options are displayed.
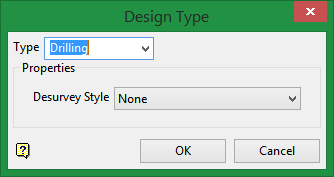
Figure 6 : Design Type panel displayed by clicking the Attributes button.
Select Drilling for the type, then click OK.
- On the Table menu, click Insert. This will create a blank table.
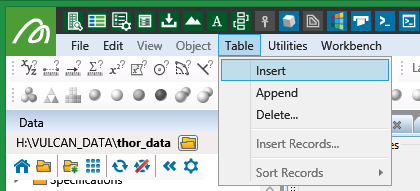
Figure 7 : Use Table > Insert to add a new table.
- Type ENTRY as the name. Notice that the tab at the top of the table will show whatever is typed into the Name field.
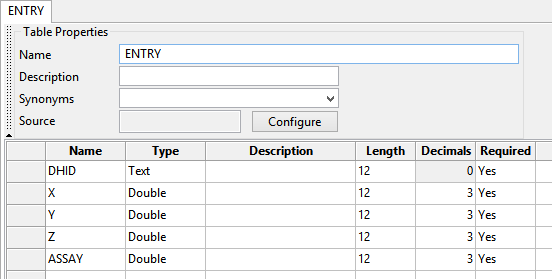
Figure 8 : The new table after it has been filled out with the same fields as those found in the sample_ENTRY.csv file, except for COMPID.
Fill in the table values with the names of each column found in the sample_ENTRY.csv file, as shown in Diagram 8 above. Notice that all fields are labelled as Required.
Note: The COMPID field that was inserted as the first column in the CSV file is not entered into the table.
- Create a GROUP table by repeating the same process as shown in steps 5 and 6.
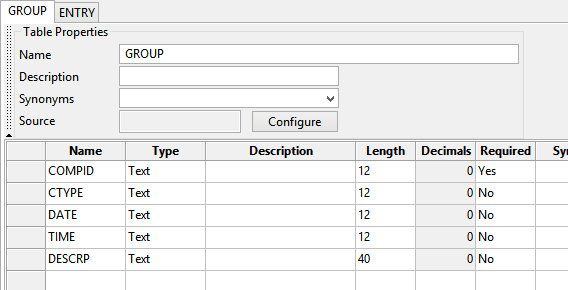
Figure 9 : The GROUP table includes all the fields that are in the sample_GROUP.csv file.
Fill in the table values with the names of each column found in the sample_GROUP.csv file, as shown in Diagram 9 above.
Note: COMPID is the only required field. All other fields are optional.
- As a final step, right-click in the column to the left of the Name field next to COMPID to display a context menu, then select Primary Key.
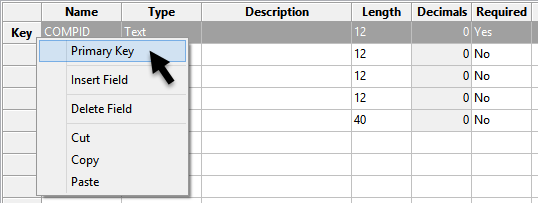
Figure 10 : Select Primary Key from the context menu.
- Save the design by using File > Save.
- Close the design file by using File > Close.
Part 3 - Populating a Samples database
We can now import our data into a new database and use the design template we just created.
- On the Utilities menu, point to Import, then click Tables to display the Database Import panel. Select New Database, then click Next.
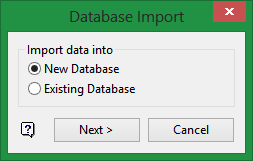
Figure 11 : Select New Database, then click Next.
After you click Next, the New Database panel displays.
- Enter a name for the new database. In this case, we will use ‘thor_samples’. For New Database Design, click Select. This will bring up a new panel. Select the smp.dsf template you just created. Notice that your template now has a.dsf extension added to the three characters you selected as the name.
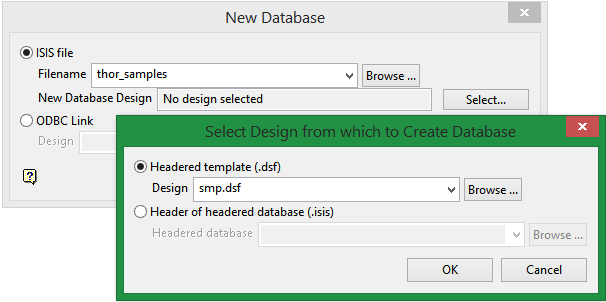
Figure 12 : Enter a name and select the design file.
Click OK on the Select Design from which to Create Database panel to return to the New Database panel.
Click Next on the New Database panel to close it and display the Import Tables panel.
- On the Group tab of the Import Tables panel, use the Table data file drop-down list to select the sample_GROUP.csv file. If you saved the file in a location other than your working directory then you will need to use the Browse button to search for it.
Since the first row of the CSV file consisted of the field names, we will need to indicate that our data begins on row 2. Leave the other options in the panel as they are. Repeat this process on the ENTRY tab using the samples_ENTRY.csv file.
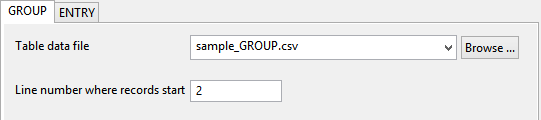
Figure 13 : Select the data file to import into the new database.
- Click Import to close the panel and create the database.
Part 4 - Displaying the samples in Vulcan
To display the samples in Vulcan you must first open the database, then load the samples.
- Open the new database by going to Geology > Sampling > Open Database. Select the new database from the drop-down list.
- Load the samples by going to Geology > Sampling > Load.
Note: You must have a Samples legend already created for the samples to display.
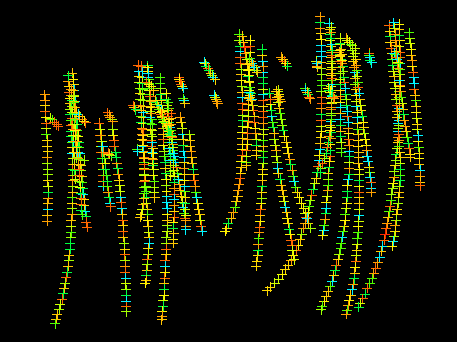
Figure 14 : Loaded samples display in Vulcan.

