Shrink Wrap
Use this option to identify the top and bottom extents of two or more overlapping triangulation surfaces, solids, or grids. The results can be saved as triangulations representing the surface top, surface bottom, and a solid that combines the two.
Instructions
On the Model menu, point to Triangle Utility, and then click Shrink Wrap.
Follow these steps:
-
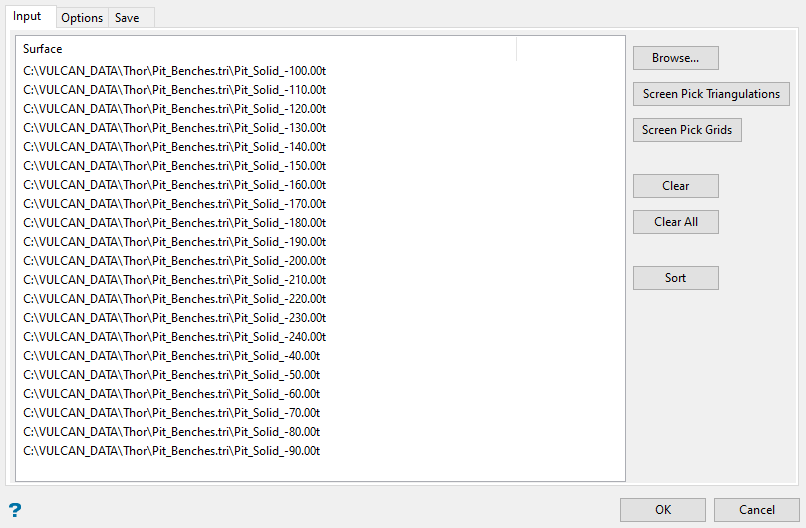
From the Input tab, select the input model files using the Browse button, or pick from the triangulations and grids loaded on the screen using the Screen Pick Triangulations or Screen Pick Grids buttons.
The selected files are listed in the table. You can use the Clear, Clear All, or Sort buttons to manage the list.
-
Click the Options tab to set the scan parameters. These control the resolution of the resulting output files.
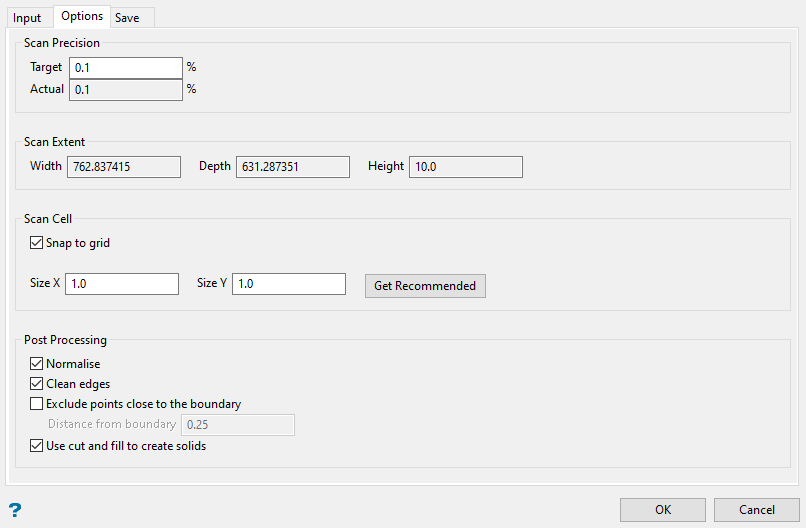
The Scan Precision Target represents the percentage of the scan cell size compared to total area being scanned. A higher percentage will result in a lower resolution. The maximum input is 25%.
-
Click Get Recommended to automatically calculate the scan cell size after you have entered the target percentage.
The Get Recommended option evaluates the extents of the input files and calculates a scan cell size to maintain a uniform scan precision throughout the maximum extent.
You can enter different scan cell dimensions.
-
Select the Post Processing options you want to apply to improve the output triangulations.
-
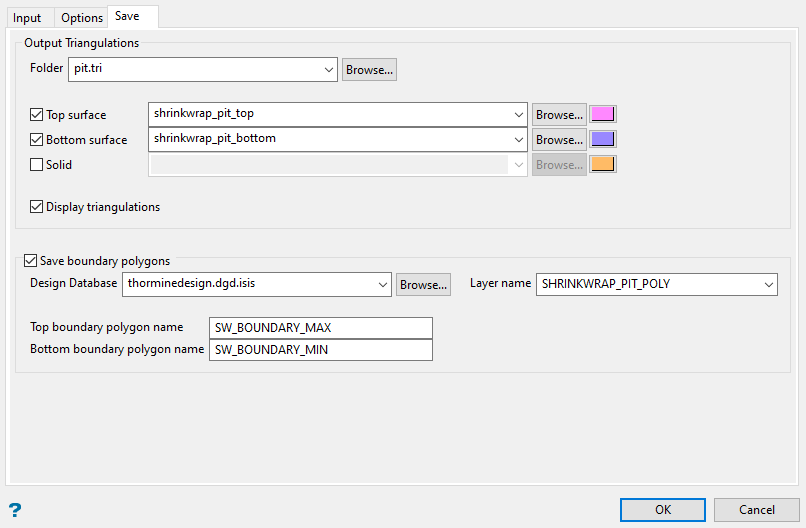
Click the Save tab to enter information about the resulting triangulations.
-
The Output Triangulations section allows you to enter the output triangulations names and storage location.
The Folder location is optional. By default, all triangulations will be stored in the current working directory.
Note: To be viewed in Vulcan explorer, the folder name should include the (.tri) extension.
-
Select Display triangulations to load all of the output triangulations on the screen after they have been created.
-
Enable Save boundary polygons option to select a design database and layer to save the boundary polygons that are created and used during the Shrink Wrap process.
-
Click OK to complete the process.

