Manual Project
Project Blocks Manually
Use the Manual Project option to project blocks step-by-step as opposed to the Auto Project option which performs all projections in the macro file in one step. The macro file must have been assigned to the blocks or strings (strings may have been used to represent walls) to be projected.
This option is useful when blocks have already been projected but then edited, For example, new points are added. The projection can then be restarted for the modified block(s) only.
Note: The SAVE_WTAGS macro command, or the Save batter and berm values with strip blocks option on the Block projection defaults panel, can be used to apply the correct batter angle and berm width values to the W tags when using this option. Refer to the Create Macro option for more information on macro commands.
Instructions
On the Open Pit menu, point to Benching and Batters, and then click Manual Project to display the Option dialog box.
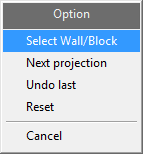
Select Wall/Block
Select this option as the first step when manually projecting blocks or walls. Once selected, you will be asked whether or not this is the correct block/wall. Upon confirmation, the box is redisplayed. You can then select the Next projection, Undo last or Reset options which will work on the selected block/wall. If you selected Reject, then you can use the Select Wall/Block option again to select another block/wall.
Next projection
Select this option to perform the projection once a block/wall has been selected. You can continue selecting this option until all projections specified in the macro file have been applied.
Undo last
Select this option to cancel the last projection.
Reset
Select this option to cancel all projections.
The projected blocks all have the same feature name (PIT$BLOCK), so may be deleted without deleting the original 2D blocks ( Design > Object Edit > Delete option using the feature selection category).
The object names of the projected blocks are the original 2D block names plus the number of the operation performed on it. For example, if the first block in the strip produced a polygon from the second projection (that is, the second operational command in the macro file), the block is called 001:02.
The names can be displayed through using the Analyse > Label > Object Label option. They can be changed through using the Open Pit > Benching and Batters > Block Number option.
Note: The projected blocks also have a linkage set up to point to the reserve database to be created with the Run Batvol option (under Batvol). Therefore, once the reserves are calculated the blocks can be inquired (using the Analyse > Attribute Data > Inquire option).

