Automatic Prefix
Automatic Blast Hole Naming
The Automatic Prefix option to automatically name blast holes, beginning with a prefix and ending with a three digit number. Either alphabetic or numeric prefixes can be generated.Instructions
- Select Open Pit menu
- Select Blast Design Bench submenu
- Select Automatic Prefix option
Indicate the boundary.
Indicate the position of the first and second rows, followed by the position of the first and second columns.
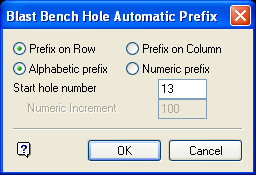
The following panel is then displayed.

Blast Bench Hole Automatic Prefix panel
Prefix on Row
Select this option to prefix on row, that is, the prefix changes when the next row starts.
Example - Prefix on Row (Alphabetic)
Row 1: A001 A002 A003... Row 2: B001 B002 B003... Row 26: Z001 Z002 Z003... Row 27: AA001 AA002 AA003... Row 28: AB001 AB002 AB003...
Prefix on Column
Select this option to prefix on column, that is, the prefix changes when the next column starts.
Example - Prefix on Column (Alphabetic)
Column 1 Column 2 Column 3 Column 26 Column 27 Column 28 A001 B001 C001 Z001 AA001 AB001 A002 B002 C002 Z002 AA002 AB002 A003 B003 C003 Z003 AA003 AB003... ... ... ... ... ...
Alphabetic prefix
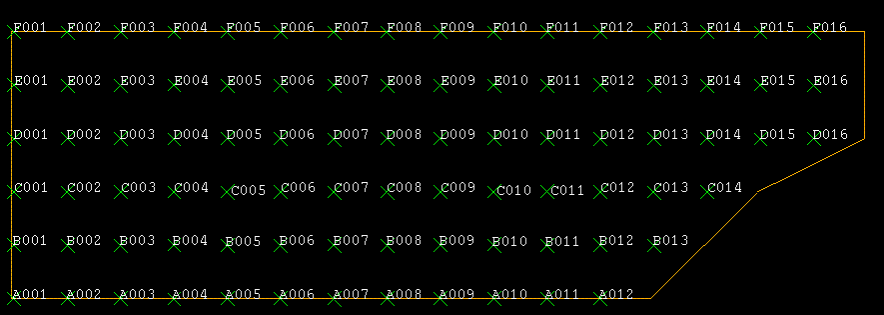
Select this option to generate hole names starting with an alphabetic prefix and ending with a three digit number.

Diagram 1 - Prefix on Row (Alphabetic)
Numeric prefix
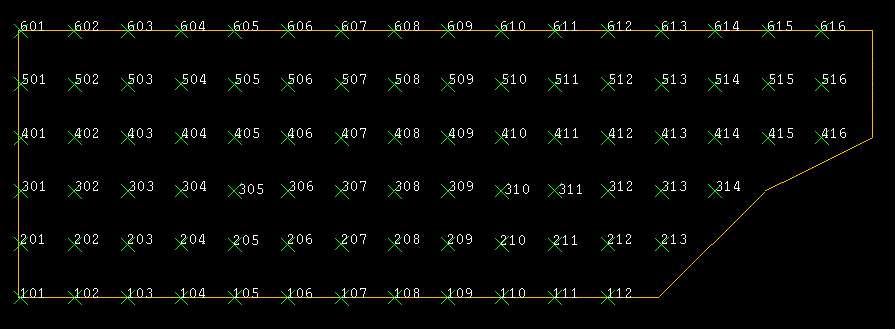
Select this option to generate hole names starting with a number that is incremented by one along the row or column.
Start hole number
This refer to the hole where you want to start the automatic naming from.
Numeric Increment
This refers to the value by which the row/column prefix will be incremented when the row/column changes.

Diagram 2 - Start hole number = 120, Increment = 100
Select OK.
You will then be prompted to select the layer containing the holes to be automatically named. You will need to confirm this layer selection.
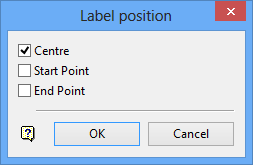
The following panel is then displayed.

Label position panel
The options on this panel allow you to select the position of the labels on the objects. You can select all three positions.
Select OK.
Once this panel has been completed, the holes are then named.

