Edit Hole
Edit a blasthole
The Edit Hole option to edit the parameters of individual blastholes.Instructions
- Select Open Pit menu
- Select Blast Hole Layout submenu
- Select Edit Hole option
The Multiple Selection box displays. This to select holes by category. Selection by layer can be used to edit entire blasthole patterns.
Once selected, the Blast Hole Editing panel displays.

Blast Hole Editing panel
You may enter up to 4 intersect horizon names on which you want to report (using the Report option in the same menu).
![]() Note
Note
All calculations, such as levels of intersection with horizons, are performed when the hole is created. You must therefore recreate the blastholes if any changes are made to the nominated horizons. The same applies to new horizons of interest; the blastholes must be recreated and the new horizon entered in the above panel. As the Report option uses the values calculated in this option, it is important to specify all horizons of interest at this point.
The top and bottom surfaces of each horizon entered in the panel must exist as triangulation or grid models. Check the Gridded check box to use the grid models of the two horizon surfaces in the calculations. If unchecked, then the system assumes you are using triangulations.
The Coal Seam name is the gridded or triangulated surface to which the blastholes are being projected. If you do not enter a horizon name, then the blastholes will be an absolute length that is equivalent to the Standoff depth (see next panel). Check the Gridded check box to use the gridded surface.
Edits made through this panel, such as changes or additions made to the nominated horizons, will be taken into account by the Report option.
![]() Note
Note
If you selected holes by group, feature or layer, then this panel will be redisplayed so that individual holes in the category can be edited (if there are numerous holes in the category, it may be worth regenerating the entire pattern). The panel will continue to be redisplayed until you select Cancel.
Select OK.
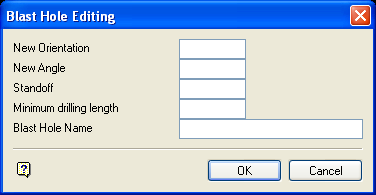
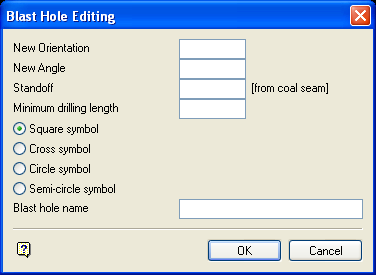
The following panel is then displayed.

Blast Hole Editing panel
New Orientation
Enter the new bearing. This value is measured in degrees in decimal format (0.0°-360.0°).
New Angle
Enter the new dip. This value is measured in degrees (0.0° - 90.0°) from the vertical of the blast hole. Angle of 0° is vertical and an angle of 90° is horizontal.
Standoff
Enter the vertical distance of the anchor hole above the target horizon. If a target horizon has not been entered in the first panel, then the Standoff will be the absolute depth of the blastholes.
Minimum drilling length
Enter the minimum drilling length. Any hole with a length less than this will not be created.
Select the symbol to be used for the anchor hole locations.
![]() Note
Note
Don't use square symbols if you intend to use the blastholes in surveying.
Blast hole Layer name
Enter the name of the layer for the holes.
To create a new layer, enter the layer name. The layer name:
- may contain up to 40 characters.
- must begin with an alphanumeric character [0-9] or [a-z].
- cannot include spaces.
- can include hyphens [ - ], plus signs [ + ], underscores [ _ ], periods/dots [. ].
- can include the special characters of ÁÂÃÀÇÉÊÍÓÔÕÚÜÑ that are used in the Spanish and Portuguese languages.
Select OK.
The changes will then be applied to the blastholes and you can select another category for editing.

