Report
Produce a hole report
The Report option to produce a summary or full report of hole information. The information in the report depends on the hole design method selected in the Set Up option.
Some summary information displays in the Report Window of Vulcan. None of the full report's information displays in the Report Window. You will need to view the file through a text editor printing. The Notepad application is the default text editor for Windows, however, you can use the
ENVIS_EDIT
environment variable to reference a different text editor.
The format of the report file names is:
hole.sum_list (summary report) hole.tot_list (full report)
Appendix A provides an example of full and summary reports for both hole design methods (using surfaces or manually entering intervals).
Note The maximum number of holes that can be reported is 50, 000.
Instructions
- Select Open Pit menu
- Select Hole Design submenu
- Select Report option
The panels/prompts displayed depend upon the design method chosen through the Set Up option. The panels/prompts for both methods are described below.
Use surfaces
Input intervals
If you haven't set the default method for designing holes, then the Create Holes panel displays first.
Use surfaces
You will be prompted to select the boundary around the holes that you want to report on.Once the boundary has been selected, the following panel displays.
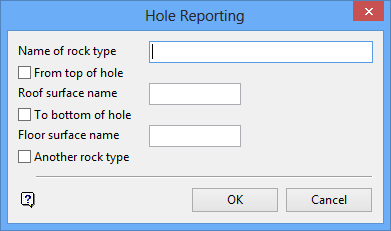
Hole Reporting panel
This panel defines the section of the hole that is to be reported. A section length can be between any surfaces that were entered when the holes were generated. The reporting details entered through this panel will be automatically stored in the
holedesign.spc
file.
Name of rock type
The entire section is reported as being comprised of one rock type. A rock type is any arbitrary name you want to use (For example, SS for sandstone).
If there are other rock types (that is, other sections in the hole) on which you want to report, then check the Another Rock type check box and the panel will be redisplayed once completed for the current rock type.
From top of hole/To bottom of hole
The section is defined by nominating a top and bottom surface.
The top surface can be either the topography surface (check From top of hole check box) or any other surface (enter Roof surface name ) that was nominated when the holes were generated. The bottom surface can be either the bottom of the hole (check To bottom of hole check box) or any other surface (enter Floor surface name ) above it. Once again, this surface must have been nominated when the hole was generated.
Another Rock type
Select this check box to report other rock types (see the description of the first field on this panel).
Select OK.
You will then be asked as to whether you want to produce a Summary or Full report. Once the report type has been selected, the Multiple Selection box displays. This to select holes by category.
Upon selection, you will be asked whether or not to print the report.
Tip The report file names will be overwritten the next time this Report option is run. If you want to keep the reports, then rename the files.
Input intervals
The following panel displays.
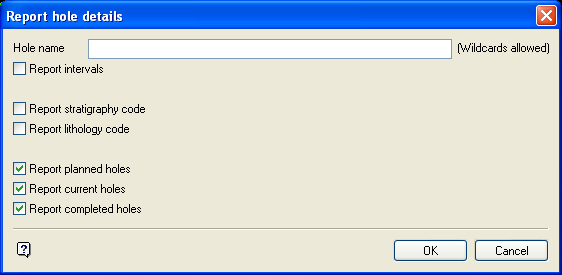
Report hole details panel
Hole name
Enter the name of the hole to be reported. Multiple holes can be selected by using wildcards (* multi character wildcard, % single character wildcard).
Specify, by enabling the appropriate check box, whether you to want to report on the intervals, stratigraphy and/or lithology codes. You can also report on planned, current and/or completed holes. Totals will be given for each hole type.
Select OK.
The following panel is then displayed.
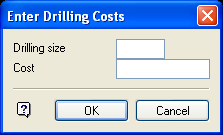
Enter Drilling Costs panel
This panel to enter an average cost for each drilling size. This is used in the calculation of the drilling cost for each hole, which is also reported. Hole type totals (planned, current, completed) are also provided.
Select OK.
The panel is then redisplayed, allowing you to specify another drilling size and cost. Select the Cancel option when you have finished specifying drilling sizes and costs.
You will then be asked whether or not to produce a Summary or Full report. Upon confirmation, you will be prompted to indicate the boundary of the holes.
Once indicated, the Multiple Selection box displays. This allows you to select holes by category. This is especially useful if you used wildcards in the hole name on the Report Hole Details panel.
Once the holes have been selected, you will be asked whether or not to print the report.
Tip The report file names will be overwritten the next time this Report option is run. If you want to keep the reports, then rename the files.

