Automatic Naming
Name holes automatically
The Automatic Naming option to name automatically up to 50, 000 holes. To use this option, the holes and the bounding polygon need to be displayed on the screen.
Note Hole names are text objects and are allocated the feature '
TEXT
'. This to remove the names using the feature selection category (through the Design > Object Edit > Delete option).
Instructions
- Select Open Pit menu
- Select Hole Design submenu
- Select Automatic Naming option
Select the boundary for labelling. This refers to any boundary around the holes that you want to name. You will then be prompted to select the position of the first and second row. These positions are used to define the direction of the hole name prefix.
Once the position of the rows has been selected, you will be prompted to select the position of the first and second columns. These positions are used to define the direction of the hole numbers.
The Hole Naming panel is then displayed.
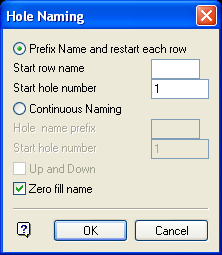
Hole Naming panel
Prefix Name and restart each row
Select this option if you want a different prefix for each row and to restart the numbering. You will need to specify the starting prefix ( Start row name ) and number ( Start hole number ). The maximum size of the prefix is 5 alphanumeric characters.
Holes named using the above method are assigned to groups based on the row (prefix) name. For example, all holes in row A are assigned to group A, all holes in row B to group B etc.
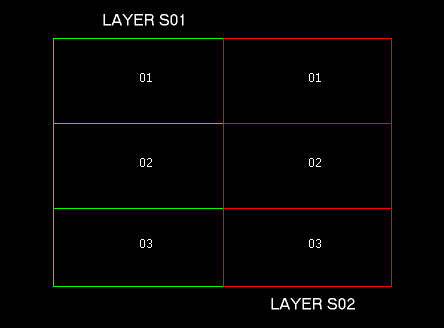
Diagram 1 - Prefix Name and Restart Numbering/Staggered Pattern
Continuous Naming
Select this option if you want the same prefix throughout the pattern with continuous numbering.

Diagram 2 - Continuous Naming/Staggered Pattern
Up and Down
Only applicable when using the Continuous Naming option. This option is best explained by the following diagrams:
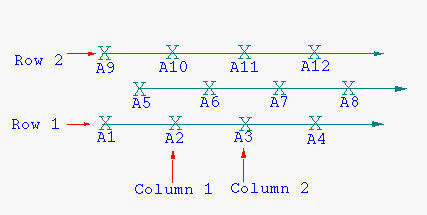
Diagram 3 - Up and Down Unchecked/Staggered Pattern
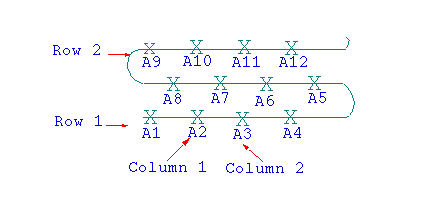
Diagram 4 - Up and Down Checked/Staggered Pattern
Zero fill name
Select this check box if you want zeroes to be filled in the name, For example,
A001
instead of
A1
. The maximum fill is 999.
Select OK.
You will then be prompted for the name of the layer (that is, hole pattern). Once indicated, the layer is highlighted and you will be asked whether or not this is the correct layer. If correct, then the names are assigned to each hole. If incorrect, then you are returned to the Select layer prompt.
Use the Annotate Holes option if you want to display the hole names (and/or depths).

