Slice Strips
This option divides any area into an equal number of required strips. The Slice option will use the linear interpolation between the two line, however, each line used to define the strip side must have the same number of points.
Design Strips between Two Strings
The Slice Strips option to generate mine strips in the area between two nominated strings. The area is 'sliced up' equally into the required number of strips.
The strings may be a polygon or two digitised strings defining the two sides of the pit. As this option uses linear interpolation between the two strings, each string (or string portion) used to define the strip side must have the same number of points.

Diagram 1 - Strip Generation between Two Strings
Diagram 1 shows two separate strings, although the second string can be another portion of the same string. The two strings or string portions can have diverging gradients and if using two separate strings, then they can be either open or closed to form a polygon. Diagram 2 shows the results of creating five strips between the two strings used in Diagram 1.
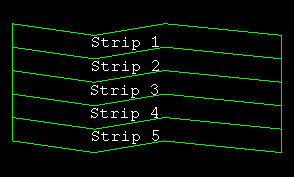
Diagram 2 - Resulting Strips
Instructions
On the Open Pit menu, point to Pit Layout, then click Slice Strips to display the following interface.
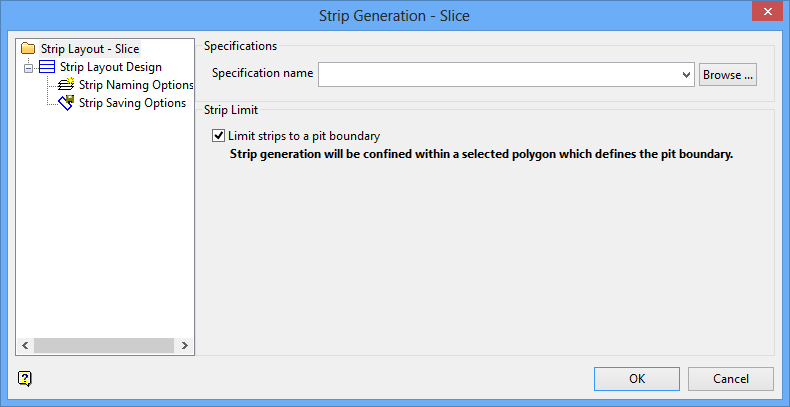
Specifications
Specification name
Select the <filename>.sb_spec specification file to load. The drop-down list displays all available <filename.sb_spec> files found in the current working directory. Click Browse to select a file from another location.
Strip Limit
Limit strips to pit boundary
Select this check box if you want use a limiting polygon when creating the fan strips. When using a limiting polygon, the resulting strips will be created in the nominated polygon object.
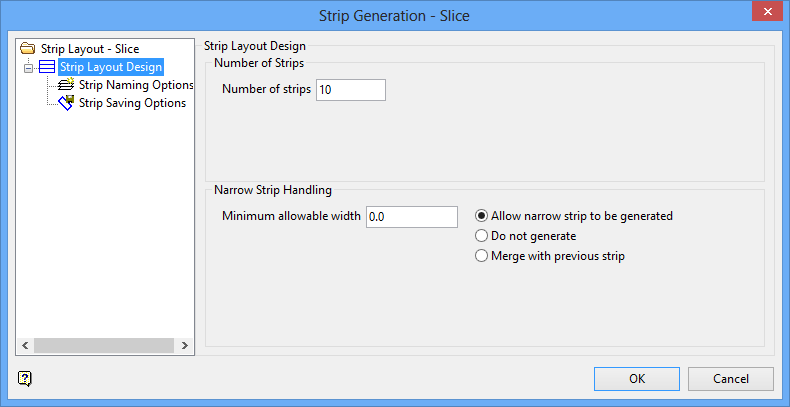
Strip Layout Design
Number of Strips
Enter the number of strips that will be generated.
Narrow Strip Handling
Minimum allowable width
Enter the minimum allowable width. Strips less than the specified area will not be created. Use the default value of '0.0' if you don't want to apply a restriction. Select how you want strips which violate the minimum allowable width parameters to be treated:
-
Allow narrow strip to be generated
-
Do not generate
-
Merge with previous strip
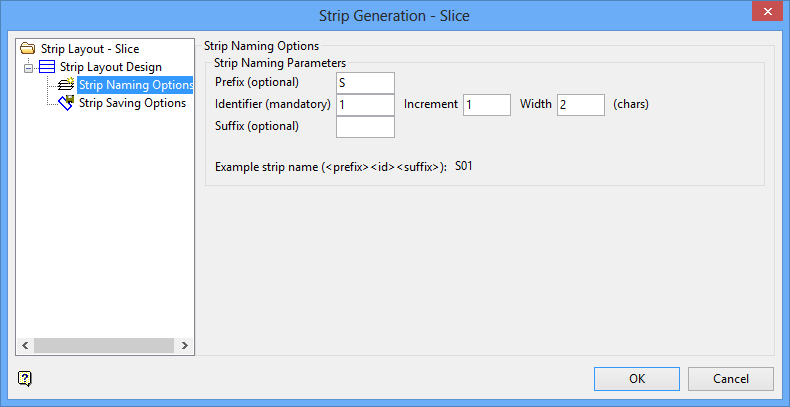
Enter your the naming parameters here. As the parameters are entered, you will be able to see an example below.
Prefix (optional)
Enter an optional prefix. The prefix will always be capitalised.
Identifier (mandatory)
This field is not optional. By default it will begin with the number 1, however, you may begin with any number you wish.
Increment
Enter the number you wish to increment each block by. By default, it will increment by 1.
Width
Enter the number of characters in width the identifier field needs to be. By default, the width is set at 2 characters wide. With an increment set at 1, this allows a total of 99 blocks (01 through 99).
Suffix (optional)
Enter an optional suffix. The suffix will always be capitalised.
Restart naming on each new strip
Select this option if you wish the numbering routine used to begin again on each new strip.
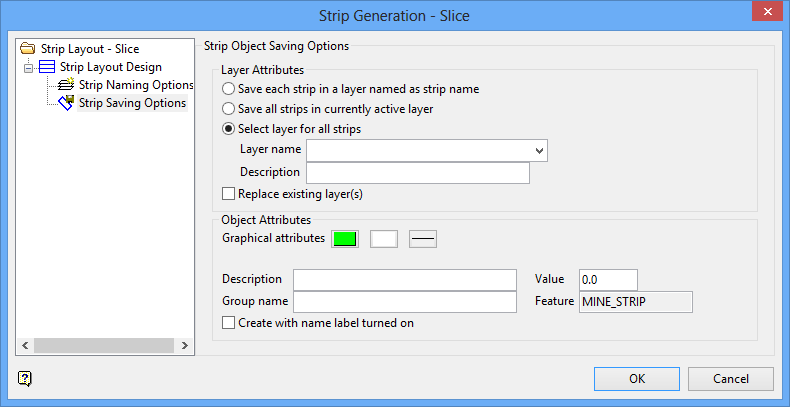
Layer Attributes
Save each strip in a layer named as strip name
Select this option if you want each strip to be saved as a separate layer.
Save all strips in currently active layer
Select this option if you want all strips to be saved into the currently active layer (usually the layer containing the baseline and cropline.)
Select layer for all strips
Select this option if you want to save all strips into a separate layer of their own.
Layer name
Designate a layer name.
Description
Enter an optional layer description.
Replace existing layer(s)
Select this option to allow new layers to overwrite older layers of the same name.
Object Attributes
Graphical attributes
Select the colour, texture and line thickness attributes.
Description
Enter an optional layer description.
Group name
Enter a group name.
Value
Enter a value.
Feature
This is an automatically populated field that cannot be edited.
Create with name label turned on
The strip layer can be created with the labels turned on. Labels can be turned off by right-clicking on the object, then selecting Label > Label Off.

