MKRD
Make a Road
The MKRD option to incorporate a haul road into a dump/pit design. The road is created during the design of the wall strings. Before using this option, you should have created a starting toe/crest string. This can be done by creating a polygon using the Design > Create > Polygon option, and then defining this polygon as a toe or crest string using the Flag Toe/Crest string option (under the Open Cut Design submenu).
The MKRD option can also be accessed by selecting the MKRD button from the Ramps toolbar.
Instructions
- Select Open Pit menu
- Select Ramps submenu
- Select MKRD option
Once selected, you will then be asked whether or not to project a temporary string. The temporary string will be used as a guide string for the ramp generation.
If a temporary string already exists, then select Don't project string or Cancel. If no temporary string exists, then select Project string.
Once selected, you will be prompted to select the pit outline to project (that is, the starting string). Upon selection of the outline, the Bench Projection panel displays.
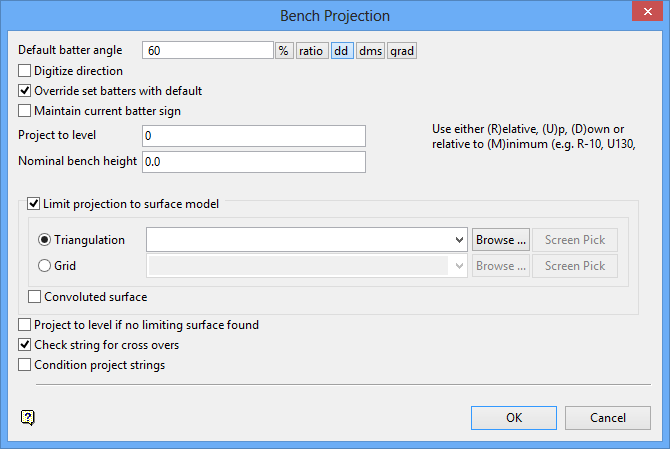
Bench Projection panel
Refer to the Project option for an explanation of the fields on this panel.
Once the temporary string is created, you will then be prompted to select the next pit outline to project. Cancel when finished selecting pit outlines.
Once a temporary string is projected (or already exists), you will be prompted to select the layer to start the road from. This is the starting string along which to make a road (that is, the original wall string). Once indicated, you are then asked whether or not this is the correct starting string. Upon confirmation, you will be prompted to select a point to start the road. A direction line is then displayed, and you are asked to confirm This way or Other way to make the road.
Upon confirmation, the following panel displays.
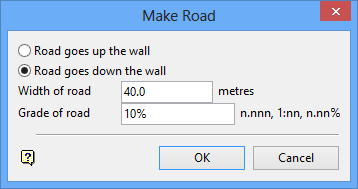
Make Road panel
Road goes up the wall
Select this option if the road is started from the base of the pit and project up. If the road is not started from the base, then select the Road goes down the wall option.
Road goes down the wall
Select this option if the road is started from the top of the pit and projected down.
Width of road
Enter the width of the road. Although the panel shows metres, it uses actually the unit of measurement set in the .dg1 file.
Grade of road
Enter the grade of the road. The grade of the road can be entered as an inclination (in decimal degrees), a ratio or a percentage.
Select OK.
You will then be prompted to select the string to limit the road. This refers to the temporary string created earlier in this option. Once the road is created, it displays on the screen. You will then be asked whether or not you want to save this road.
If you choose to save the road, then the following panel displays. If you nominate that you don't want to save the road, then you will be returned to the Select point prompt.
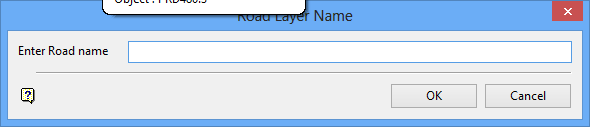
Road Layer Name panel
Enter Road name
Enter the name of the layer in which the created road will be placed.
To create a new layer, enter the layer name. The layer name:
- may contain up to 40 characters.
- must begin with an alphanumeric character [0-9] or [a-z].
- cannot include spaces.
- can include hyphens [ - ], plus signs [ + ], underscores [ _ ], periods/dots [. ].
- can include the special characters of ÁÂÃÀÇÉÊÍÓÔÕÚÜÑ that are used in the Spanish and Portuguese languages.
Select OK.
You will then be asked whether or not to delete the temporary string. If you choose to delete the temporary string, then string is highlighted and removed from the screen upon confirmation. If you choose not to delete the temporary string, then you are asked whether or not to insert the road. Generally, the temporary string is deleted as it is no longer required.
The Insert road option inserts the road, and asks you for confirmation of the insertion. Upon confirmation, the road is inserted into the starting string to form a new string. You will then be asked whether or not you want to project the new string to generate the corresponding toe/crest string. Refer to the Project option for details on projection.
You will be asked you whether or not to berm the new toe/crest string. If you select to berm, then the Safety Berms and Benches panel displays.
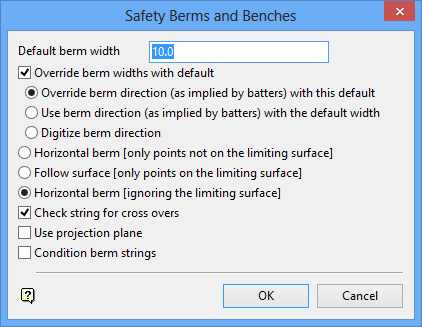
Safety Berms and Benches panel
Refer to the Berm string option for an explanation of this panel.

