Specification
Set Up Reserves Specifications
The Specification option to specify how the reserves are to be calculated. The specifications are stored in the
<proj><pit area name><job identifier>.st2
specification file. An example of a specification file is given in Appendix A.
Note Metric units are the default reserves reporting units. If imperial units are required, then manually edit the
Set_Up
section in the
.st2
file.
Instructions
- Select Open Pit menu
- Select Terrace Mining submenu
- Select Specification option
The following panel displays.
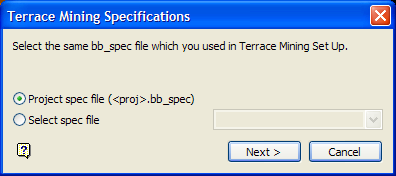
Terrace Mining Specifications panel
Select an existing Benching and Batters specification file (
.bb_spec
).The drop-down list contains all
.bb_spec
files found in your current working
Select Next.
The following panel is then displayed.
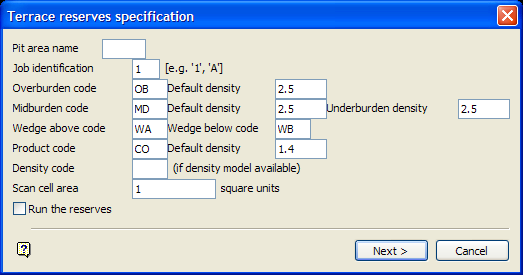
Terrace reserves specification panel
Pit area name
Enter the name of the pit area (a maximum of 4 alphanumeric characters). The pit area name and the job identification allow different reserving scenarios to be specified and run later.
Job identification
Enter the job identification (a single alphanumeric character). This complements the pit area name and provides a unique identification for different scenarios.
Overburden code
Enter the overburden code. This code, which will be used in reporting, represents the material that lies between the topography surface and the depth of weathering (specified in Set Up option). If depth of weathering is not used, then the overburden code will represent the material between the topography and the uppermost surface.
Default density
Enter the relative density of the overburden.
Midburden code
Enter the midburden code. This code, which will be used in reporting, represents the material between two surfaces. This is typically between two economic horizons, or between the top of an economic horizon and a depth of weathering surface.
Default density
Enter the relative density of the midburden material.
Underburden density
Enter the underburden density. The underburden is the material that lies between the floor of the pit and the base of the next seam up.
Wedge above code
Enter the wedge above code. This code represents the material that lies vertically above the seam in a given bench. The wedge above code will be included in the midburden/underburden report figures.
Wedge below code
Enter the wedge below code. This code represents the material that lies vertically below the seam in a given bench. The wedge below code will be included in the midburden/underburden report figures.
Product code
Enter the product code. This code represents the economic material you are interested in (For example, CO). It is used for reporting purposes.
Default density
Enter the default relative density of the stratigraphic deposit. It is used when no density models are available.
Density code
Enter the density code. If density grids exist for any of the economic horizons, then enter the two-character identifier. All density grids to be used must have the same identifier code. If horizons are present that do not have a density grid, then they will be reserved using the default density.
Scan cell area
Enter the scan cell area (the default values is '1'). This value will be used to sample any quality grids used in the reserve run. The square root of this value is the distance between sampled points.
Note A small scan cell area will increase the time needed to perform the reserve run but increase the accuracy of results. However, if the distance between sampled points is reduced to a distance shorter than the grid node spacing, the results will be no more accurate but will take an unnecessarily long time to run.
Run the Reserves
Check this check box to run the reserves immediately. Do not check this check box to save the specification file and run the reserves at a later stage. The calculated reserves will be written to a log file named
terrace_vol.log
. Refer to the
Run Reserves
option for more information.
Select Next.
The following panel is then displayed.
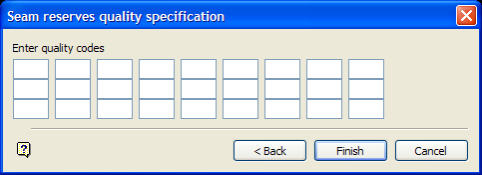
Seam reserves quality specification panel
This panel to specify the quality codes that you want to include in the reserving process. Up to 27 quality codes can be specified. These codes refer to the first two characters after the. (full stop) in the quality grid name.
For example: '
abcblue.sug
' refers to the Sulphur grid of the Blue seam in the ABC project.
Select Finish.
The following panel is then displayed.

Terrace benches panel
This panel to specify a regular series of benches starting at a given RL with a fixed bench height; or a series of user- defined RL levels, or a series of pre-existing triangulations or grids of the benches.
Bench by Levels
Select this option to reserve the mine from an initial base level (bottom level) in a series of regularly spaced benches (bench height), up to the topography surface.
Bench by Models and or Levels
Select this option to select a series of user-defined RL levels and/or a series of pre-existing triangulations or grids of the benches.
Select OK.
The Multiple Selection box is then displayed. This to select the strips and blocks to be included in the reserve calculation (layers refer to strips, objects refer to blocks).
If you selected the Bench by Models and or Levels option, then the Modelled terrace benches panel displays before you are asked to select the strips and blocks.
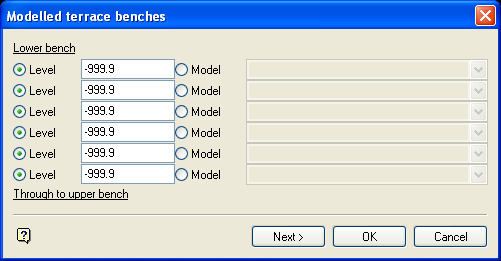
Modelled terrace benches panel
Level
Select this option to reserve the mine at a number of different levels. There is no requirement for the levels to be spaced equally, but they must progress from the deepest level to the uppermost level in sequence. These can be mixed with other models for benches.
Model
Select this option to use bench triangulations or grids, For example, slightly dipping benches to facilitate controlled bench drainage. These can be mixed with the Level option. The triangulations or grids can be manually entered, or selected from the drop-down list. For manual entry, enter the file identifier followed by the file extension (for triangulations this is
.<mv>t
; for grids this is
.<mv>g
).
Select OK to accept the panel. Use the Next option if you want to define the values for the upper bench.
Note The object names of the blocks must not have any leading zeros. Leading zeros can be removed using the Design > Attribute Edit > Name option.
Once the strips and blocks have been selected, you will then be asked to select the pit floor model. You will need to confirm your selection. Right-click with the mouse to exit the Specification option.
If you choose to run the reserves immediately, then a window is spawned in which the reserves are calculated and displayed.
Once the specification file has been created, the Run Reserves option can be used to perform the calculations.

