Convert To Crosscut
Use Convert To Crosscut to import survey lines of roadways from existing mine plans, and convert them to drivage crosscuts.
The data must be in a Vulcan design database. This may have been created from drawings created previously in Vulcan, or digitised from existing hardcopy mine plans ( Design > Wintab ).
No checks for data consistency are performed. Thus, it is assumed that the crosscuts meet headings etc. Some cleaning of digitised data may be required.
Note: As crosscuts will be associated with headings, the headings must already exist before using the Convert to Crosscut option.
Instructions
On the Underground menu, point to Coal Development, and then click Convert To Crosscut.
The Multiple Selection box displays. This to select the survey lines by category. Cancel when finished selecting survey lines.
(If a working layer was not defined prior to selecting this option, then the Set Working Layer panel is displayed first.)
Working name
Enter, or select from the drop-down list, the name of the working layer. The chosen layer will be set as the active working for underground coal operations. It does not affect the layer set through the Layer option (under the Design > Create submenu)
To create a new layer, enter the layer name. The layer name...
- may contain up to 40 characters.
- must begin with an alphanumeric character [0 - 9] or [a - z].
- cannot include spaces.
- can include hyphens [ - ], plus signs [ + ], underscores [ _ ], periods/dots [. ].
- can include the special characters of ÁÂÃÀÇÉÊÍÓÔÕÚÜÑ that are used in the Spanish and Portuguese languages.
Description
Enter a description to further describe the contents of this layer. The description can be up to 80 alphanumeric characters and may include spaces. If a description is not entered, then a default description will be used instead. If the chosen layer already has an assigned description, the description will be displayed when the layer is selected. Existing layer descriptions can be overwritten.
To add to an existing working layer, the layer must be loaded onto the screen. If a working layer by the same name already exists in the currently open database, but has not been loaded, then you will be asked whether you want to select the layer or replace it.
Click OK.
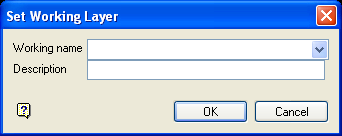
Set Working Layer panel
Working name
Enter, or select from the drop-down list, the name of the working layer. The chosen layer will be set as the active working for underground coal operations. It does not affect the layer set through the Layer option (under the Design > Create submenu).
To create a new layer, enter the layer name. The layer name:
- may contain up to 40 characters.
- must begin with an alphanumeric character [0-9] or [a-z].
- cannot include spaces.
- can include hyphens [ - ], plus signs [ + ], underscores [ _ ], periods/dots [. ].
- can include the special characters of ÁÂÃÀÇÉÊÍÓÔÕÚÜÑ that are used in the Spanish and Portuguese languages.
Description
Enter a description to further describe the contents of this layer. The description can be up to 80 alphanumeric characters and may include spaces. If a description is not entered, then a default description will be used instead. If the chosen layer already has an assigned description, the description will be displayed when the layer is selected. Existing layer descriptions can be overwritten.
To add to an existing working layer, the layer must be loaded onto the screen. If a working layer by the same name already exists in the currently open database, but has not been loaded, then you will be asked whether you want to select the layer or replace it.
Select OK.
You will then be asked whether or not to convert the lines. Convert these objects displays the following panel.
Width
Select this option to create drivage crosscuts as centre lines of the roadway. If this option is selected, then you will need to specify the roadway width.
Offsets
Select this option if you want to create drivage crosscuts as lines with variable right and left offsets. If this option is selected, then you will need to specify the left and right offsets.
Click OK.
Y ou will then need to select the heading to which to attach the crosscut, followed by a second heading. This is similar to indicating the first and end points in the Create Crosscuts option. As soon as the second heading has been selected, the crosscuts are then generated.
The crosscuts will be associated with the first selected heading and are named <heading>_n where n = a number incremented by one for each crosscut on the heading line. For example, A_1, A_2, A_3, B_1 etc.

